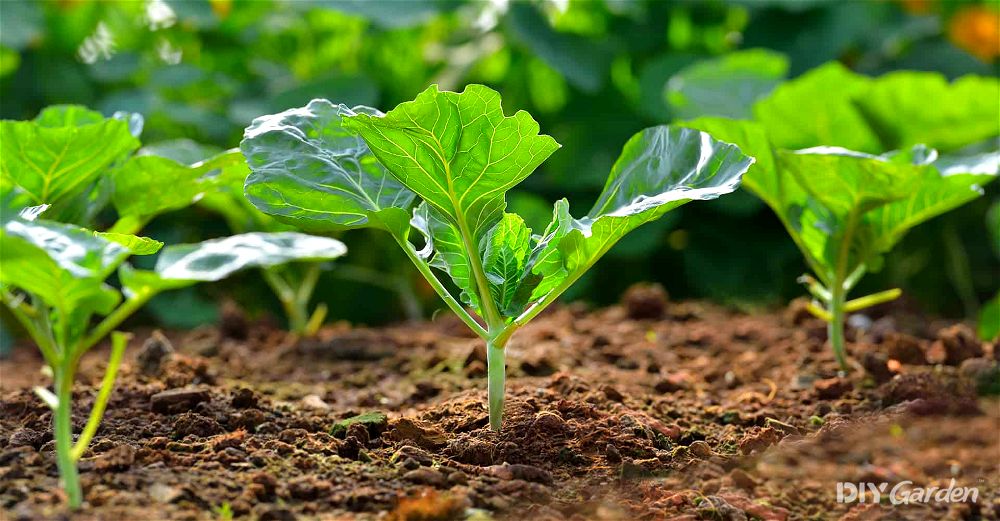
Kale is one of those fool-proof crops that everyone should grow because it’s hardy in the cold months, it’s resistant to most diseases, and grows in all types of soil.
Kale is a member of the brassica family. It’s a cabbage-type plant that forms a loose unstructured head rather than the hard, round cabbage heads we all recognise.
It’s a mystery to me why more people don’t enjoy growing their own kale, but the tide is turning.
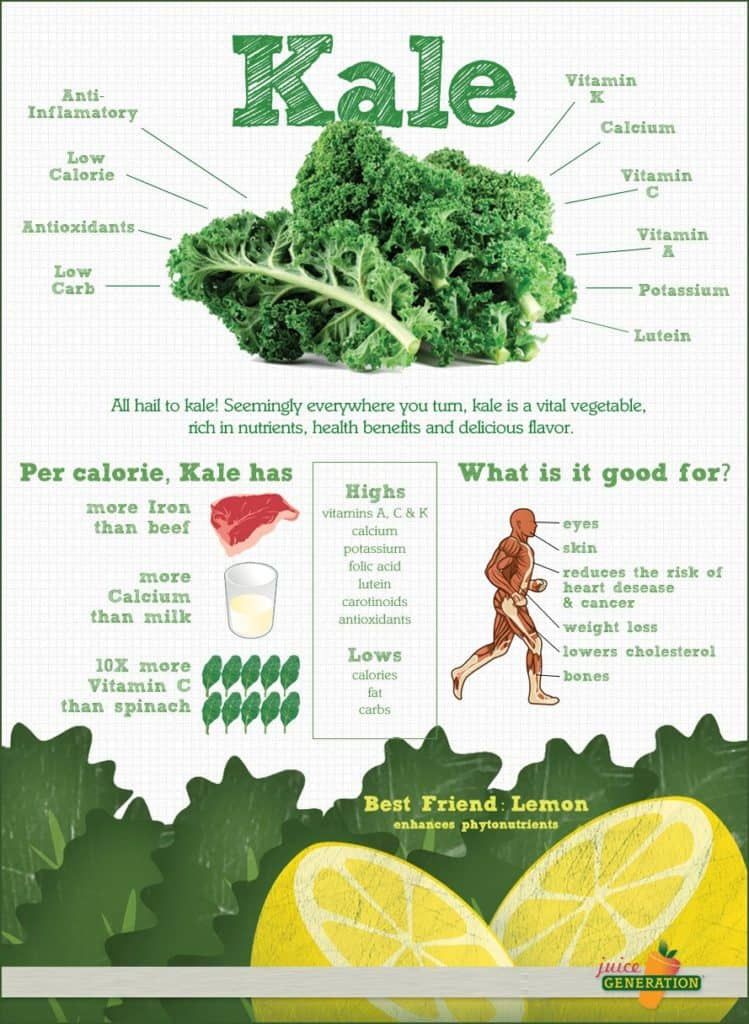
Kale is making a comeback due to its numerous health benefits. It’s a powerful antioxidant and anti-inflammatory, and a great source of iron, minerals, and vitamins too.
It’s been unpopular for decades which is a real shame because when kale leaves are picked young and tender from the veggie patch they are truly delicious.
The History of Kale
It’s also known as borecole, but the name kale comes from the Latin ‘caulis’ – which is also the root word for cabbage and cauliflower. The ancient Greeks used to boil it up as a way of preventing drunkenness. I don’t know if it works, but it certainly would have provided them with a large dose of vitamins!
Kale is grown across the globe. It thrives in nearly all climates even surviving Siberian winters. It’s a staple food for cattle and has fed poor people throughout history which may explain why it’s been unpopular – much like the poor old turnip which has a bad reputation but is also delicious when it’s young.
Health Benefits of Kale
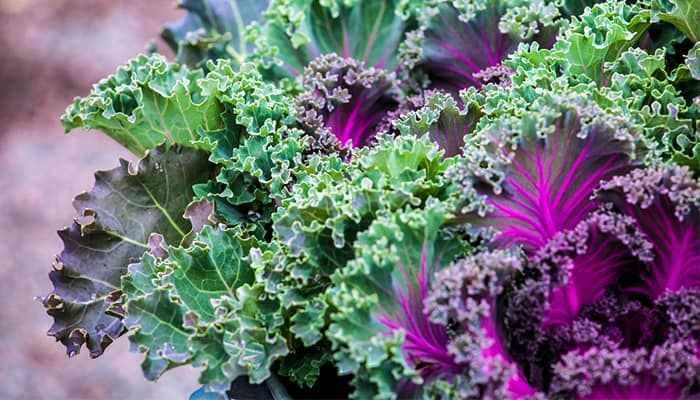
Varieties of Kale
There are many different cultivated types of kale from ones that resemble crocodile scales to frilly petticoats versions. The curly leaf kale stocked by supermarkets is, in my opinion, the least tasty, but there are other versions to try such as plain leaf kale, Russian red and spear kale.
And let’s not forget ornamental kale in white, red and purple rosettes that sell for £15 a go in the cut flower aisle. These go by the fashionable names of peacock kale and coral queen but don’t taste all that great.
If I had to recommend a kale for eating it would be the famous Cavolo Nero. It has large strappy leaves and a rich warming taste when steamed or added to soup, pies or pasta dishes.
So you’ll be pleased to hear it’s simple to grow your own!
When to Grow Kale
Kale will grow in cold months when other plants ignore you, but it’s best to start in March and April when the sun is warming up so you’ll get the strongest growth.
If you want to start earlier, plant your seeds in trays on a sunny windowsill during late February to early March. I’ve had great results sowing indoor seeds during late February.
When Not to Grow Kale
Pretty much anyone can grow kale, but it doesn’t fare so well in very hot temperatures.
Drought and direct boiling sunshine prevents kale from thriving, gives it a bitter tang, and encourages bolting.
If you’re not sure what bolting is – it’s when the plant suddenly puts out its seeds and ends its life shortly after. It’s expecting its demise and wants to get its offspring out as quickly as possible. If your kale bolts cut off the seeds and give it plenty of water.
Which Are Best Kale Seeds or Kale Plugs?
Whether you buy cheap seeds and germinate them yourself or go for ready-grown plugs is entirely up to you. I’ve grown kale both ways and they taste just as good.
I would say that plugs are already thinned out and easier to manage, but there’s something very satisfying about growing your own crop of seeds.
Gardeners are always waiting to get seeds in as soon as possible and kale is one of those you can do first if you’re raring to go.
If you want to buy ready grown plug plants choose ones that are short and stocky rather than tall and spindly. Tall seedlings have likely dried out and bolted.
Preparing the Ground For Kale
Kale is tough. It will germinate and grow in all soils except those that are bone dry. Chalky, clay and sandy soils can produce a decent harvest of kale, but as with all plants, soil preparation will improve the harvest no end.
Unless you’re blessed with rich crumbly soil that’s laden with worms and nutrients, it’s worth digging in some well rotted organic manure well before the seeds and plants go near the soil.
Improving the soil is a good job to complete during winter months when there isn’t much else on.
Some people prefer chicken pellets or a ready-made sprinkle like Growmore. They are all good ways to feed plants, but if the soil is thin it’ll need bulking out. Topsoil will help here as will dry stable manure.
If you are planning to plant kale seeds directly into the soil you can wait until the plants are actively growing before adding manure. Seeds don’t need nutrients to germinate – just water, soil, and light.
Which leads us nicely to – sowing kale!
How To Sow Kale
Sow directly in the soil
Remove stones and roots from the seedbed and rake it over so you have fine soil.
Dig a shallow trench about a centimetre deep and finely sprinkle your seeds inside.
Cover and water.
You might need to use a cloche or netting if pigeons, blackbirds, cats and other wildlife are likely to dig the at seedbed.
Sow into seed trays
If you want to use a tray fill it with seed compost and sprinkle seeds on top.
Cover with a fine layer of compost or grit.
Put it somewhere warm and keep the compost moist but not drenched.
Module trays can be used too. Pop in one seed per module.
How To Plant Out Kale
After a few weeks indoors and up to four weeks outside you should have seedlings.
It can take longer if the weather turns cold outside, but if there’s nothing after six weeks, sow more seeds.
Tray grown kale will need transplanting to its growing place in the veggie patch. It isn’t keen on moving once it’s properly growing, so make sure you have the space free for many months. The area needs sunlight, but kale can cope with partial shade too.
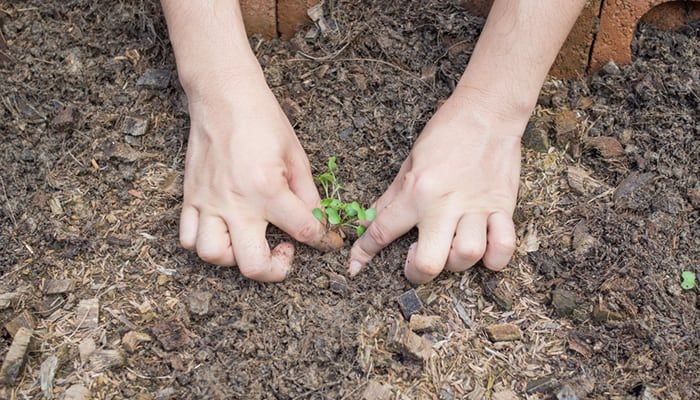
When the seedlings develop five to six true leaves they are ready for the soil.
Place the small plants 45cms apart and leave at least 45cms between rows.
It may look bare, but those babies will grow big and they need space otherwise they become overcrowded and grow mold in the damp environment. Giving greens space so air can circulate means the plant is healthier and tastier – which is what it’s all about!
Kale should be planted deeper than its original depth. Get a good extra inch of stem beneath the soil, putting the lowest leaves at ground level. This helps stabilise plants in autumn winds.
Push the soil down firmly around the roots and water them in well.
If you planted seeds directly into the growing bed thin them out when they develop five to six true leaves.
You may be able to replant the thinned kale babies in another seedbed if you have space. I’ve done this successfully many times. It seems wasteful to throw away the new plants.
Hardening Off Kale Seedlings
It’s a good idea to toughen up your seedlings a bit before transplanting them outside.
Indoor plants are used to warmer temperatures so putting them straight outside with no heat can shock the plant and cause it to die off.
The easiest way to harden kale is in a greenhouse or a cloche. Pop the trays undercover for ten days and bring them indoors overnight for the first few days.
Windowsill raised seeds are used to basking in the warmth. Before putting them outside into uncertain UK weather pop them in an unheated room before moving on to the cloche/greenhouse set up.
Taking Care of Kale Plants

Kale needs water, light, food and pest defence.
Watering
If the weather is dry you’ll need to water kale. It’s a quick-growing plant that needs water to reach its full potential. Remember that it isn’t only sun that dries the soil. Wind will turn it bone dry too especially if you have chalky or sandy soil.
Feeding
If you didn’t prepare the soil with extra nutrients before planting out, now is the time to feed and mulch.
Mulch is wonderful stuff. It slowly feeds the plant, cuts out light so weeds die off, and conserves moisture.
Choose a feed with plenty of nitrogen which is what leafy plants like. Seaweed liquid feed is amazing stuff, and chicken pellets are an easy-to-use long-lasting nitrogen alternative. Feed your kale once a week if you have poor soil, less if the soil is rich.
Weeding
To make sure your kale thrives you’ll need to suppress the weeds.
Mulch will help, but wind-blown seeds will anchor themselves between the individual plants and rows. The best way to deal with vegetable patch weeds is a hoe.
Hoes do an excellent job of dislodging weeds. Chop them at soil height on a dry day so they can’t re-root. Yes, it’s an old-fashioned method – but if it ain’t broke, don’t fix it. All vegetable gardeners need a long-handled hoe.
Removing dead leaves
If you notice kale developing yellow leaves, especially around the lower levels, just clip them off and give it a good feed of seaweed.
Pests and Diseases
Kale is a tough veg that was grown by peasants because it didn’t attract much in terms of pests and disease. It was a reliable crop that fed lots of people.
That said there are a few issues to contend with.
Pigeons
I Iove wildlife in the garden, we have to co-exist with other creatures, but it’s disheartening to have your crop decimated by hungry pigeons. The only way to stop them is a net.
You can easily net your kale this way –
Hammer posts to either end of the kale row or form a square around the plot. Pop a flowerpot on top of each post and drape heavy bird-proof netting, mesh or fleece over them. Large areas may need extra posts in the centre.
Using net means you MUST check for hedgehogs, frogs, and other wildlife every day. They get tangled in netting and can’t get away. That means a slow painful death that you as a responsible gardener can prevent.
Caterpillars
Caterpillars like brassicas especially the cabbage white. This butterfly lays the most precise rows of orange eggs on the underside of green leaves. It’s truly amazing to see, but they must go!
Wipe eggs off with gloved hands or they’ll turn into caterpillars that eat the leaves. A lot of caterpillars can reduce your lovely kale to stalks.
Try meshing young kale with insect-proof netting so butterflies can’t reach leaves in the first place. You could also use a chemical spray, but these methods are not organic and probably don’t do us much good when we eat them.
Chemicals also kill lots of other good insects like ladybirds and bees that eat aphids and pollinate the flowering veggies.
If you already have caterpillars pick them off and pop them on the bird table. Blue tits go crazy for caterpillars.
Cabbage root fly
Root fly is a problem for all root veggies. Kale is more resistant than others, but large infestations can cause wilting, stunting and death. Kale will turn an odd blue colour if it’s being attacked by cabbage root fly.
The root flies start life as white 5cm long larvae laid by the cabbage root fly. They eat the roots before developing wings and leaving to find another site to infest.
To prevent cabbage root fly you can net kale with insect-proof mesh. Cabbage collars can stop flies laying eggs around the base of the plants too, but they are time-consuming as you have to dress each plant.
Of course, there are now nematodes bred to defend your garden from pests too.
I could write a whole article on nematodes – the natural predators you can introduce to keep your plants safe. The cabbage fly nematode is a tiny worm that kills the larvae. They already live in your garden, but bumping up numbers means they form a small army.
Cabbage Whitefly
On occasion you may be bothered by cabbage white fly. It’s not as destructive as aphids and blackfly but if you find stickiness beneath leaves wash them clean with a hosepipe.
The stickiness is honeydew – a beautiful word for what is actually – poo! It’s not something you want to eat.
Clubroot
Clubroot is a fungus that affects most brassicas, but kale is often strong enough to resist.
If kale leaves go brown and wilt pull up a plant. Knobbly roots and a horrible smell means clubroot, and its bad news because the spores last for nine years.
There’s no chemical that clears up clubroot, but you can dig the earth over in dry weather to expose and dry out the spores, or try adding lime because clubroot prefers acid soils.
It’s not much help if you already have kale growing, but next time try a club-root resistant variety like ‘Tall Green Curled’ or Caledonian’.
Growing Kale In A Container
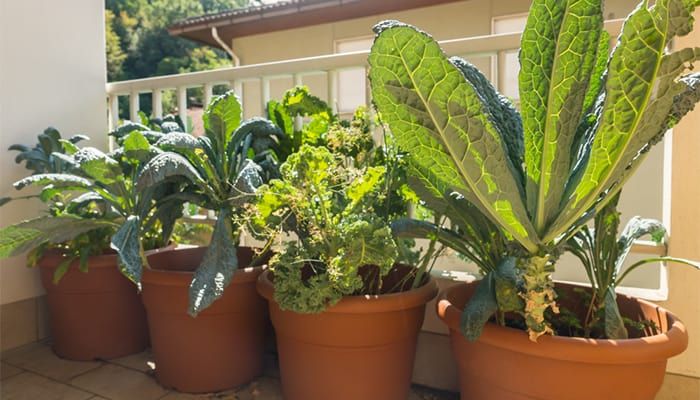
You don’t need a vegetable garden to grow kale because it will thrive in a well-watered container.
Choose a pot with at least 50cms depth and follow the steps above. Growing kale in a container has some benefits such as fresh soil that avoids clubroot, and moving the pot around to catch the sun encourages new growth.
How and When To Harvest Kale
Pick leaves at any point, but the main harvest is ready when leaves are palm-sized.
Don’t take more than a third each time you harvest because the plant needs photosynthesis to regenerate more leaves. It should be ready for the second picking in a week’s time.
If you’re able to wait for the first frost your kale will taste sweeter, much like parsnips sweeten after frost, but I’d recommend you don’t wait if the weather is mild.
Kale is much tastier when the leaves are small. Large leaves taste bitter and they are chewy too, much to the disgust of children.
All Hail The Kale
So there we have super kale. It was once a staple food for people and cattle and it’s still chock full of health benefits.
Embrace your leafy green side with easy-to-grow, delicious kale this year – you won’t be without it again.