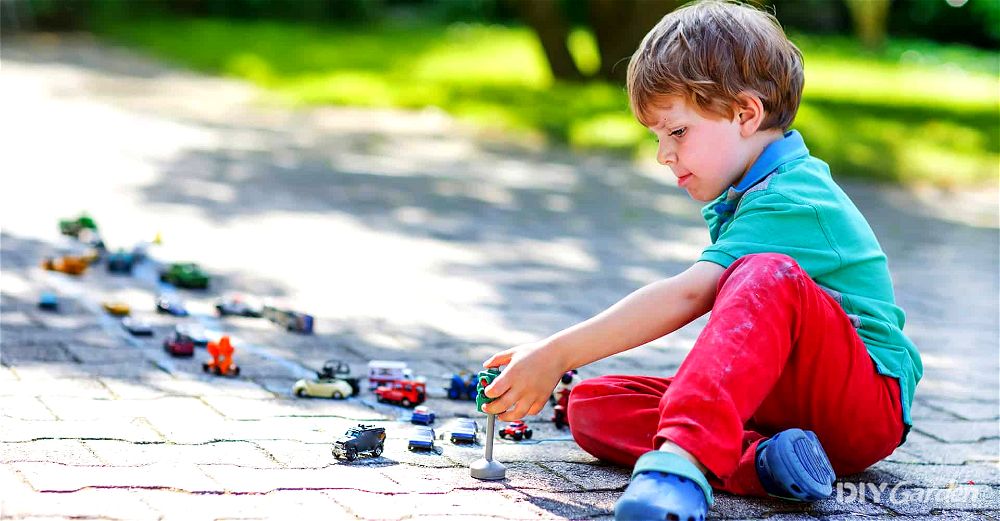
Quell the cries of boredom this weekend with a DIY garden racetrack.
Ridiculously easy and insanely impressive, this nifty little project will have your mini Stigs spellbound for hours on end.
Guaranteed to put an end to lockdown tedium, this fantastic garden feature will keep the kids entertained while you get on with tending your borders in peace. Sounds blissful!
Garden racetracks are amazingly versatile, amusing everyone from toddlers with their matchbox cars right up to teenagers with their RC cars. And what’s more, they are so straightforward that even DIY novices can construct them with ease.
Garden Racetracks For Small Gardens
A concrete area or tiny outdoor space doesn’t make a garden racetrack out of reach. Even the smallest of back-gardens are suitable, you simply need to work with what you have and get creative!
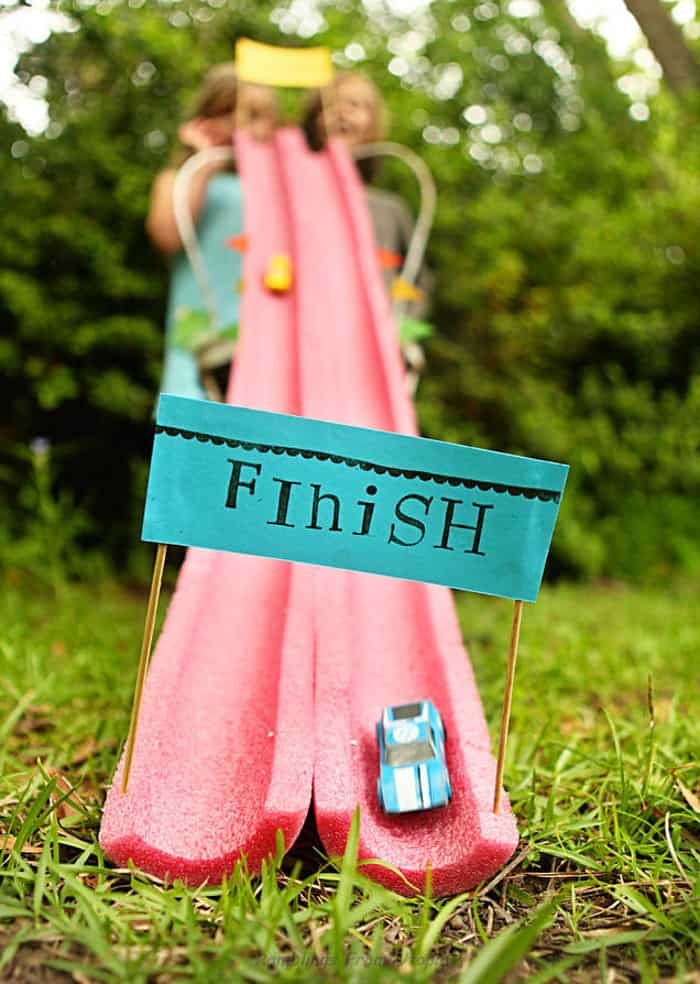
Cutting a pool noodle or PVC pipe in half will give you an instant no-fuss dual racetrack. Decorate with chequered race tape and flags. Perfect for siblings to settle their differences over.
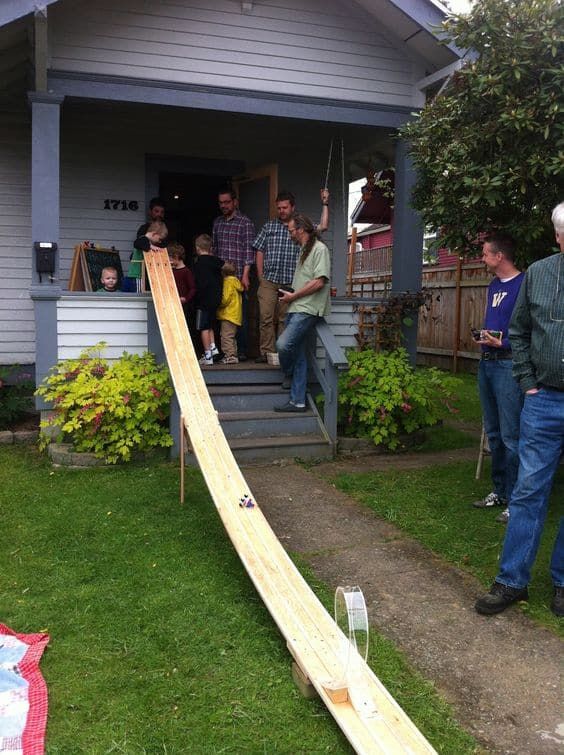
Get your hands on some flexible birch plywood, fashion a couple of stands, throw in a plastic loop-the-loop and you’ve got yourself (and your kids) one hell of a launching track!
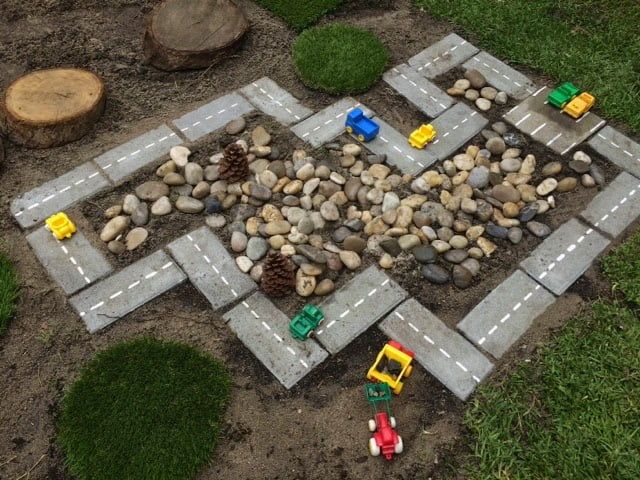
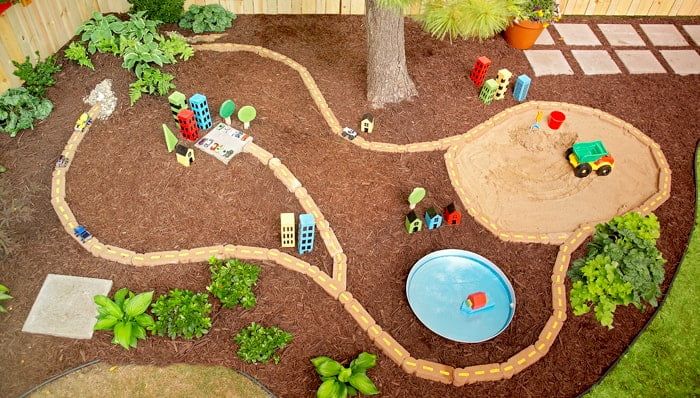
For a more permanent fixture, cinder blocks and paving edgers make excellent adaptable roadways that can be as basic or complex as you like. For minimal upkeep, fill the inner space with playground mulch or bark chippings. Use sand in these spaces to form mini sandpits, giving added sensory appeal and fuelling your child’s imagination further. Who doesn’t love an off-road hot wheels adventure?
How to Build The Ultimate Garden Racetrack
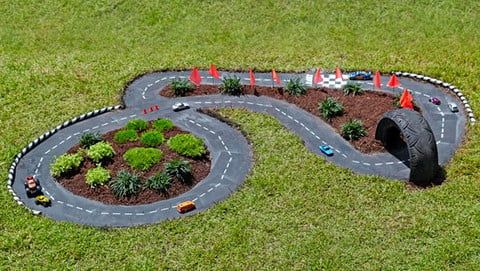
A cement garden racetrack is perfect for die-hard mini speed junkies and thrill seekers. This permanent track is a unique focal point and if laid properly, it will stand the test of time and see your little ones the whole way through from early childhood to adolescence.
1. Choosing a Design
Raid your art and crafts box and put some designs on paper. Involve your kids and consider their suggestions carefully, after all they will be the ones using it. However, bear in mind when they present you with a masterpiece of intricate interlinking roads that you will be the one trying to use a grass strimmer on every week.
Think not only about shape, but also texture and colour. Giving as much depth as possible to your racetrack will feed your kids dreams, creating an incredible sensory experience for them.
Study your garden and think carefully about where you would like to build your track. A nice shady nook will protect the little ones from burning sunshine in high summer. Remember to keep your track an adequate distance from any beds or borders to prevent errant little feet accidentally trampling your perennials.
Plot your track meticulously, making notes of widths and dimensions. A comprehensive outline will guarantee a professional finish, so time spent planning is definitely time well spent.
Decide what you will be using to fill the inner spaces of the track. Playground mulch or bark chippings are an excellent low-maintenance option, but for a splash of colour, grass and mini shrubs also make interesting fillers.
Remember that you will be dealing with cement, so wait for a dry spell of weather before attempting this project.

2. Materials Required
- Landscaping Spray Paint
- Rope
- Sand and Cement Mix (2 bags should suffice)
- Black Oxide Powder
- Bricktor (this prevents the concrete cracking)
- Shovel
- Trowel
- Wheelbarrow
- Wooden Float
3. Shovels at the Ready!
Once you’ve worked out a good blueprint and collected your materials, it’s time to get stuck into the hard work. Marking and digging out the trench is the first step. Use rope to outline the track. When you are satisfied with the shape, spray along the length of rope with landscaping paint to plot it directly on to the grass.
Dig down 100mm. Enlisting the help of your children with this will help to burn off their energy while saving yours. When the trench is completely excavated, line with Bricktor.
Put the Sand and Cement mix into your wheelbarrow and add a capful of Black Oxide. Make up with water and stir thoroughly until you have a stiff mixture.
Carefully shovel the cement into the trench. At this stage, you can sprinkle more Black Oxide over the top if you want to darken the mixture further. Level the cement with a wooden float and smooth over with a trowel.
The cement will take 24-48 hours to set. Curious little hands won’t have the impulse control to keep away from their new toy, so you might want to restrict their garden access for a few days.
4. Dress it Up
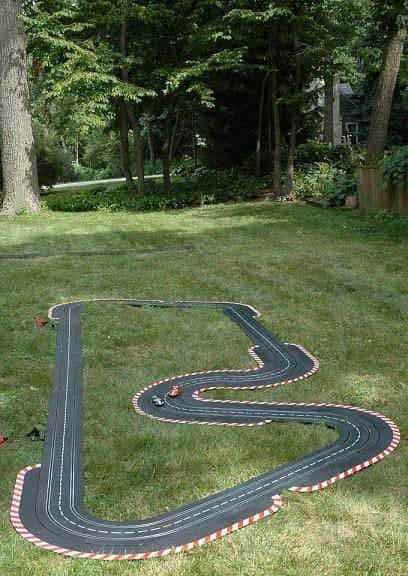
The waiting is over, and now it’s time for the fun part! You can decorate your track as much or as little as you like. Kids have wonderfully vivid imaginations, so a little really does go a long way. Simply lining the track to transform it into a road will ensure unlimited amusement.
Let your little ones build their own mini world by adding bits and pieces from their toybox. Lego, figurines and wooden buildings are a great start.
Poly tube wrapped in electrical tape can be secured around the bends of your road to create an authentic looking safety barrier. Flags and bunting are also a wonderful addition.
Using a variety of materials such as sand, gravel and grass to fill the interior sections of the track will give a brilliant multitextured effect that the kids will love.
A garden racetrack offers your outdoor space a wonderful, youthful feel. You won’t believe how quick and easy this project is until you try it for yourself, and you will reap the benefits for years to come. On your marks, get set, go!