Trampolines are fantastic addition to any garden. Great for entertaining the kids while burning off excess energy, they are also an ideal exercise accessory to keep adults fit and toned.
Nonetheless, there are some disadvantages to traditional trampolines. Large and cumbersome, they can blight the landscape of your garden, blocking precious light from your beds and planters. You might also find that you need to drag the trampoline around the garden to cut the grass underneath, or disassemble it completely if a storm is forecast. However, where there’s a will there’s a way, and if you’re as serious about owning a trampoline as you are about gardening, then a sunken trampoline is the perfect compromise for you.
How to Create a DIY Sunken Trampoline
Creating a sunken trampoline sounds complicated and you might be tempted to get the professionals in for that all-important finish, but it’s a straightforward job that you can do yourself for half the cost. All it takes is a little planning and a lot of digging. What better way to spend a sunny spring weekend!
1. Plan, Plan, Plan
Get your measuring tape out and decide exactly where you want to position your trampoline. Carefully consider how it will look once it’s completed. Contemplate the size of the trampoline, what shape you would prefer and what colour padding would suit your garden best. Don’t rush this stage or you might spend years regretting it. When measuring up, don’t forget to factor in 50cm around the edge for your doughnut.

2. Buying your Trampoline
Trampolines start at around £100 for the most basic models and go right up to £500-£600 for top of the range brands. It’s a case of ‘you get what you pay for’; spend less money and your trampoline will be lacking in features and have a shorter lifespan. Is it worth saving money in the short term if you have to dig the whole thing up and replace it again after 2 years?
Feature-wise, there are a few things to consider when purchasing. Many basic trampolines are only suitable for children so if you plan on bouncing some calories away yourself, be sure to check the weight limit. For a sunken trampoline, a heavy-duty rust-resistant frame will offer better longevity. Once you have done your homework and purchased your trampoline, it’s time to roll up your sleeves and get your shovel out!
3. The Dirty Work
Before you start digging, you will need to mark out a template of your trampoline on the ground. Aim to get it as accurate as possible. Measure the height of your trampoline. Some people prefer to leave the surface of the trampoline a few inches above ground for air flow, but this in turn can cause a potential trip hazard so it’s worth bearing in mind.
If your garden has poor drainage, you may want to dig down an extra foot in the centre of the hole and fill the space with shingle.
If your soil is sandy, there is a risk of edge collapse further down the line. If this is the case, lining the wall of your hole with lengths of wood will give added support.
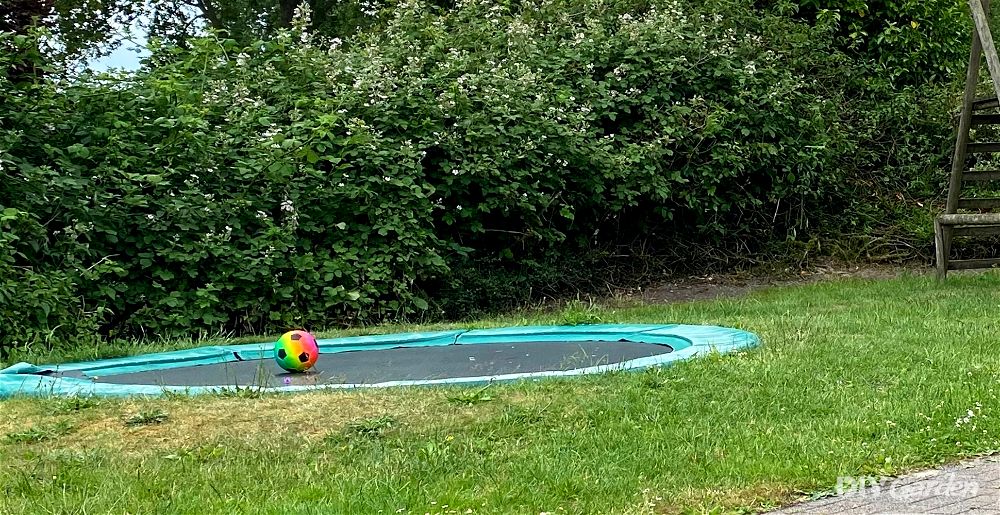
Once you have lowered your trampoline in, use some of the discarded topsoil from the hole to create a donut around the trampoline. About a foot high will give a nice slope and will obscure the trampoline from a distance.
Surprisingly simple, isn’t it? Play your cards right and your DIY sunken trampoline will guarantee you many years of pleasure with minimal intrusion on the landscape of your garden. Enjoy!
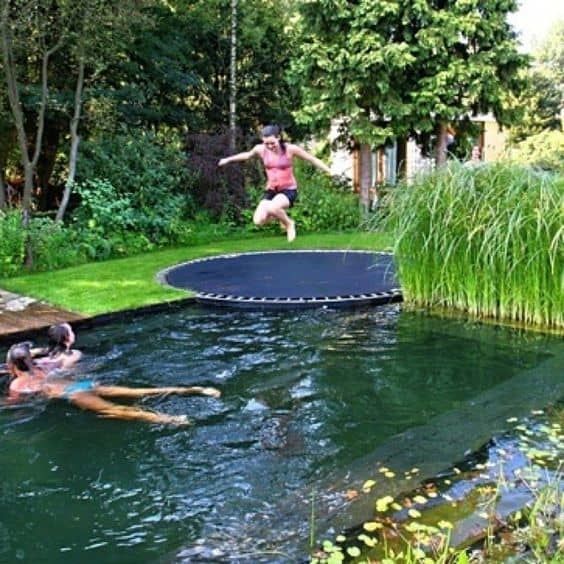
Image courtesy of:
http://www.sunkentrampolines.co.uk
http://cherkyb.blogspot.co.uk/2007/07/inground-trampoline-design.html