How to Level a Sloping Garden
An uneven garden can be tricky to style, mow and use. In fact, not only can a sloping lawn be difficult to work with, but low-lying areas also collect water which can lead to lawn disease and soil erosion.
If your entire garden is on a slope, there are ways to level it. If you’re working on a budget, you could approach the job yourself, but it will naturally be easier to employ professional help.
Whilst there are a lot of different ways to level a lawn, this step-by-step guide will walk you through the most basic process to make the ground level using a retaining wall.
You may also need to consider using several retaining walls to divide you lawn into many tiered levels. This is a useful tactic if your sloping garden has a particularly large gradient.
Take a look at this 10-step guide to level a sloping garden:
Things You’ll Need to Level a Garden
Tools
- Two tall stakes
- Measuring tape or metre stick
- String
- Spirit level
- Shovel or small digger
- Soil compactor
Materials
- Water to moisten the soil
- Materials for your retaining wall – popular materials include breeze blocks, concrete retaining blocks, bricks, natural stone or reclaimed railway sleepers
- Grass seed or turf for your new lawn
10 Steps to Level a Sloping Garden
1. Assess the Area
Make sure you have permission to level your uneven lawn. In most instances you won’t require planning permission, but there are some scenarios where you might; for example, if your house is a listed building.
Check with your local council whether you need planning permission before starting the process of levelling a sloping garden.
It’s also very important to check with utility companies that there are no pipes or cables underneath your garden that will be affected.
2. Measure Your Existing Slope
First, you’ll need to measure the slope to assess what you’re dealing with. Follow these steps:
1. Place a stake at the top of your garden slope and a stake at the bottom.
2. Tie a piece of string close to the ground on the top stake. Then, bring the string across to meet the other stake. The string should be horizontal, at a 90° angle to both stakes. Tie the string to the bottom stake. Use a spirit level to check that the string between the two stakes is level.
3. Measure both the ‘rise’ and ‘run’ of the slope. The rise is measured on the bottom stake, by measuring from the ground to where the string is tied. The run is the length of the string between the two stakes.
4. The ‘rise’ and ‘run’ make up two sides of a triangle. The rise shows how tall your retaining wall will need to be. You now need to calculate the area of the triangle (there are many websites online to help work this out!).
5. Decide how long the retaining wall will need to be (this is likely the width of your garden). Multiply the area of the triangle by the length of the retaining wall.
6. This will tell you, roughly, the volume of space that you will need to fill with soil behind the retaining wall.
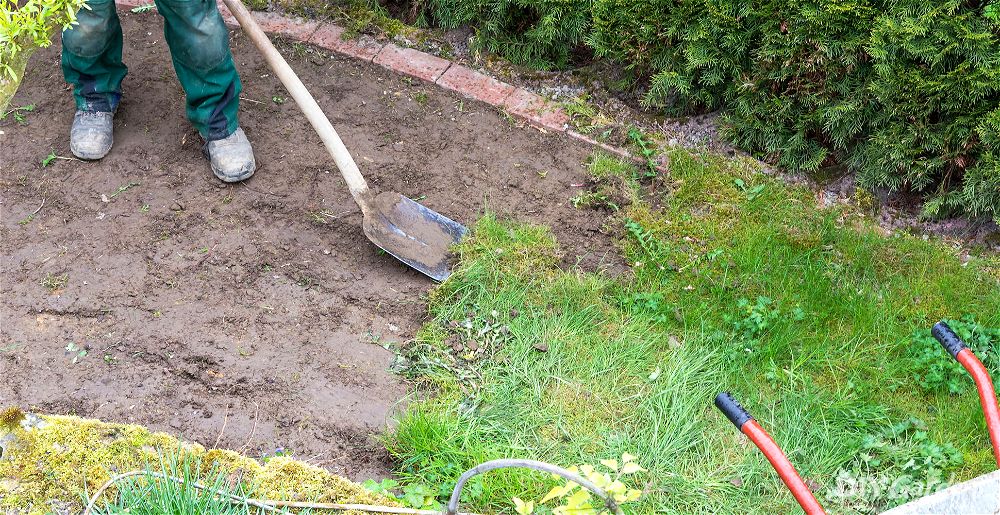
3. Mow, Rotavate and Water Your Lawn
Mow your lawn at the lowest setting, rotavate and remove debris, then water the areas that you will be digging. This will make the ground easier to work with.
It’s best to water at least 24 hours before you start digging, but don’t overwater: wet soil will be very heavy and much harder to work with.
4. Dig the Trench for Your Retaining Wall
As mentioned in the introduction, you’ll need a retaining wall to hold your newly levelled garden in place.
To build a retaining wall, you should first dig a trench that runs the width of the area you are levelling, parallel with the bottom of the slope.
Base the depth of the trench on the proposed height of your retaining wall. Make the trench 1/8th as deep as the wall, and add on an additional 8cm. For example, if your retaining wall is going to be 60 cm tall, the trench should be 20.5 cm deep.
Your retaining wall will support the raised land in your garden, but it’s essential that it’s strong enough to hold the soil you pile behind it.
When it rains, the wet soil behind the retaining wall will be much heavier, so your wall may need to be a lot stronger than you think. If you are at all worried, it’s best to call in a garden landscaping professional; you may even require a structural engineer.
Be aware: if your wall isn’t strong enough for your plot, it can collapse, causing expensive, and potentially dangerous, damage.
5. Build Your Retaining Wall
Don’t forget to lay a good foundation before building your retaining wall. Crushed rock or gravel is a good material to start with.
When building the wall, it’s vital to make sure everything is level. The first row of bricks or stones will set the precedent for the rest of the wall, so take your time getting it right.
Build up the wall in layers, making sure each layer is level using a spirit level.
Your retaining wall should ideally be no more than 60 cm tall. If it’s higher than this, it will be trying to hold up too much soil behind it. This will make it more likely to break under the pressure.
If your retaining wall needs to be taller than this, you will need to use several tiered/stepped retaining walls.
6. Pile Up the Soil
Start piling garden soil behind the retaining wall, ensuring it’s level. If the slope isn’t particularly steep, you can use topsoil to level it.
If you are also lowering a section of your lawn, you can remove the soil from here and add it in behind the retaining wall.
7. Check Your New Lawn is Level
Check that the soil behind the retaining wall is level. First take a look for any lumps and bumps, then use a spirit level to check the entire lawn is flat.
You could put the stakes back in at either end of your lawn, tie the string between them, and check that the string is flat using your spirit level.
8. Compact the Soil
Add an even layer of compost on top of your soil, then compact the soil using your soil compactor. If you don’t compact it, the next rainfall will likely create lumps and bumps and it could be prone to soil erosion.
Once compacted, check again that the soil is level by using your spirit level. If it’s not, add more soil on top, repeat the compacting or rolling process, then check the level once again.
9. Plant Your New Lawn
If you’re growing your grass from scratch, follow the grass seed instructions to plant up your lawn.
Scatter grass seed over the exposed soil and water thoroughly.
If you’re using turf, this can now be laid. Place the sheets of turf as close together as you can, ensuring that each one is flat.
10. Take a Step Back
Keep off the area whilst the grass seed grows and the lawn settles. Admire your garden from a distance and be proud of the hard work that you’ve put in and the garden transformation that you’ve achieved!
Additional Resources
- My Urban Jungle – Guide to Level a Sloping Garden
FAQs
Can I level my garden myself?
Technically yes: in most cases it is possible to create a level lawn by yourself. However, depending on the gradient of the slope, this can be a very big job. If the retaining wall is not strong enough to hold the soil behind it, the repairs can be very costly. If you aren’t confident, and don’t have experience, it’s best to get in touch with a professional to sort out an uneven garden.
How much will it cost to professionally level an uneven garden?
This depends on the size of your garden and the amount of work that is required. The average cost of levelling a sloped garden is around £1200 – £1500.
Can I level my garden without planning permission?
In most cases, you will not need planning permission to level a sloping garden. But if the work you are doing impacts protected bushes and trees, you will. You’ll also need planning permission if your property is a listed building.
While you don’t need to ask your neighbours’ permission, it’s a good idea to give them a heads up if the work you are doing is going to affect them (in terms of noise, builders parking, machinery or blocking any sightlines).
You should also check with utility companies that there’s no cables underneath your garden that will be affected.
How can I level bumps in my lawn?
If your garden isn’t sloped, but there are bumps in your lawn that you would like to level. There are a few ways to do this.
- If you’ve only got small sunken areas that you want to level, this can be done using a simple levelling mix. Mix 40% fine sand, 40% topsoil and 20% compost. Alternatively, buy it premixed. Apply the mixture to low areas using a shovel, adding no more than half an inch. Spread the mixture evenly using a garden rake, then brush the grass backwards and forwards to work the mixture into the soil.
- If you’ve got larger sunken areas, you’ll need to build them up. To do this, remove the patch of turf within the area, taking care to protect the roots. Spread a layer of topsoil into the hole and build upwards until it’s the same height as the rest of your lawn, then replace the patch of turf and check that it’s level.
- If you’ve got lumps in your lawn, you can create a level lawn by lifting the turf and removing the soil underneath. Remove as much soil as it takes to make the area level with the rest of your lawn, then lay the turf back down.