Whether you want to grow your own vegetables, maintain a tidy lawn, or create a wildlife haven, reading is one of the best ways to expand your gardening knowledge. Varied sources are always essential to expose yourself to different ideas and opinions, but, no matter which gardening book or blog you may be reading, chances are that you’ll come across a few technical terms that leave you completely puzzled.
To make things less confusing for all of you new gardeners out there, we’ve put together a gardening glossary featuring some of the most commonly-used terminology that you’ll encounter.
Annuals, Biennials, and Perennials
These three terms refer to how long a plant lives for.
Annuals are plants that germinate, flower, set seed, and die all in one year. While they may be short-lived, they have a long flowering period with flowers that tend to be beautifully extravagant. This is why annual flowers are so popular in gardens around the world.
Biennials are plants that produce strong roots and leaf growth in their first year, followed by flowers, fruits, and seeds in their second year. After they set seed, they die.
Perennials are plants that live for three years or more. Some perennials, such as lupins and hyacinths, are short-lived, meaning that they’ll live for about five years. However, short-lived perennials usually self-seed quite well, so you’ll always have replacements coming up in your garden. On the other hand, long-lasting perennials, such as rhubarb and asparagus, could potentially live for half a century or more.
Bare Root
A bare root plant is a perennial plant in dormancy (meaning that it has stopped growing for the season), which has been dug up and stored without any soil around its roots.
This may sound a little strange, but it’s a very convenient way to post/ship plants. The lack of soil makes them much lighter, and the plants will start growing again once they have been planted and watered.
Bolting
Bolting is when a plant starts to produce flowers and seeds, which then ends its lifecycle. It’s a term that’s usually used in reference to vegetable crops. Once plants start to bolt, they put all of their energy into seed production, leaving their leaves and stems tough and bitter.
Since bolting tends to mean that a plant is no longer usable, it’s something that gardeners try to delay for as long as possible. Methods to prevent a plant from bolting include:
- Maintaining consistent temperatures. Laying a mulch around your plants can help with this (keep reading to learn more about mulching!)
- Preventing plant stress, especially from pests and diseases
- Planting your vegetables at suitable times of the year
- Making sure that you’re using the right fertiliser
- Planting bolt-resistant vegetable varieties
Companion Planting
Companion planting is worth reading up on – once you start doing it, you’ll never look back. This organic gardening method sees specific plants being grown in close proximity, because they provide each other with certain benefits.
These benefits could be:
- One plant repelling pests from another, such as onions protecting carrots from carrot root fly
- One plant providing a good habitat for insects that are beneficial to the other plant. A good example would be marigolds, which attract ladybirds and hoverflies that eat aphids and greenfly on tomato plants
- Making the most of your space. Planting shallow-rooted crops in between deep-rooted crops increases the yield for that growing area
- Providing a living mulch, in the way that strawberries grown under fruit trees do
Crop Rotation
Crop rotation is a technique that involves planting different crops, one after the other but in a certain order, on the same plot of land.
This may sound confusing, but there’s a solid reason behind it. Crop rotation prevents nutrient depletion, which improves soil health. It also ensures that plant-specific diseases and pests don’t build-up in a certain area.
Getting crop rotation right requires some advanced planning, but it’s more than worth it for maintaining your garden’s health.
First and Last Frost Dates
A frost is when temperatures dip down to, or below, 0°C. This causes ice crystals to form on plants. When this happens to young and delicate plants, it usually causes injury, and can often quickly kill them.
This is why it’s so important to know both your first and last frost date. The first frost date is usually in the autumn – this is when the first frosts are normally experienced in your location. The last frost date refers to the final frost in the spring, after which it is safe to plant out younger plants.
First and last frost dates vary hugely based on location. Fortunately, a quick internet search will give you average frost dates for your area, no matter where in the world you may live.
Frost Pockets
A frost pocket is a small and usually low-lying area of ground that is more prone to frosts than other parts of the garden. Dips or the bottoms of hills are common frost pockets, as cold air flows downwards and collects in these spots.
If you have a frost pocket in your garden, then you’ll experience very late frosts in the spring/summer, as well as very early frosts in the autumn. You’ll need to keep this in mind when deciding what to plant in that area.
Hardening Off
Sowing seeds indoors is a great way to give your plants a head start on the growing season. However, moving from a warm and cosy environment into harsh outdoor elements can send young plants into shock, which could end up being fatal.
The hardening off process prevents transplant shock by slowly acclimatising indoor-grown plants to outdoor conditions. To harden a plant off, you would place it in a sunny and sheltered outdoor spot for an hour or two to begin with. The next day, you would then increase this by a couple of hours, and so on.
After a week or two, depending on how gradually you take things, your plant will have happily spent the night outside. At this point, it’s ready to be planted in the ground.
Heirloom
Heirloom seeds or plants are specific varieties that have been grown for at least 50 years. Some say that a plant variety can only be classed as an heirloom if it was grown before World War II.
Either way, these historic varieties are worth keeping around. You’ll find some that date back thousands of years. These strains have clearly managed to withstand the test of time and their seeds can easily be saved year after year, preventing you from ever needing to buy more of that variety again.
Leggy Seedlings
If you’ve ever grown seedlings indoors on a windowsill, then chances are that you’ll have already experienced legginess. This term refers to plants that have grown tall and lanky because they don’t have an overhead light source, requiring them to stretch horizontally instead in order to lean towards the light.
Plants that have been started earlier in the season, when natural light levels are still quite low, are more prone to legginess than those started later in the spring. Overcrowded seedlings can also end up leggy, since they’ll try to compete with each other for light.
Legginess needs to be prevented as much as possible, otherwise it will stunt growth, cause weak stems, and leave the plants more susceptible to pests and diseases.
Rotating the trays or pots that your seedlings are growing in can help to prevent legginess. This allows all parts of the plant to access the light. Keeping temperatures low and moisture levels consistent can help too. If none of this helps, then it may be worth investing in some grow lights.
Mulching
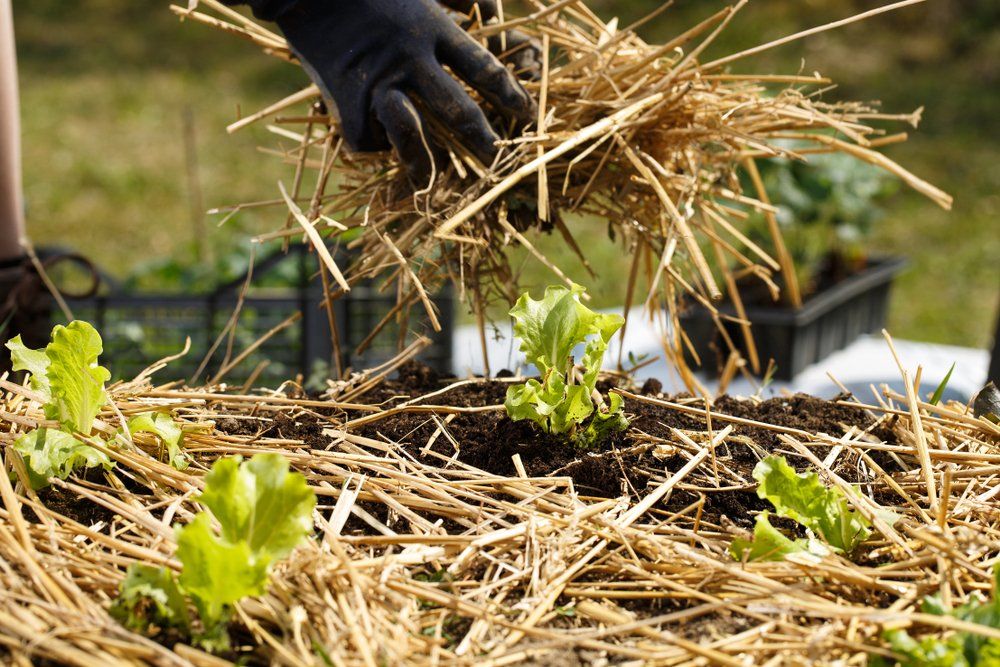
Mulching is a technique that just about every gardener would benefit from. It consists of laying some sort of material over the surface of your soil, around your plants. This brings several benefits:
- It maintains the temperature of the soil, keeping it cooler in the summer but warmer in the winter. This helps to extend plant harvesting periods
- It helps to maintain soil moisture by preventing water from evaporating out of the soil
- It suppresses weed growth
- An organic mulch will also feed your plants as it breaks down, while improving soil structure and fertility
There are two main types of mulches; organic and inorganic. As mentioned above, organic mulches provide even more benefits, making this the better long-term option. If you would like to learn more about mulching, check out our detailed guide here.
Nitrogen-Fixing
Nitrogen-fixing plants contain a specific strain of bacteria in their roots that allows the plant to draw in nitrogen from the environment around it. Once the plant dies back, the nitrogen stored in that plant is released into the soil, where it then feeds the other plants nearby.
Growing nitrogen-fixing plants around your garden is a great way to provide your other plants with an extra, and completely natural, source of nitrogen. Some of the best nitrogen fixers include:
- Peas
- Beans
- Comfrey
- Alder
- Sea buckthorn
- Lupins
- Licorice
Pollination & Pollinators
Pollination is when pollen is transferred from a male flower to a female flower, which then fertilises the plant and allows it to produce fruit and seed. While the wind helps with pollination, the process is usually carried out by pollinators, a term used to describe the insects that fly from one flower to another.
When plants are grown outdoors, pollination, whether by insects or the wind, tends to happen naturally, without the need for human intervention. However, pollination problems can occur when plants are grown in a greenhouse, since this restricts both wind and insect access.
One way to increase pollination of your plants is to surround them with flowers that are known for attracting pollinators. When this isn’t possible, hand pollination is another option, although this can be very time-consuming if you have a large number of plants that need to be pollinated.
Pot Bound
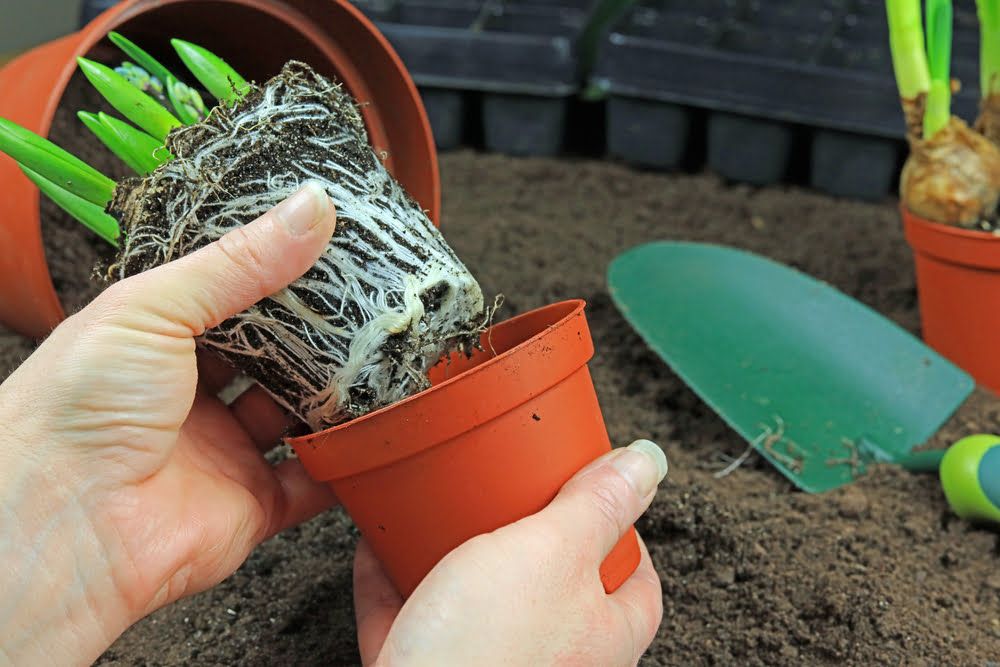
Pots are great for growing plants, but it often doesn’t take long for a plant’s roots to extend out until they are touching the edges of their pot. Since those roots can’t stretch any further, they end up circling around the pot, causing them to become pot bound. This is also referred to as being root bound.
A pot bound plant will not only experience restricted growth, but they will also have a much tougher time absorbing enough water and nutrients. The best way to prevent a plant from becoming pot bound is to regularly check the drainage holes at the bottom of each pot. As soon as you see roots starting to emerge, it’s time to move your plant into a bigger pot.
Pricking Out
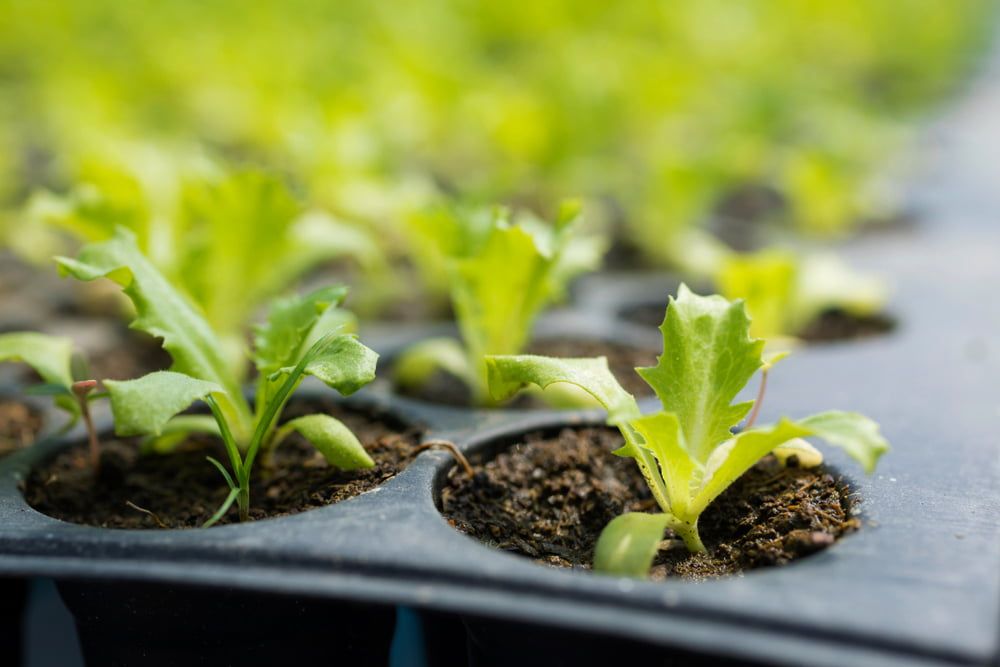
Pricking out refers to transplanting seedlings from their seed trays, soon after they have germinated, into individual pots or modules. This gives those seedlings enough room to properly grow.
Although pricking out should only be done when seedlings are large enough to safely handle, it’s still quite a fiddly process. It’s important to be extremely gentle, because young seedlings are easily damaged.
One way to avoid pricking out is to sow your seeds in individual modules to begin with, rather than in a seed tray. However, this does require more space right from the start, especially since some of those seeds may not even germinate.
Seed Scarification
Some seeds, such as nasturtiums, are covered a very tough protective coating, which can significantly extend their germination time. One way to speed things up is by scarifying the seeds, which means using an abrasive material to gently nick that hard outer coating, before soaking the seeds overnight.
Once you sow them the next day, you’ll have kickstarted the germination process. This not only means faster germination, but also better germination rates. Keep in mind that not all seeds need to be scarified – doing this to seeds that don’t require it will only end up damaging them.
Soil Amendments
A soil amendment is when a material of some sort is added into the soil to improve the way in which the soil functions. Whether this may be to increase fertility, alter pH, improve moisture retention, boost drainage, or anything else, soil amendments can vary hugely depending on the needs of your plants.
Stratify/Stratification
When you’re germinating seeds, you need to try to replicate their natural environment as much as possible. Some seeds need to go through a cold period before they will germinate, while others need a warmer-than-average environment – this is what stratification refers to.
Cold stratification requires you to keep seeds at a temperature of around 5°C for a certain period of time. Storing them in a fridge works well.
Warm stratification requires seeds to be kept at temperatures between 15-20°C – this is sometimes needed before the cold stratification process.
Thinning Out
Thinning out is a process in which you remove extra seedlings or plants from their growing area, in order to give the other plants around them more space to reach their mature size. Most commonly done soon after germination, with excess seedlings being snipped away, thinning out can also take place when older plants are growing too close together.
True Leaves
When a seed first germinates, it produces seed leaves. These are generic-looking leaves – they’ll look similar on most of your seedlings, no matter what you may be growing. However, once those seedlings start to grow a little more, they’ll produce true leaves, which are leaves that look like smaller versions of that plant’s final mature leaves.
It usually takes 2-3 weeks for a seedling to produce its true leaves. Once this happens, it’s a sign that the seedling is growing well. At this point, you’ll be able to carefully transplant the seedling without causing too much damage.
