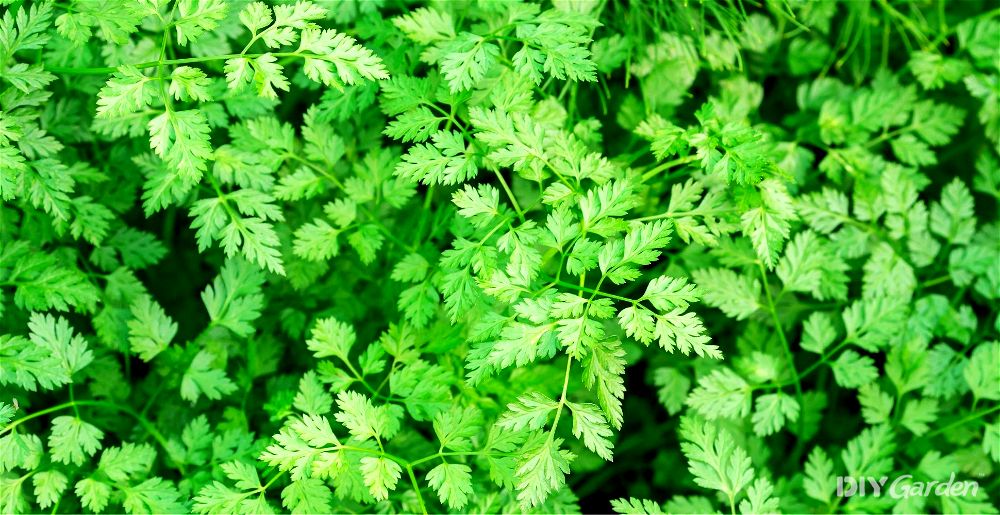
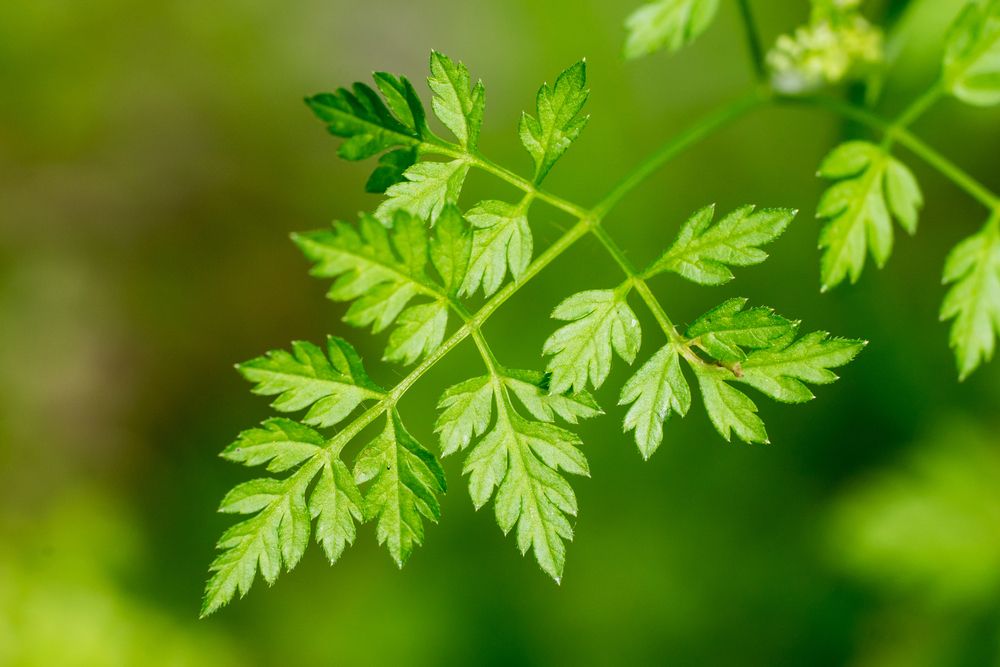
A key herb in French cuisine, chervil is a delicate, cool-season biennial that’s related to parsley. The two look and taste a little similar, but chervil also boasts subtle notes of liquorice and tarragon, giving its flavour a beautifully complex depth. You’ll notice that this aromatic herb commonly features in fine dining menus, yet it isn’t one that you’ll often find on supermarket shelves. Fortunately, it happens to be an easy herb to grow at home, with first harvests taking place just a couple of months after sowing.
Growing Chervil: A Quick Snapshot
When to Sow – Mar-Aug
When to Plant – Apr-Sep
When to Harvest – May-Oct
Average Yield per Plant – 220g
Spacing – 20cm
Depth – 0.2cm
How to Grow Chervil at Home
Native to Southern Europe, Russia, and Central Asia, chervil has been used for both culinary and medicinal purposes since ancient times. It may be a delicate herb, but it’s vigorous, especially when provided with the right conditions. Give your chervil what it needs and you may even find that it self-seeds around your garden, doing away with the need to sow more next year.
Growing Requirements for Chervil
Being a cool-season crop, chervil doesn’t usually do well in hot summers. The heat will cause your plants to bolt and die back. Chervil doesn’t tolerate hard frosts either, meaning that you’ll need to get your timings right to maximise yields – aim to carry out your biggest harvests in the spring and autumn.
One thing that sets chervil apart from most other herbs is that it doesn’t need much sun. In fact, chervil does best in shady spots – it’ll thrive in those darker corners of your garden where other plants tend to struggle. However, it’s also a beneficial plant to have next to lettuce ( it will repel slugs and aphids) and radishes ( chervil improves their flavour).
Plant your chervil in an area that has fertile and well-draining soil. However, since chervil prefers damp conditions, make sure that you incorporate compost or well-rotted animal manure into your soil before planting – these organic materials are great for retaining moisture in the soil.
How to Grow Chervil from Seed
Chervil produces a very long and delicate taproot. It’s difficult to transplant seedlings without damaging this, which is why sowing your seeds directly outside will usually give you stronger and healthier plants.
However, if you’re hoping for an early harvest and would like to start some seeds off indoors, do this in biodegradable pots. These are pots that can be planted directly into the ground, without removing the seedling within, which helps to protect that fragile taproot.
How to Sow Chervil Seeds in Pots:
- Mix a small amount of sand with some multi-purpose compost, and then use this to fill small, biodegradable pots
- Lightly press your chervil seeds onto the surface of the soil. Chervil needs light to germinate, so don’t bury them in
- Gently water the pots from above to help settle the seeds into place
- Place your pots somewhere warm, but not hot – chervil seeds won’t germinate if they’re too warm. Temperatures between 15-18°C are ideal
- Keep your pots moist until your chervil seeds germinate
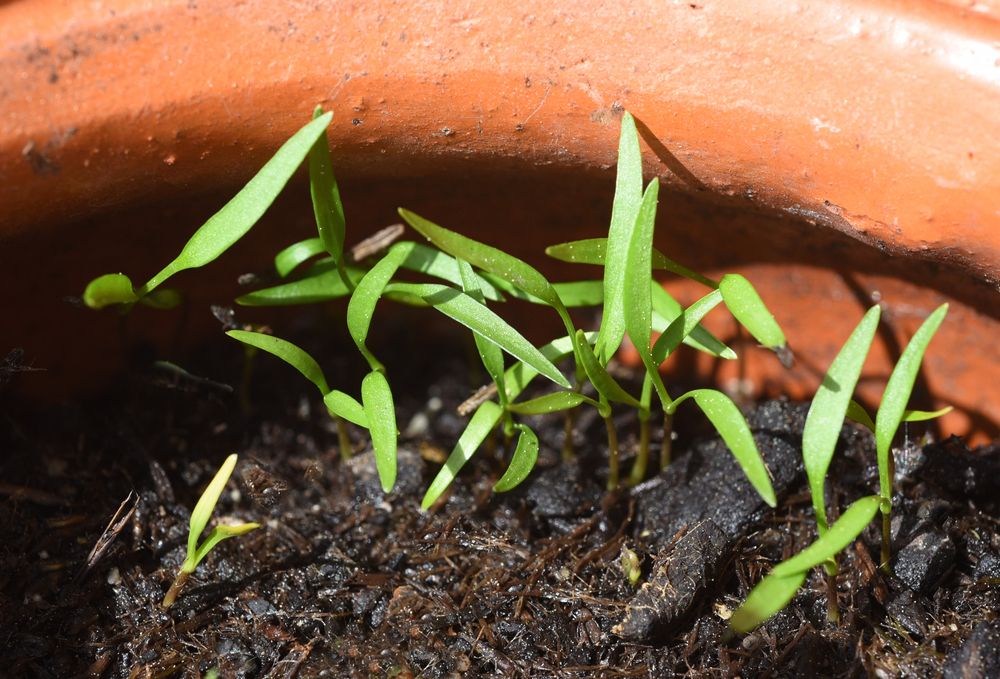
It usually takes between one to two weeks for chervil seeds to germinate. Once they do, move them to a sunny spot and keep them moist until they’re ready to be planted out.
How to Direct Sow Chervil Seeds:
- Make sure that your growing area is weed-free and water it to dampen the soil
- Mix your seeds with some sand – this will allow you to sow them thinly
- Sprinkle your seeds over the surface of the soil
- Lightly press your seeds into the soil
Once your seeds germinate, keep them moist. Wait until they’re a couple of weeks old before thinning them out, leaving about 20cm of space in between each plant.
How to Plant Chervil Outside
Once you know that you have two months of frost-free weather ahead of you, you can plant your chervil outside. However, before you do this, make sure that you spend a week or so hardening your seedlings off. Since they’re quite delicate, they’re easily susceptible to transplant shock.
Make sure that your growing area is weed-free before digging small holes in the soil, just slightly larger than the size of each of your pots. Place your biodegradable pots into these holes before filling in any empty spaces with soil. Firm the soil down and water deeply. You may need to firm the soil down once again after watering, since this can cause the pots to shift.
How to Plant Chervil in a Greenhouse
As mentioned, chervil does best in cool temperatures, meaning that growing it in a greenhouse can be tricky. That said, with some careful planning, your greenhouse can be a huge asset. You’ll be able to harvest your plants earlier in the year, as well as later into the winter.
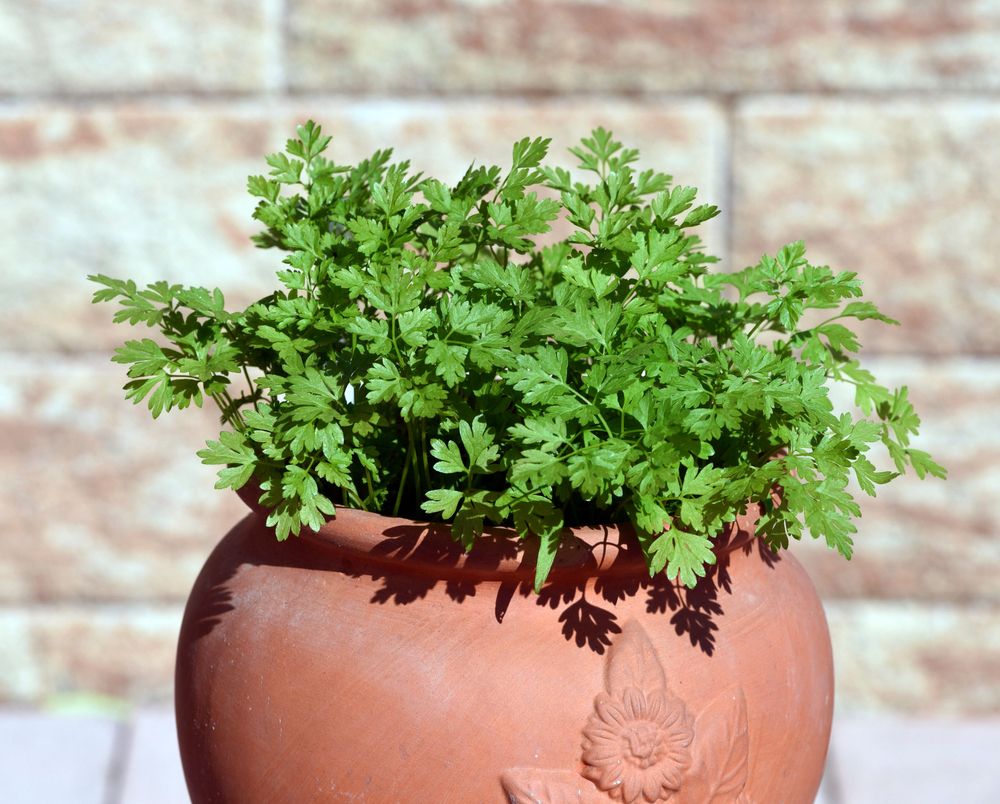
However, be prepared for your greenhouse chervil to bolt as soon as temperatures start to rise. One way to avoid this is by growing your chervil in containers. You can use your greenhouse to start them off before moving your containers outside once the weather turns warmer. Chervil does well in a container, so long as you pick one at least 30cm deep to accommodate its taproot.
How to Care for Chervil
In some parts of the world, chervil grows so freely and vigorously that people view it as a weed. However, in other regions, gardeners struggle to produce leafy and bushy plants. If this isn’t a plant that grows wild where you live, then you’ll need to give your chervil a little extra care to ensure maximum yields. Here’s what you need to know:
Watering Chervil
Chervil needs its soil to be consistently moist. If you allow it to dry out, it will soon bolt, which affects the flavour of the leaves. So, whenever the top 1cm of soil around your chervil plants feels dry, give them some water.
While manual watering may not be needed often during the early spring and autumn, keeping your plants well-watered in the warmer months will help to prolong your harvesting period. Chervil grown in containers will also dry out much faster than plants growing in the ground, so make sure that you’re watering your pot-grown chervil even more frequently.
Feeding Chervil
When grown in rich soil, chervil shouldn’t need a fertiliser. However, if you know that your soil was lacking, or if you would simply like to give your plants a little boost, try a single application of a nitrogen-rich fertiliser early in the season. This will encourage your plants to produce more leafy growth.
Weeding and Mulching Chervil
Although vigorous, chervil is delicate. It doesn’t take much for this herb to end up smothered out by aggressive weeds, making it important to keep your chervil patch weed-free.
One way to save yourself from hours of weeding is to mulch your chervil plants. Do this once they’re a few centimetres tall, and choose an organic mulch if possible. This will help to feed your plants as it breaks down, while also improving soil quality for anything else that you plant in that area in the future.
How to Harvest Chervil
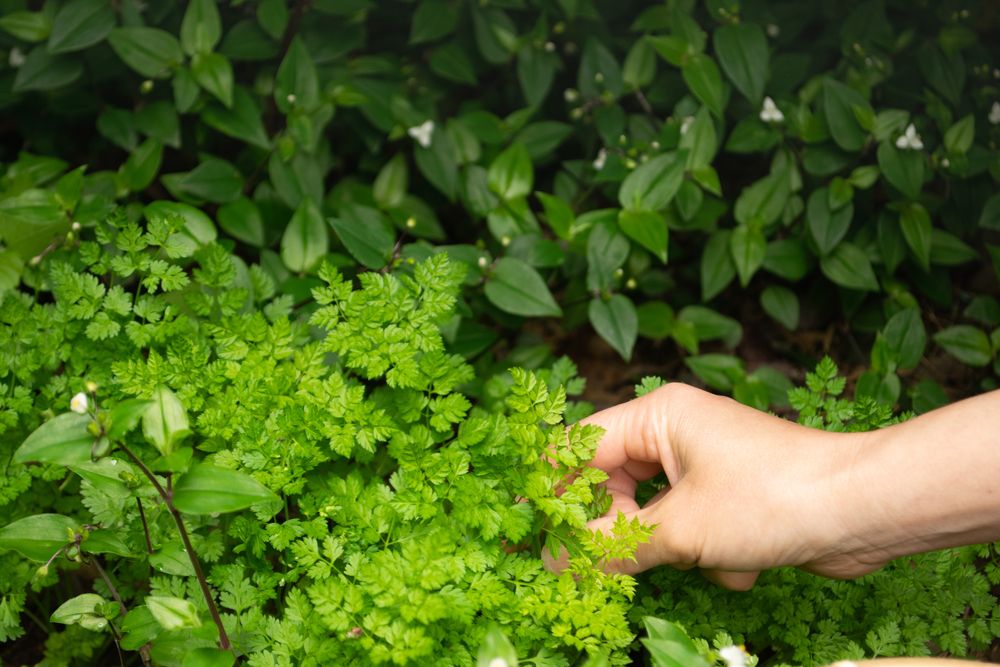
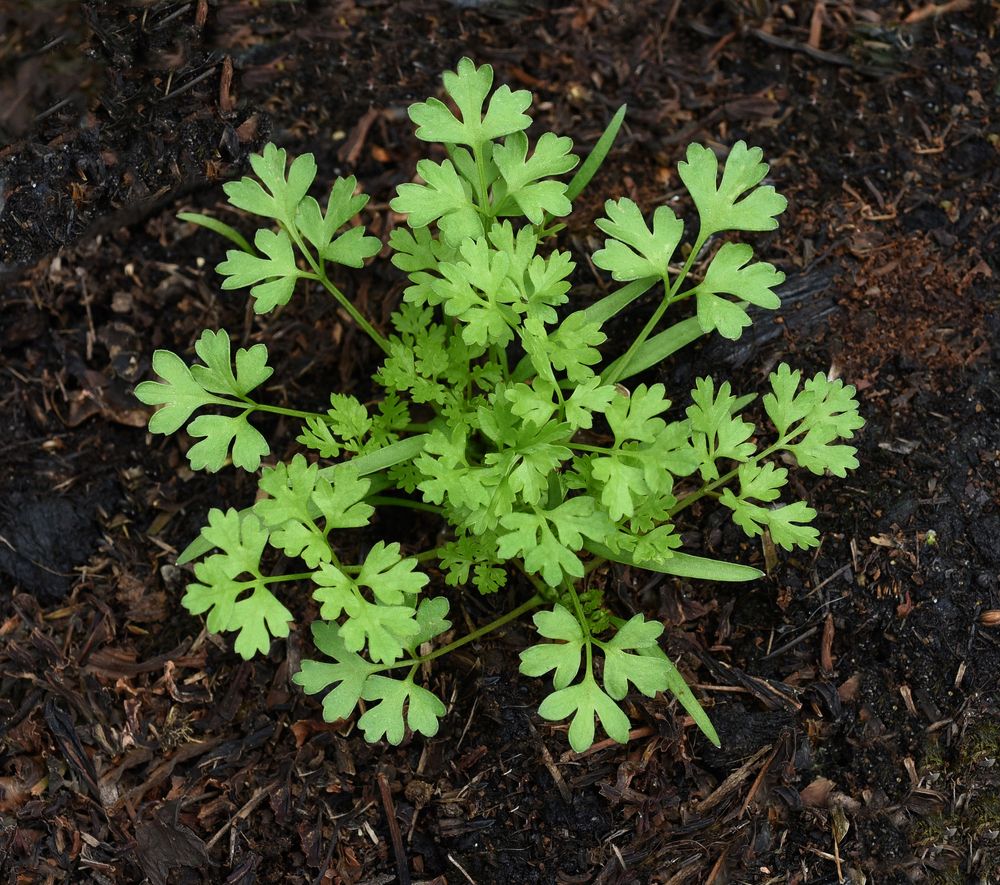
You can start harvesting your chervil plants once they’re about 10cm tall, which usually means that they’re around 6-8 weeks old.
Chervil leaves taste best when they’re young and tender. This is when they’re at their most aromatic. However, don’t disregard larger leaves either – they’re still flavourful, just a little less so, meaning that you would require more of them when following a recipe calling for fresh chervil.
Chervil leaves that have turned brown or purple are best discarded – these will taste very bitter.
To harvest your chervil, simply pick off the leaves as and when you need them. Always pick the outer leaves first, as this will encourage a bushier growth habit. Alternatively, snip off an entire stem, near to its base, if you need the leaves in larger quantities.
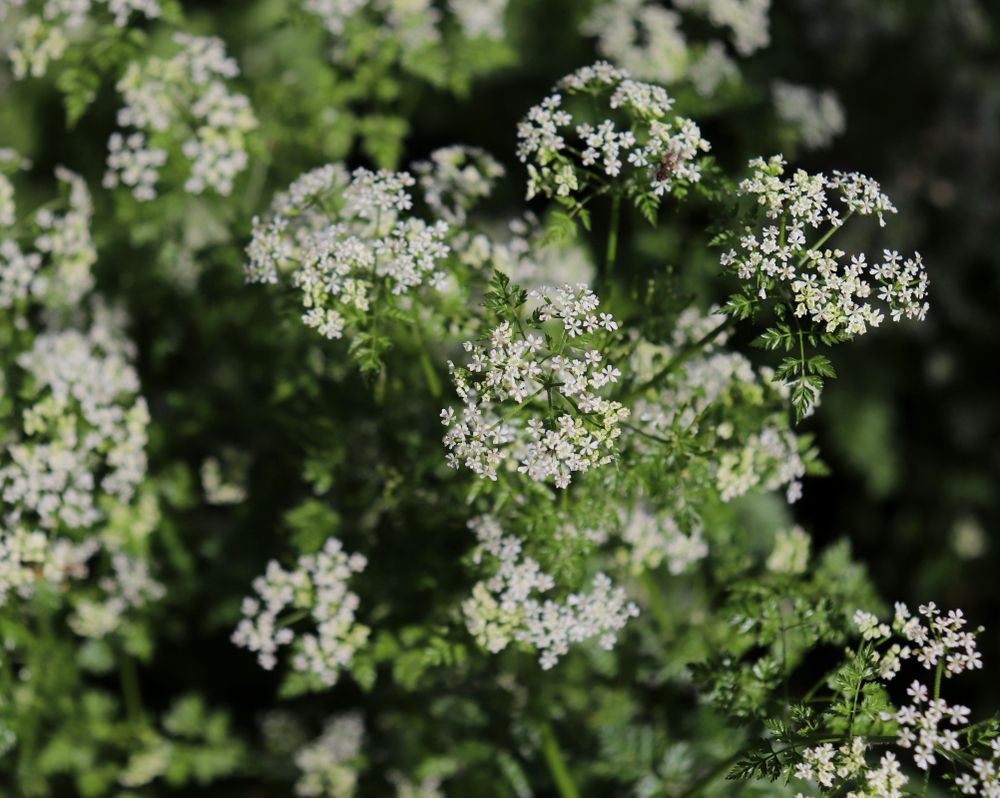
Once your chervil starts to flower, the leaves will turn unpalatable.
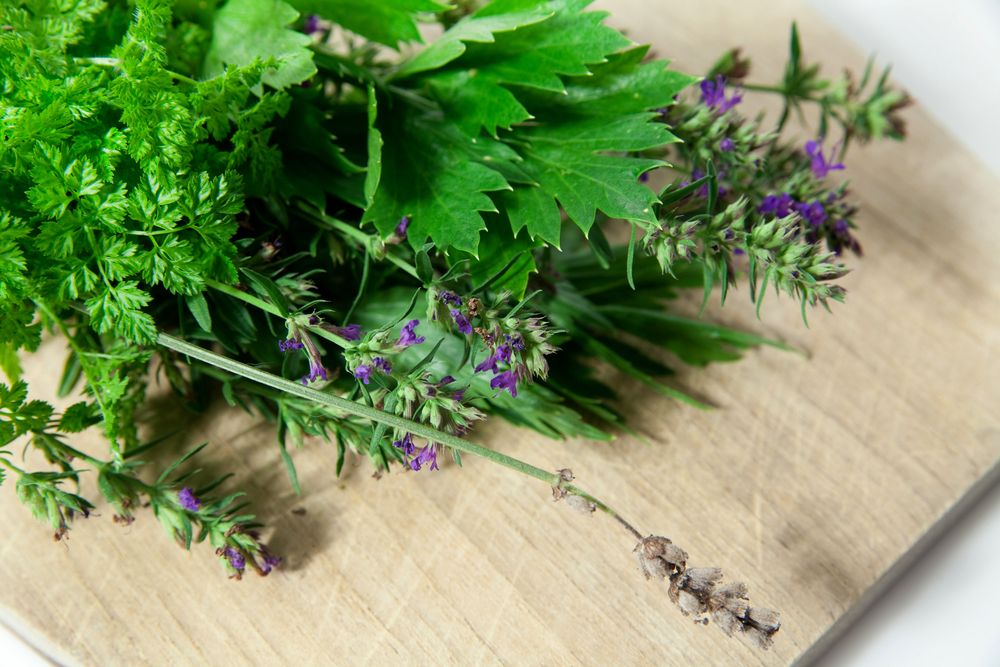
How to Store Chervil
Fresh chervil leaves can be stored in the fridge for about three days. Leave them unwashed and place them into an airtight bag.
When it comes to long-term storage, your first option is to freeze the leaves. You can either flash freeze them and then place them all into an airtight container, or pack them tightly into a bag and freeze them together. It all depends on how you plan on using them.
Alternatively, try drying your chervil leaves. Although they won’t be as flavourful as fresh leaves, they’re great for rubs and marinades, and the powder is a tasty addition to soups and sauces. When stored in a well-sealed container, dried chervil can last for up to three years.
How to Prepare & Cook Chervil
Since chervil leaves taste better the fresher they are, try to use them soon after picking.
Give your chervil a rinse under running water before chopping, just as you would parsley. You can then add it into just about any dish that you happen to be cooking, with chervil capable of enhancing the flavour of other herbs that you’re using too. A few ways to use chervil in the kitchen are:
- In “fines herbs”, a traditional French herb blend made with chervil, parsley, tarragon, and chives
- Sprinkled over eggs
- In a butter or bearnaise sauce
- As a garnish for fish
- In a soup – try a courgette and chervil soup
- Sprinkled over a potato salad
Common Chervil Problems
There aren’t too many problems that plague chervil plants, with the main issues to look out for as follows:
- Aphids – these tiny pests will suck the sap from your chervil plants, stunting their growth. Check the undersides of leaves – this is where they tend to cluster. In small numbers, aphids can be manually picked off. For larger infestations, you’ll need to turn to a spray treatment, of which there are plenty of organic and DIY options available
- Slugs – these dreaded pests love tender young chervil plants. They’ll munch holes through the leaves, and even if you never see the slugs themselves, you’ll be able to spot their silvery slime trail. There are numerous slug repellants out there, with beer traps, sheep fleece mulches, and copper tape working particularly well
READ NEXT: Are Slugs Good For Plants & Garden? (Expert Advice)
- Fusarium root rot – the first sign of this fungal disease is wilting foliage. The leaves will then turn yellow and brown before dying. The only way to identify it is to dig up the plant and check the roots – they’ll be soft and mushy. Unfortunately, there’s no cure – you’ll need to dispose of any affected plants, and avoid planting anything from the same plant family (such as parsley or fennel) in that area for five years
Popular Chervil Varieties to Grow
There are a few chervil varieties worth looking into:
- Common Chervil – the most widely available, this one is ready for harvesting after about 6-8 weeks
- Brussels Winter – a cold-hardy variety that’s able to withstand a few heavy frosts, so long as they don’t last for too long
- Curled – as you can tell from the name, this one has curled leaves and a milder flavour
- Vertissimo – a flat-leaved, clumping variety that’s quick to regrow after being picked yet slow to bolt
Conclusion
While chervil isn’t a crop that’s going to bulk out your meals, it’s more than capable of deeply transforming the flavour of the food that you eat. It may require a little attention while it’s still young, but the plants tend to look after themselves once they’ve established. Even better, give them good growing conditions and they’ll happily self-seed around your garden, giving you year after year of chervil harvests with very little effort.