How to Grow Chillies from Seed
Step 1: Select Your Chilli Seeds
- Choose varieties: Pick chilli pepper seeds based on your flavor preference, heat tolerance, and growing conditions. Popular varieties include Jalapeño, Habanero, and Cayenne.
- Purchase seeds: Buy seeds from a reputable garden center or online store to ensure high germination rates.
Step 2: Prepare Your Supplies
- Containers: Use small pots or seed trays with drainage holes.
- Soil: Select a seed starting mix, which is light and promotes good drainage.
- Watering can: A small one with a fine rose attachment is ideal for gentle watering.
- Labels: Use plant labels to mark varieties if planting multiple types.
Step 3: Sow the Seeds
- Fill containers: Fill your containers with moist seed starting mix, leaving a small gap at the top.
- Plant seeds: Sow 2-3 seeds per container, spacing them out. Cover lightly with soil, about ¼ inch deep.
- Water gently: Use a spray bottle or watering can to moisten the soil without disturbing the seeds.
Step 4: Germination
- Warmth: Chilli seeds need warmth to germinate. Place containers in a warm spot (75-85°F or 24-29°C) or use a heat mat.
- Keep moist: Ensure the soil remains damp but not waterlogged. Covering containers with plastic wrap can help retain moisture.
- Wait for sprouts: Germination can take 2-3 weeks, depending on the variety and conditions.
Step 5: Seedling Care
- Light: Once seeds sprout, remove plastic covers and place seedlings in a sunny window or under grow lights.
- Watering: Keep the soil consistently moist, but be careful not to overwater.
- Thinning: When seedlings develop their first true leaves, thin them out, leaving the strongest seedling in each container.
Step 6: Transplanting
- Harden off: Gradually acclimate seedlings to outdoor conditions over a week before transplanting.
- Transplant: Once all danger of frost has passed and seedlings are 6-8 inches tall, transplant them into larger pots or your garden, spacing them 18-24 inches apart.
Step 7: Ongoing Care
- Watering: Water plants deeply but infrequently to encourage strong root growth.
- Feeding: Use a balanced, slow-release fertilizer at the time of planting and a liquid feed every 4-6 weeks.
- Support: Some chilli plants might need staking to support their growth, especially taller varieties.
Step 8: Harvesting
- Timing: Harvest chillies when they’re firm and fully colored. The longer they stay on the plant, the hotter they become.
- Method: Cut the chilli peppers from the plant with scissors to avoid damage.
Troubleshooting Tips
- Leggy seedlings: Provide more light or use a grow light to encourage stout growth.
- Overwatering: Let the soil dry out slightly between waterings to prevent root rot.
- Pests: Inspect regularly and use organic pest control methods if necessary.
Growing chillies at home requires patience and care, but the process is highly gratifying when you harvest your own spicy fruits.
Growing Chillies: A Quick Snapshot
When to Sow – Jan-Apr
When to Plant – Apr-Jun
When to Harvest – Jul-Nov
Average Yield per Plant – 1kg
Spacing – 45cm
Depth – 10-15cm
How to Harvest 100s of Chillies!
Chilli Plant Care Information
Chillies are a warm-weather crop that need a long growing season in order to produce a substantial harvest.
While it’s easy enough to purchase potted chilli plants that you can continue to grow on yourself, growing chillies from seed isn’t difficult, and gives you access to so many more varieties.
Light Requirements for Chillies
Chillies need lots of light, as well as warm temperatures, in order to grow.
A greenhouse or polytunnel is ideal, although those in warmer regions can successfully grow chillies outdoors too.
Choose a growing spot that isn’t shaded by other plants, trees, or buildings. The exception to this would be if you’re in an exceptionally hot region – your chillies may need some shade from the afternoon sun to prevent them from burning.
Soil Requirements for Chillies
Chillies do best in a rich, well-draining soil. A quality, general-purpose compost is ideal, especially if you mix in some perlite too to improve drainage.
If you’re planning on growing your chillies in a pot, then this is easy enough. However, for those growing their chillies outdoors, you’ll need to amend your garden soil with some quality compost to ensure that your chillies receive all of the nutrition that they need.
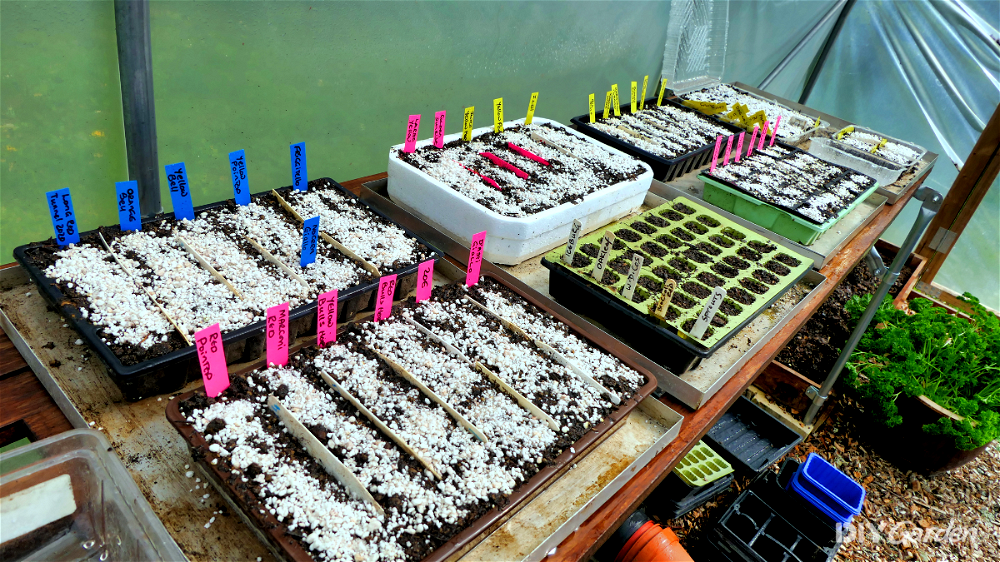
Chillies need as long a growing season as possible, which is why it’s best to start your seeds off in January or February.
Seeds can be sown in trays, but individual modules tend to be better. This means less root disturbance when you pot your chillies on.
Fill your modules with compost and then give the soil a bit of water. Place a chilli seed over the top of each module, and then cover with about 0.5cm of compost. Chillies need to be sown quite near to the surface of the soil in order for the seeds to properly germinate.
Water again and then place your trays in a warm location. A heated propagator is ideal – chilli seeds germinate best when kept at a temperature between 26-30°C.
If you don’t have a heated propagator, a warm location in your home will work too. However, if the temperature fluctuates throughout the day, keep in mind that germination may be erratic. Don’t allow temperatures to drop below 21°C.
Caring for Chilli Seedlings
Most chilli varieties take a couple of weeks to germinate. Some, especially the hotter varieties, can take up to a month, so be patient!
Keep your seed trays consistently moist during the germination process. However, don’t allow the soil to get too soggy, as this will inhibit germination.
Once your seedlings emerge, make sure that they have access to plenty of light. If not, they’ll turn leggy and weak, which will affect your final harvest. Sunny windowsills work well, but keep rotating your seed trays so that your seedlings receive light from all angles.
Potting Up Chilli Seedlings
Once your chilli seedlings have a few sets of leaves, they’ll need more space, meaning a larger pot. 7cm pots usually work well at this stage.
Again, fill your pots with a quality compost and give them some water.
Then, gently remove each seedling from its module, taking care to disturb the roots as little as possible. Try to take as much soil as possible with you, as this will hold the roots in place.
Place each seedling into its new pot, planting them slightly deeper than they were previously. Just like tomatoes, chilli plants will produce roots along any part of its stem that’s touching the soil. Planting them deeper enables the plants to develop a larger and stronger root system.
Water in well after transplanting.
As your seedlings grow, you will need to continue potting them up. Do this at regular intervals until you’re ready to plant your chillies outside or in a greenhouse.
How to Plant Chillies Outside
Unless you live in a hot climate, chillies do best when grown in a greenhouse or polytunnel. Still, if you have a sunny spot in your garden or vegetable bed, ideally one that’s sheltered from the wind, then growing chillies outside is still possible.
Wait a few weeks after your last frost, once temperatures have risen to a consistent minimum of 12ºC at night. Remember, the warmer the better for chillies.
Hardening Off Chilli Plants
Immediately moving from cosy indoor temperatures to harsh outdoor elements can send your chilli plants into shock, which is why you need to harden them off first.
To do this, move your potted chilli plants outdoors for a couple of hours, before bringing them back in. Continue to do this each day, slowly increasing the amount of time your plants spend outside over the course of a week or two.
After this, they’ll be ready to be planted out.
Planting Out Chillies
Make holes in your planting bed large enough to accommodate each chilli plant, along with as much soil as you can lift out with the plant too. Keep holes about 45cm apart.
Place each plant into a hole, planting at a slightly deeper level than they were in their pots. Cover over, gently firm down, and water.
How to Plant Chillies in a Greenhouse
If your greenhouse beds are in the ground, then follow the same steps above for hardening off (although do this in your greenhouse, rather than outside), and planting.
For those planning on growing chillies in pots in a greenhouse, then simply harden off in your greenhouse and then continue to pot your plant up as it grows.
Your final pot size will need to be around 10 litres, although this will vary depending on how large or small your specific chilli varieties are expected to grow.
How to Care for Chillies
Once planted, chilli plants are pretty easy to take care of, so long as you meet their basic needs:
Watering Chilli Plants
Chilli plants need regular moisture, but they also enjoy slightly drier periods.
Water your chilli plants two to three times a week – this gives the soil a bit of time to dry out in between waterings. However, never allow the soil to fully dry out.
How often you water will depend on the weather, wind exposure, rainfall, humidity, pot size, and more, so regularly check soil moisture with your finger when establishing a watering schedule.
Fertilising Chilli Plants
You can begin to fertilise your chilli plants a couple of weeks after potting them up for the first time.
Use a tomato fertiliser, as this provides chillies with all of the nutrients they need. The younger your plants are, the more you will need to dilute down your fertiliser solution.
Fertilise every two weeks, until your plants start to finish up for the season.
How to Harvest Chillies
The amount of time between sowing to harvest depends on the variety of chilli you’re growing. However, this usually ranges between 80 to 120 days, with the first chillies usually ready for picking in July.
Chillies have quite a long harvesting season. They start off green before ripening to their final colour, which could be anything from red to orange to white, depending on variety. They can be picked from the green stage onwards, with green chillies usually having a much milder flavour than their riper alternatives.
As soon as your chillies are the colour and size that you want, you can harvest them by simply snipping them off at the top of their stem.
Don’t be tempted to leave your chillies on their plants for too long – the more you harvest, the more fruits your plants will produce.
How to Store Chillies
There are a few different ways in which you can store your chilli harvest long-term:
- Dry the chillies and then either leave them whole or grind them into a powder – this will last for about a year
- Pickle them to keep them for about two years
- Freeze them whole – this keeps them usable for about 6 months
- Preserve them in oil, which will store them for about two years
Storing your fresh chillies in the fridge is another option, but this means that they will only keep for about a week and will need to be cooked with quickly.
How to Prepare & Cook Chillies
Preparation and cooking methods will vary depending on the variety of chilli you’re growing, but a few common methods are:
- Slicing off the top and chopping the chilli up into small pieces. The seeds make them spicier, so remove them if you prefer a milder flavour. You can then use your chopped chilli in everything from a stir fry to a curry to a simple omelette.
- Slice them down the middle, hollow them out, stuff them with a filling of your choice, and then bake.
- Slice them up and gently fry them in oil. Then, remove the chillies and use your chilli-flavoured oil for cooking.
- Leave them whole, brush them with olive oil, and then grill them.
Be aware that chillies contain a compound called capsaicin. This can really irritate the skin and the eyes, so be careful when handling your fresh chillies. Don’t touch your face until you have thoroughly washed your hands.
Common Chilli Problems
Here are a few of the most common problems that you may experience when growing chillies at home:
- Flowers dropping off – this is often caused by a lack of pollination, which is common in plants grown in a greenhouse. Pollinate your plants yourself by dabbing a paintbrush into the centre of a flower, before moving on to the next flower and doing the same. Make sure that you also check the temperature of your growing environment and your watering schedule – mistakes in both of these can also lead to flower drop.
- Powdery mildew – this disease shows up as a white powdery substance on leaves of plants, which then cause the leaves to drop off. Warmth and humidity contribute to the disease, while wind and rain spread the spores from one plant to another. Immediately remove and destroy any infected plant parts, improve ventilation, and apply a mulch to prevent water from splashing up onto your plants.
- Blossom end rot – this disease causes the tips of your chilli plants to start rotting. It’s triggered by infrequent watering and calcium deficiencies, so your soil will need to be amended. In the meantime, remove any affected chillies and use them up as soon as possible, after cutting off any blackened parts.