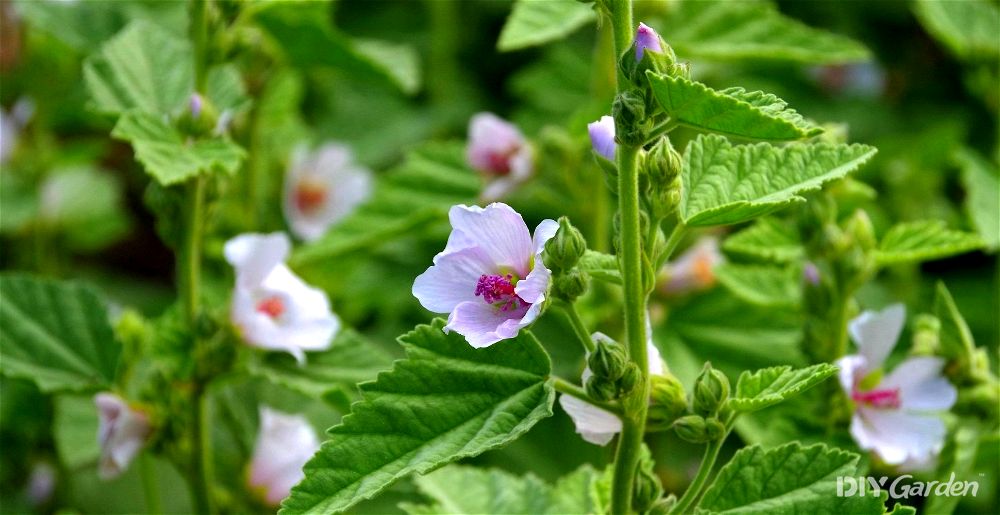
While the fluffy and sugary-sweet marshmallows of today are usually made from sugar, water, and gelatin, this wasn’t always the case. Back in the day, marshmallows were made from the root of the marshmallow plant – a cold-hardy, perennial herb that couldn’t be easier to grow. Not only were these plants used to create the classic sweet treat, but they were also loved for their powerful medicinal properties. Even better, marshmallow plants are beautifully ornamental and their flowers are loved by pollinators – simply plant them once and they’ll return even bigger and better as each year passes.
Growing Marshmallow: A Quick Snapshot
When to Sow – Mar-Oct
When to Plant – Apr-Oct
When to Harvest – Sep-Nov
Average Yield per Plant – 100-300g of root/year
Spacing – 20cm
Depth – 0.5cm
How to Grow Marshmallow at Home
Once established, marshmallow is considered to be a very low-maintenance plant. So long as you’re able to give it the right conditions to begin with, it will pretty much look after itself after that.
Growing Requirements for Marshmallow Plants
Marshmallow plants do best in full sun. However, they’re able to tolerate partial shade too, so long as they’re still getting a couple of hours of sun in the mornings. This will encourage their flowers to open up for the day.
When it comes to soil type, marshmallow plants aren’t fussy. However, what they do require is moisture – this is where the “marsh” part of the plant’s name comes from. They’ll do well in the damper parts of your garden where other plants usually rot. That said, don’t plant them in standing water either.
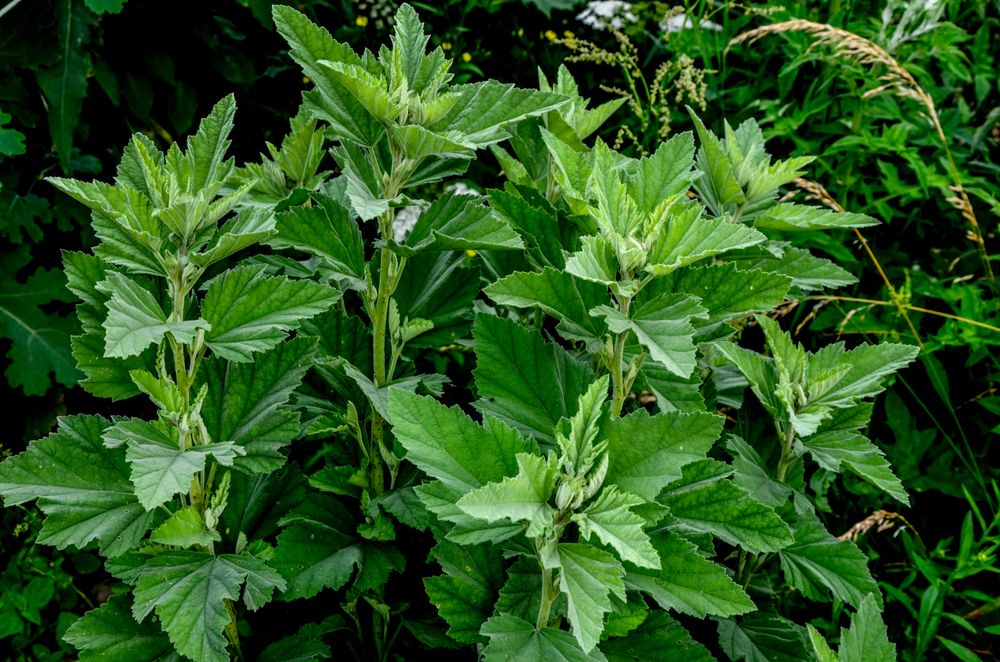
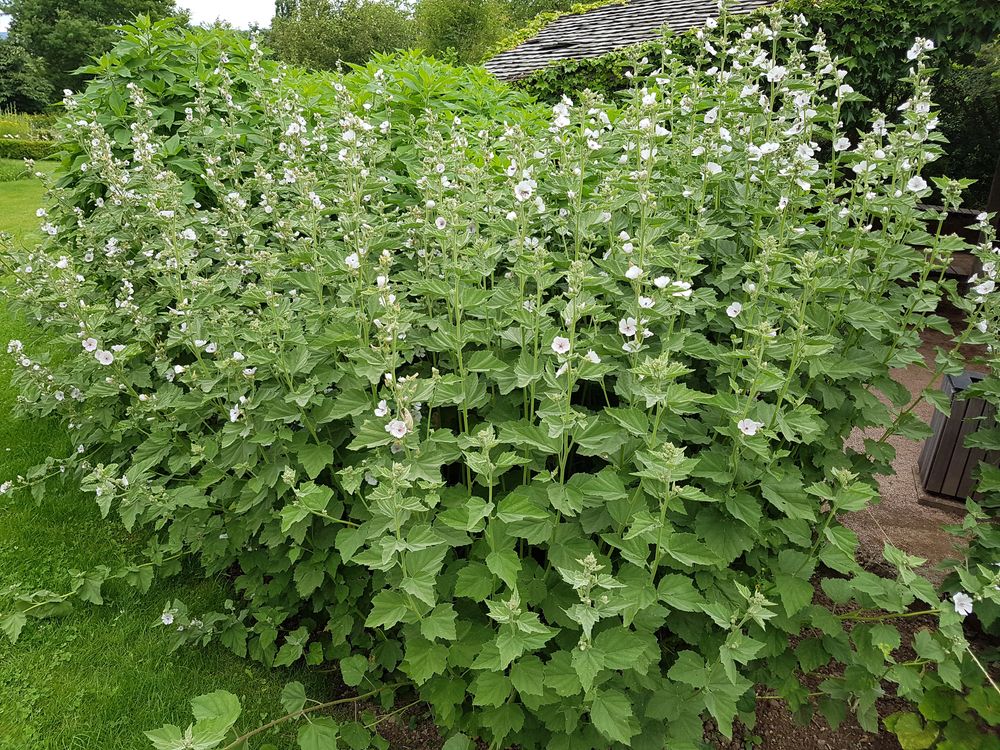
In terms of space, marshmallow plants are tall rather than wide. In the right conditions, they can grow to up to 1.5m tall, although it does take a few years before they reach these heights.
How to Grow Marshmallow from Seed
Marshmallow seeds can be sown in either the spring, summer, or autumn. However, the time of year will dictate how you sow them. If you’re sowing the seeds during the warmer months of the year, you’ll need to cold stratify them first – they need a period of chilly temperatures before they’ll germinate. However, if you live in an area with mild winters, wait until late summer/early autumn and direct sow them outside – cold stratification will then happen naturally, and your plants will shoot up in the spring.
Cold Stratifying Marshmallow Seeds
It may sound complicated but the cold stratification process for marshmallow seeds couldn’t be simpler. You can literally just place your seed packet into the fridge for 3-4 weeks before sowing them. Alternatively, scatter the seeds onto a damp paper towel and place this into a plastic bag in your fridge for 3-4 weeks.
Whichever method you choose, give your seeds a spray whenever they seem to be drying out. Keeping them moist during this chilling process is the key to successful germination.
How to Sow Marshmallow Seeds in Modules:
- Fill module trays with multi-purpose compost
- Water the compost well
- Sow 4-6 seeds in each module, burying them about 0.5cm deep
- Place your trays somewhere protected. So long as temperatures are above 4°C but below 20°C, the seeds should germinate
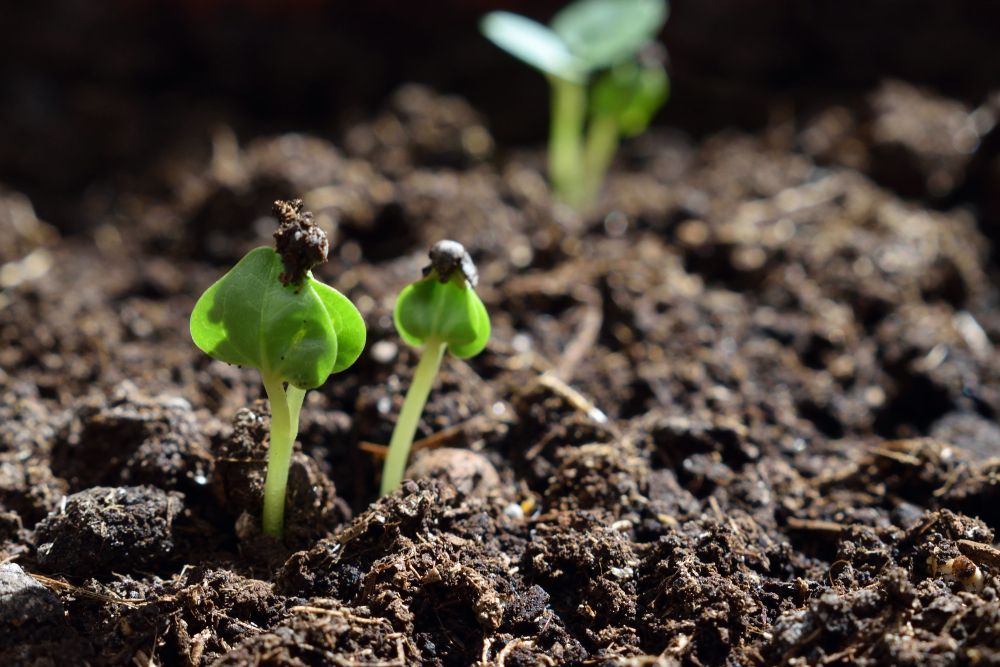
Marshmallow seeds will often germinate in just a couple of weeks. However, the process can sometimes take a few months if the seeds haven’t been stratified correctly, so be patient!
Once they’ve sprouted, move your seedlings somewhere bright. After a few weeks, you’ll need to thin your seedlings out, leaving the healthiest seedling in each module. Grow them on indoors for a little longer before transplanting them outside. If you’re sowing them indoors towards the end of the year, then you may need to wait until the following spring before moving your plants out. Mature crowns can withstand the cold, but a bitter frost could quickly kill off young marshmallow roots.
How to Direct Sow Marshmallow Seeds:
- Prepare your growing area, ensuring that it is weed-free
- Once soil temperatures are around 4°C, give your growing area some water. Doing this before sowing will save you from dislodging your seeds with water after they have been sown
- Scatter your marshmallow seeds over the ground, lightly covering them over with about 0.5cm of soil
Once your seeds have germinated, give them about a month to grow before thinning the seedlings out. Leave 20cm of space between each plant. Many sources will recommend giving the plants more room, but studies have found that a 20cm spacing leads to maximum root yields.
How to Plant Marshmallow Outside
You can plant your marshmallow seedlings outside anytime after your last frost in the spring. However, if you’re planting them out towards the end of the summer, make sure that your seedlings will be able to enjoy a couple of months of frost-free weather before the winter hits. If not, keep them protected until the following spring.
Once you’ve weeded your growing area, dig holes in the soil, spacing them 20cm apart. While commercial growers plant marshmallow in rows, they tend to look better in a home garden when grown in clumps/groups. Make sure that each hole is slightly wider and deeper than the root ball of each of your seedlings.
Gently remove your seedlings from their modules and place them into the holes that you’ve dug. Take care not to damage those long roots while doing so. Backfill the hole with soil, and then use your hands to firm the soil down around each plant. Then, water your plants well and, if necessary, firm the soil down again.
How to Plant Marshmallow in a Greenhouse
Since marshmallow plants prefer cooler temperatures, they’re not commonly grown in a greenhouse. However, if you live in a very cold climate, there’s no reason why you can’t give this a try.
That said, your marshmallow plants should still be planted in the ground, rather than in pots or raised beds. Due to its extensive root system, as well as its need for moist soil, these plants don’t usually do well in containers.
How to Care for Marshmallow Plants
You won’t need to give your marshmallow plants much attention once they’ve established. However, if you’re hoping to harvest as much root as possible, a little extra care wouldn’t go amiss:
Watering Marshmallow Plants
As mentioned, marshmallow plants need plenty of water. Even if you’re growing them in a damp spot in your garden, keeping them topped up with extra moisture would be very beneficial.
Make sure that the soil is constantly moist, especially during the first year after planting your marshmallow out. If the soil is too dry, those roots won’t be able to establish. The more you water your marshmallow plants, the larger your yields will be.
Feeding Marshmallow Plants
Marshmallow plants will grow just fine without a fertiliser. The only reason to feed your plants would be to extend their flowering season. In this case, give them a single application of a general-purpose fertiliser during the summer, once they have started blooming.
Other than that, top-dressing your soil with well-rotted manure every few years or laying an organic mulch around your marshmallow plants will give them all of the nutrients that they need to thrive.
Weeding and Mulching Marshmallow Plants
Not only will using an organic mulch help to feed your marshmallow plants, but it will also increase soil moisture levels, which is exactly what you want when growing such a thirsty plant.
Even better, a mulch will help to suppress weeds too. These aren’t usually an issue with established plants, but heavy weed growth can quickly suffocate seedlings.
How to Harvest Marshmallow
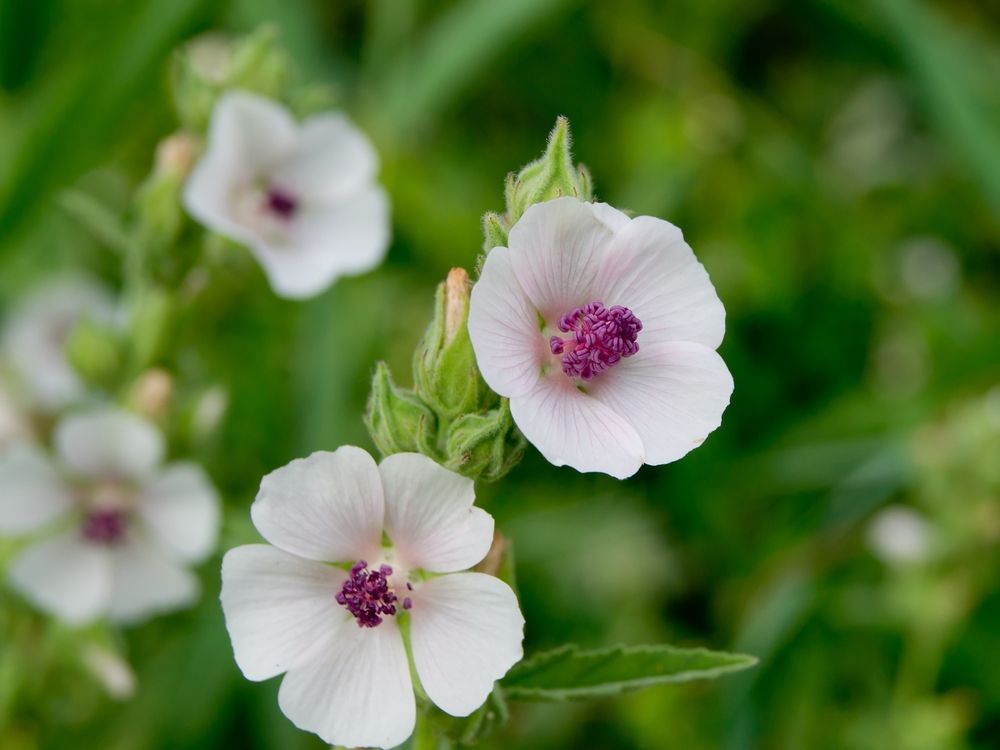
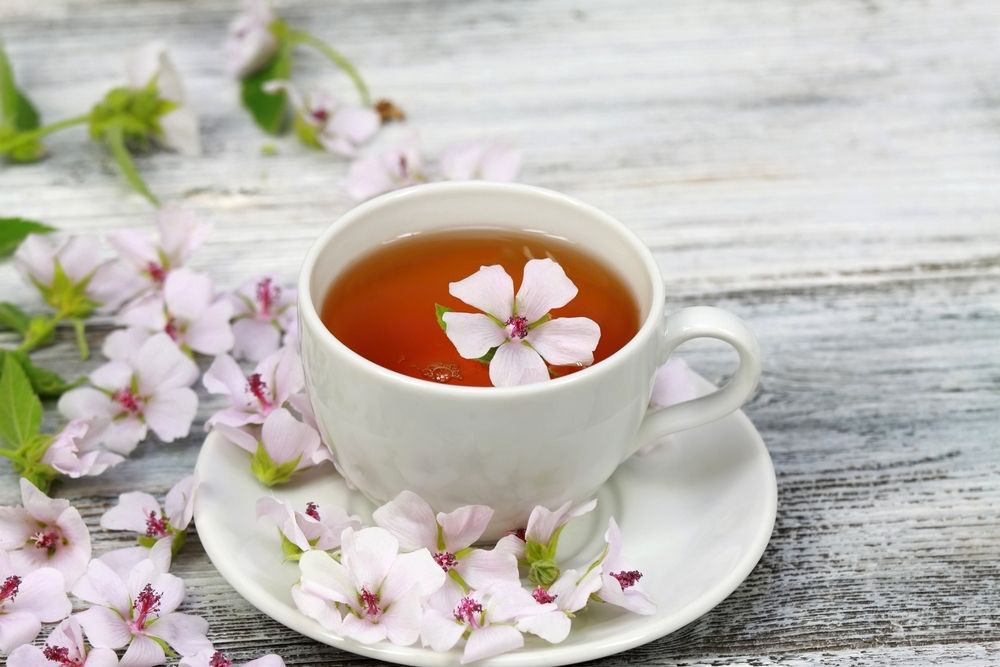
While the roots may be the plant’s biggest attraction, marshmallow leaves and flowers are edible too. These can be picked as and when needed throughout the summer months. The flowers in particular make for a beautiful garnish.
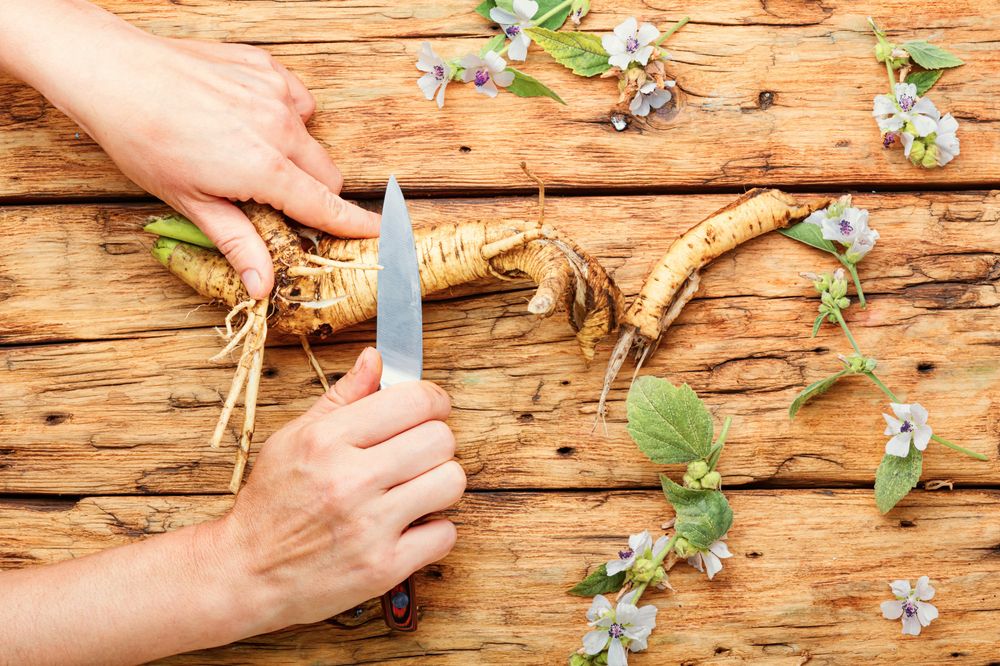
Marshmallow roots are best harvested in the autumn, once the top growth has died back. This is when the mucilage content of the roots is at its highest.
Use a large spade or fork to dig down below the roots, levering the roots upwards from different angles. This can take some time – the roots are very long and you don’t want to risk damaging them. Once you’ve properly loosened them, you should then be able to simply pull them out. Cut away a portion of the roots for yourself, leaving the central crown as intact as possible. You’ll then be able to replant this, meaning that the plant will be back again next year.
How to Store Marshmallow Roots
The best way to store marshmallow roots is to dry them. You’ll need to first wash them well under running water, before slicing them up into thin slices. Grating them is another option.
Place the roots into a dehydrator. If you don’t have one, turn your oven onto its lowest setting and sit the roots inside, leaving the oven door slightly ajar. This gives all of the evaporating moisture somewhere to escape to. Once the roots have fully hardened, meaning that they snap instead of bending, place them into an air-tight container. They’ll be good to use for up to four years.
How to Prepare & Cook Marshmallow
Marshmallow leaves and flowers don’t require much preparation. Just give them a rinse under running water and they’re ready to be used. They’re most commonly added into salads, but the leaves can also be turned into a tasty pesto, while both flowers and leaves can be dipped into a batter and then fried as fritters.
Now for the part that you’ve been waiting for – making your own marshmallows. There are several recipes out there so we won’t go into the details here, but be prepared for some trial and error. However, if you enjoy experimenting in the kitchen, you’ll no doubt be able to soon whip up some tasty yet healthy marshmallows.
Don’t forget that the marshmallow is also a prized medicinal plant. It can be turned into a tincture, a tea, a poultice, and so much more. It can be used to treat everything from coughs to digestive issues to skin conditions, making it a very useful plant to have around.
Common Marshmallow Problems
There are a few issues that you’ll need to keep an eye out for when growing marshmallow plants:
- Aphids – these tiny pests hide in clusters on the undersides of leaves, sucking the sap from your plants. If there are only a few, you’ll be able to rub or hose them off. For larger infestations, look into one of the many organic aphid remedies out there
- Spider Mites – if you notice tiny yellow or white spots on your marshmallow foliage, combined with silky webs, then spider mites are probably at play. Give the plant a good hose down and then apply an organic insecticide, such as neem oil
- Rust – this disease first manifests as pale spots on the leaves, which turn into pustules. It’s most prevalent in moist and mild conditions. Dusting some sulfur over your plants can help, as can an application of neem oil – both are effective fungicides. Try to improve air circulation around your plants to prevent rust from striking again
Popular Marshmallow Varieties to Grow
There’s only one marshmallow variety; Althaea officinalis, otherwise known as the common marshmallow. It usually produces either pink or white flowers. If you’re growing the plant solely for its flowers, rather than its roots, you may want to consider adding a few other varieties from the mallow family into your garden. From the roots to the leaves to the flowers, all mallow plants are edible.
Conclusion
Even if you don’t actually intend on cooking up any healthy homemade marshmallows, the marshmallow plant is still worth having around. It requires very little care, produces beautiful light pink flowers, and is loved by the bees. Plus, it’s also highly medicinal – try applying a marshmallow poultice, or even the mucilage itself, to your skin the next time you’re scratching at an insect bite and you’ll be thanking yourself for giving this herb a place in your garden.