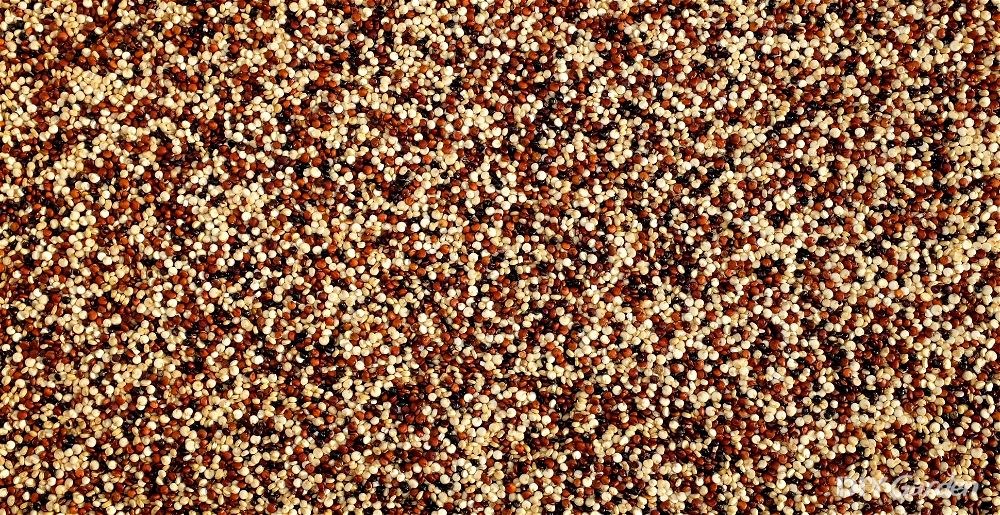
While you may not have heard of quinoa ten years ago, it’s now everywhere. Although cooked and eaten like a grain, quinoa actually consists of edible seeds that come from a plant related to spinach and beetroot.
Although loved for its nutty flavour, crunchy texture, and powerful medicinal properties, many don’t actually realise just how versatile the quinoa plant is. Not only are its young leaves edible too, but this plant is surprisingly tolerant of different climates and temperatures. So long as you’re willing to give your plants a little care, you could be harvesting homegrown quinoa in just a few months.
Growing Quinoa: A Quick Snapshot
When to Sow – Mar-Jun
When to Plant – Apr-Jun
When to Harvest – Jul-Oct
Average Yield per Plant – 50-100g
Spacing – 25-35cm
Depth – 5mm
How to Grow Quinoa at Home
Although native to the Andean region of South America, quinoa is a hardy, cool-climate plant that tolerates a range of conditions. It thrives in temperatures between -4°C to 32°C, with some varieties happily continuing to grow even when temperatures drop lower than that.
However, while quinoa might not be finicky in terms of temperature, there are a few growing conditions that you’ll need to provide if you want to end up with a crop that’s worth harvesting.
Growing Requirements for Quinoa
Quinoa does best when grown in full sun. The only exception to this would be if you live in a hot climate. In this case, your quinoa would benefit from some light shade in the afternoons, when the sun is at its strongest.
In terms of soil, quinoa is generally quite adaptable. You’ll likely be able to grow this crop even on poor soil. However, for maximum yields, aim for a soil mix that’s rich yet well-draining. Adding some compost or well-rotted animal manure to your growing area prior to planting your quinoa is a great way to achieve this. In fact, for thousands of years, llama dung has been the fertiliser of choice for quinoa plants.
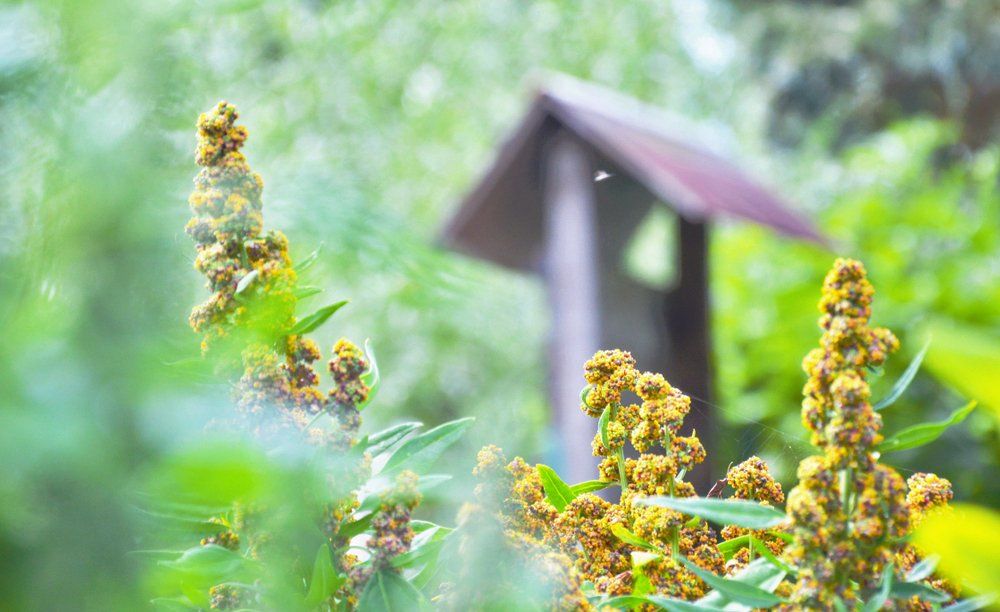
One other factor to consider before growing quinoa is space. Quinoa seedlings may take a while to get going, but, once they do, the plants will be towering at about 2m in height by mid-summer. Not only does this mean that some varieties will require staking, but you’ll also need to think about their positioning in your garden. Since you don’t want your quinoa plants shading out anything else, they may be best placed towards the back of your growing beds.
How to Grow Quinoa from Seed
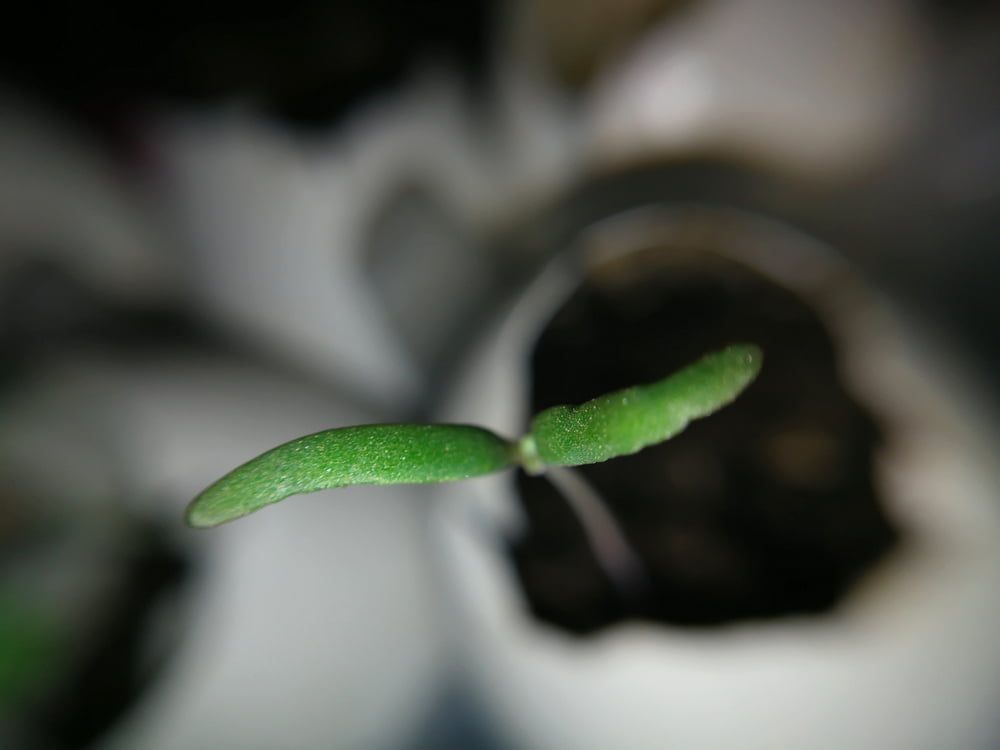
Although quinoa is frost-hardy once established, young seedlings aren’t. So, either start your seeds off indoors about a month before your last frost date in the spring, or wait until your last frost has passed before sowing your seeds directly outdoors.
Don’t make the mistake of sowing your seeds too early. Quinoa seeds germinate in less than a week!
How to Sow Quinoa Seeds in Pots:
- Fill small pots with a multipurpose compost
- Water the compost well, ensuring that excess water is able to freely drain from the bottom of the pots
- Thinly sow a few quinoa seeds into each pot. Ideally, you don’t want more than two or three seeds in each one, but the fact that the seeds are tiny make it difficult to be accurate!
- Gently press the seeds down into the compost, so that they’re lightly buried, about 5mm deep
- Place the pots in a heated propagator, or somewhere warm in your house. The optimum germination temperature for quinoa seeds is between 18-23°C
About a week after your seeds germinate, thin your seedlings down, leaving just one seedling per pot.
How to Direct Sow Quinoa Seeds:
- Prepare your growing area by thoroughly weeding it and raking out the topsoil
- Mark out rows in your soil, spacing each row 90cm apart
- Sow your quinoa seeds lightly – you’ll eventually need to thin them out so that each plant is between 25-35cm apart
- Lightly cover the seeds back over with soil, so that they’re about 5mm deep
- Water your growing area if the soil was dry
How to Plant Quinoa Outside
Once you’ve had your last frost, your indoor-sown quinoa seeds can be planted out.
Prepare your growing area and then dig planting holes that are just slightly larger than each seedling’s root ball. Gently remove each seedling from its pot and place them into their new homes. Cover the roots over with soil and firm down.
Water your plants well after planting.
How to Plant Quinoa in a Greenhouse
Due to its height when mature, as well as its tolerance to cold temperatures, few gardeners dedicate precious greenhouse space to quinoa, choosing to grow their plants outdoors instead. However, if your outdoor climate isn’t suitable for this and you have enough greenhouse space, your quinoa plants will thrive.
Since a greenhouse offers extra protection, direct sow your seeds instead of starting them indoors.
Another option would be to grow your plants in pots. This allows you to strategically move them in and out of your greenhouse to extend your growing season. Since the plants have a relatively shallow root system, a container that’s about 15cm deep should suffice.
How to Care for Quinoa
Your quinoa plants will need about three to four months to grow before they’re ready to be harvested. During this time, you’ll need to give them a little care:
Watering Quinoa
Once established, quinoa plants are relatively drought-tolerant. However, in order for your plants to produce as many seeds as possible, never allow the soil to run dry.
That said, rainfall will likely provide most of the water that your plants need. You’ll only need to water them during long, dry spells.
Feeding Quinoa
Quinoa’s high protein content is all thanks to the nitrogen that the plants absorb from the soil. This means that, in order to maximise yields, a nitrogen-rich fertiliser is needed. Feed this to your plants every four to six weeks after planting them out.
Weeding Quinoa
Once they’re about one month old, your quinoa plants will likely smother out any weeds that are growing around them. However, in order for them to get to this stage, you’ll need to keep their growing area weed-free.
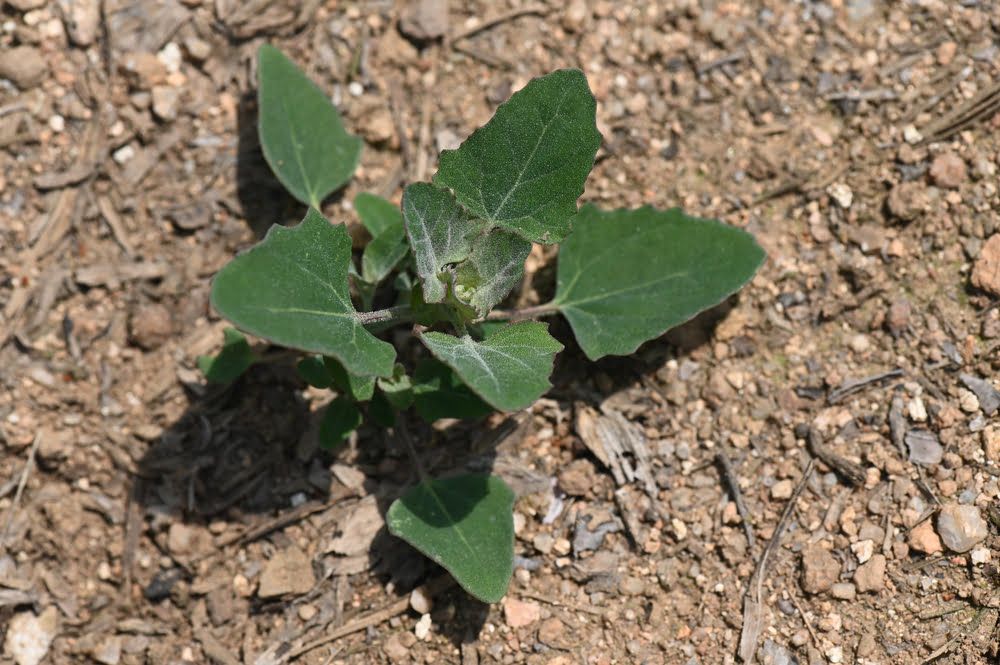
While having to deal with just a few weeks of weeding is a blessing compared to other crops, you do need to be careful when weeding around your quinoa. The seedlings and young plants look very similar to a plant called fat hen or lambs quarters, so don’t weed them out by accident!
Staking Quinoa
If you’re growing a tall variety of quinoa, then be prepared to stake your plants once they begin to produce seed heads. As these seed heads mature, they’ll increase in weight. Without any support, they can often end up pulling the plant down, causing it to snap and break.
Tall bamboo canes work well as a stake. Insert these into the soil next to each plant and then use some garden twine to tie each stem to a cane.
How to Harvest Quinoa
The harvesting process for quinoa is a little time-consuming, but completely worth it!
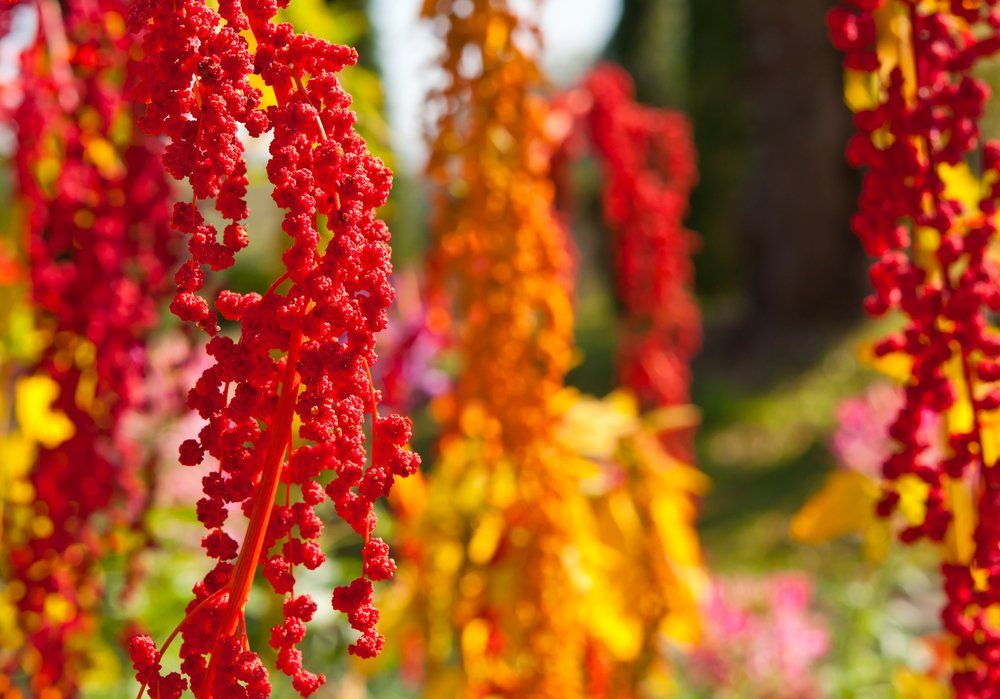
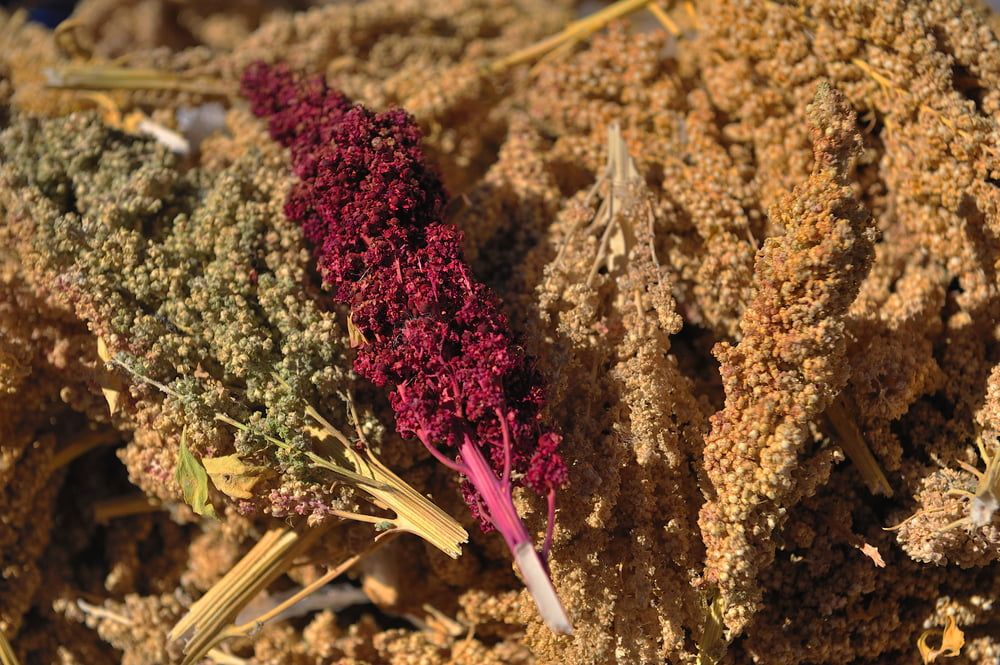
In the autumn, you’ll notice that the flower heads on your quinoa plants begin to change colour. Gently rub one in your hands – if you see seeds emerging, then this means that your plants are ready to be harvested.
To harvest your quinoa, use some sharp shears to snip off each flower head, leaving a small portion of stem on each one too.
Drying Your Quinoa Harvest
After harvesting, you’ll need to dry the seeds out for a couple of days. The easiest way to do this is by hanging them up in an area that offers good ventilation. Place something underneath your plants to catch any seeds that fall out.
Once dry, most of the seeds will have naturally fallen off your plants. However, give the flower heads a gentle rub in your hands to dislodge any stubborn seeds, so that you’re left with a big pile of seeds.
The next step is to separate out any other plant material that may have fallen into your seed pile. You can do this by hand, or invest in a riddle to save time.
After this, your seeds will need to be left to dry again. Give them a few days, and then rub the seeds in the palm of your hands to remove the flower bracts.
The final step is a process called winnowing. This simply involves pouring your seeds from one container to another, while a gentle breeze blows through them. This removes any tiny bits of debris that have been missed during the separating process.
How to Store Quinoa
Being a dried seed means that quinoa stores easily. All you need to do is place your seeds into an air-tight container and they’ll be good to use for at least one year!
How to Prepare & Cook Quinoa
Quinoa seeds are coated with natural chemicals called saponins. These give the seeds a bitter and soapy flavour, but are what prevent birds from feasting on the plants.
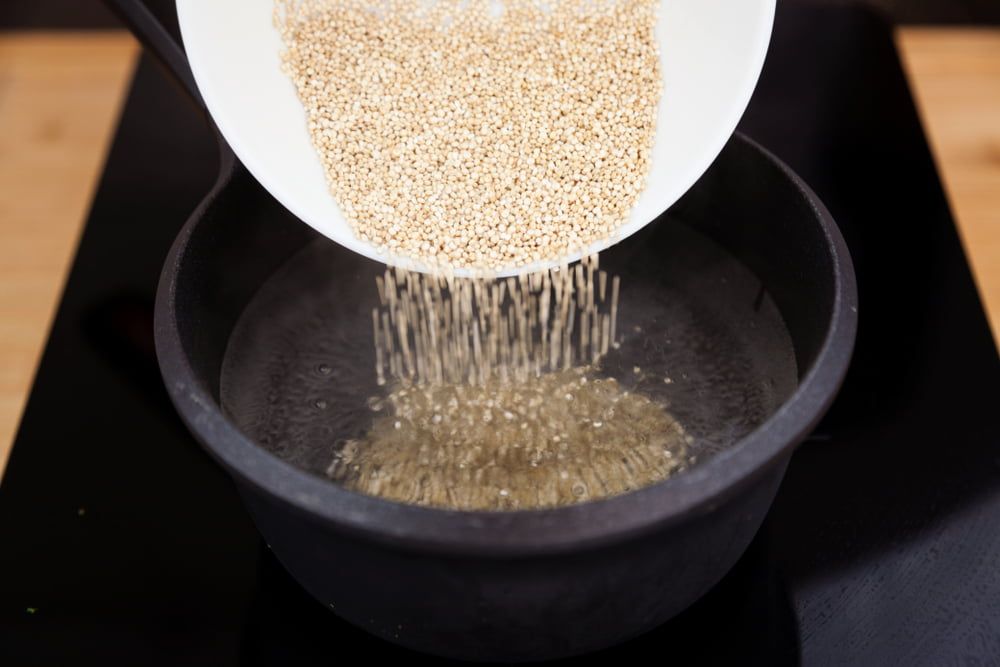
Store-bought quinoa is usually pre-washed. However, when grown at home, quinoa seeds will need to be soaked before they’re cooked. This is easy – soak the seeds in some water overnight, and then rinse them a couple of times the next day in cold water.
After this, you can get cooking! To do this, cover the seeds with water and bring them to a boil. Turn the heat down to a simmer and leave for 10-20 minutes. Once the seeds have absorbed most of the water, remove them from the heat and leave to steam for about 5 minutes. Then, fluff them up and use as required!
A few dishes that beautifully showcase the unique flavour and texture of quinoa are:
- Quinoa salads
- Quinoa-encrusted fish
- Quinoa soup
- Quinoa and kale patties
- Quinoa-stuffed peppers or butternut squash
In addition to tasting absolutely delicious, quinoa is also packed with nutrients, making this vegetable well worth eating more of!
Common Quinoa Problems
Thanks to the bitter saponins that coat quinoa seeds, the plants are usually able to fend for themselves. However, a few problems to be aware of are:
- Slugs – slugs love young quinoa plants and will quickly munch holes through the leaves. There are several natural slug remedies out there, with beer traps being particularly effective
- Leaf miners – just like spinach and beetroot plants, quinoa is sometimes susceptible to the leaf miner. You’ll notice brown trails over leaf surfaces. While they don’t kill a plant, they do affect its flavour. Try netting your plants to prevent the adults from laying their eggs on or near your quinoa
Popular Quinoa Varieties to Grow
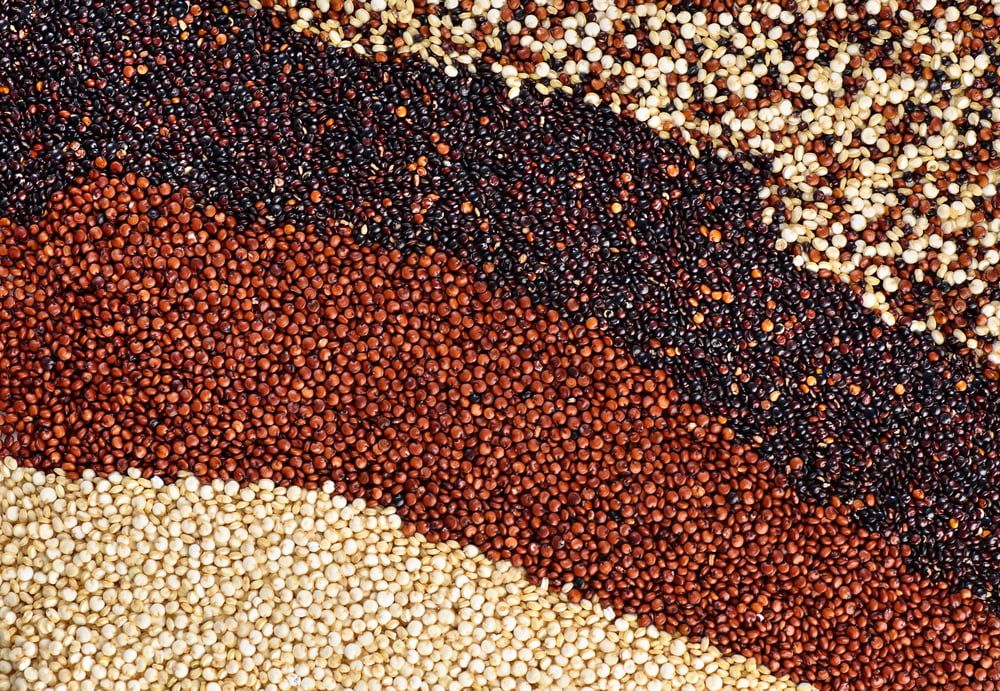
There are several quinoa varieties out there. However, if you’re new to growing this crop, then look for a variety that’s reliable, adaptable, and productive. These are some of your best options:
- Cherry Vanilla – an extremely ornamental variety with seed heads that turn a deep shade of pink when mature
- Biobio – although these seeds are smaller than other varieties, the plants mature quickly and are very productive
- Bright Brilliant – a popular variety due to its colourful nature. The seed heads transform into shades of yellow, orange, pink, and white through the growing process
- French Vanilla – a high-yielding, but very tall, plant
- Temuco – open seed heads help to shelter this variety from strong rains, making it great for those in wet and windy locations
Conclusion
Although it’s considered to be one of the healthiest foods on the planet, few gardeners tend to grow quinoa at home. This is usually due to the fact that the plants have a high-maintenance reputation, which, as you now know, is a big myth! Not only are quinoa plants hardy and adaptable, but they’re also highly productive, capable of providing a delicious base for a nutrient-dense meal.