Back in the day, runner beans were purely an ornamental plant. They were enjoyed for their flowers, but the beans themselves were believed to be poisonous. Thankfully, we know differently today. Runner beans are now a staple on the dinner table. They’re sweet, nutty, and deliciously buttery, and also happen to be one of the easiest and most productive vegetables to grow at home.
Growing Runner Beans: A Quick Snapshot
When to Sow – Apr-Jun
When to Plant – May-Jul
When to Harvest – Jul-Oct
Average Yield per Plant – 750g
Spacing – 15-30cm
Depth – 5cm
How to Grow Runner Beans at Home
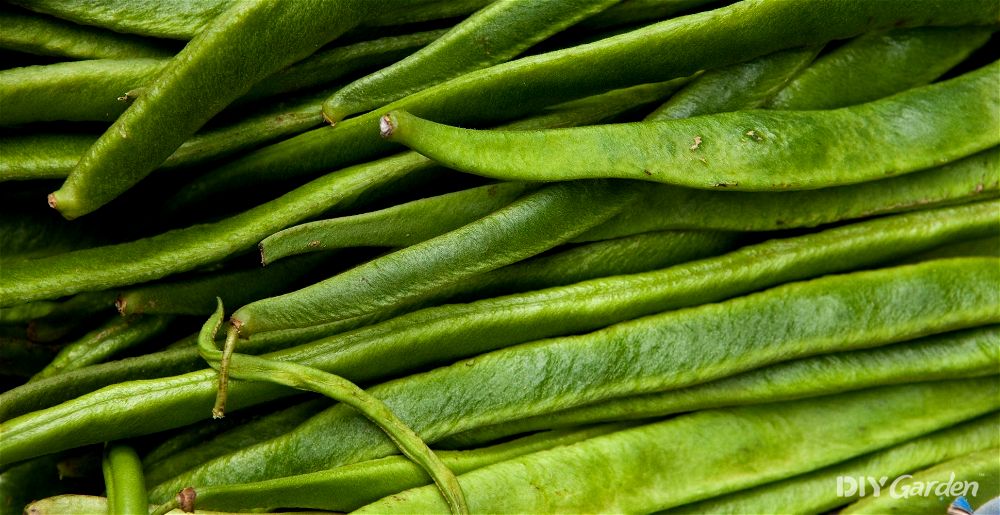
Supermarket runner beans have a reputation of being stringy and fibrous, but pick them while they’re still young and tender and you’ll notice a much sweeter flavour, along with a succulent texture. Grow them for the first time and you’ll quickly see why they’re a regular in vegetable gardens all over the world. They’ll be one of the most productive crops that you’ll produce, with the least amount of effort.
Growing Requirements for Runner Beans
Unlike most of the other vegetables in your garden, runner beans don’t require full sun. Instead, give them around five to six hours of sun a day and they’ll thrive, even if they’re in partial shade the rest of the time. Chances are, your bean plants will soon quickly climb above whatever happens to be shading them – they’re good at seeking out any extra light that they need on their own.
When it comes to soil, you need a mix that’s rich and moisture-retentive. Runner beans don’t do well in a drought, which is why many gardeners choose to fill deep trenches with well-rotted animal manure before planting their runner beans. If you decide to incorporate animal manure into your soil, do this a few months before planting. Adding it in at the same time as your beans will result in plants that are bursting with foliage, but with very few beans.
How to Grow Runner Beans from Seed
Although runner beans do well when direct-sown, they’re not frost hardy. This means that you’ll have to wait until late spring, when all chances of frost have passed, before sowing your seeds outdoors. Do this and you’ll only be enjoying your first harvest mid-summer.
On the other hand, start some seeds indoors for an earlier crop, followed by your direct-sown seeds a little later in the year. Successional sowings work well with runner beans, enabling you to space out and maximise your harvests.
When starting runner bean seeds indoors, standard module trays will work, but not very well. Runner beans have extremely long roots. For the healthiest plants, you need to give your seeds a deeper-than-average container. A specialised root trainer is a better option, or use empty toilet roll holders for a DIY alternative.
How to Sow Runner Bean Seeds in Containers:
- Fill your containers with a multi-purpose compost. If you’re using toilet roll holders, water your compost before filling the rolls. If you’re using plastic containers, water them after filling
- Make an indentation in the centre of each container, about 5cm deep
- Place one runner bean seed into each indentation and then cover back over with soil
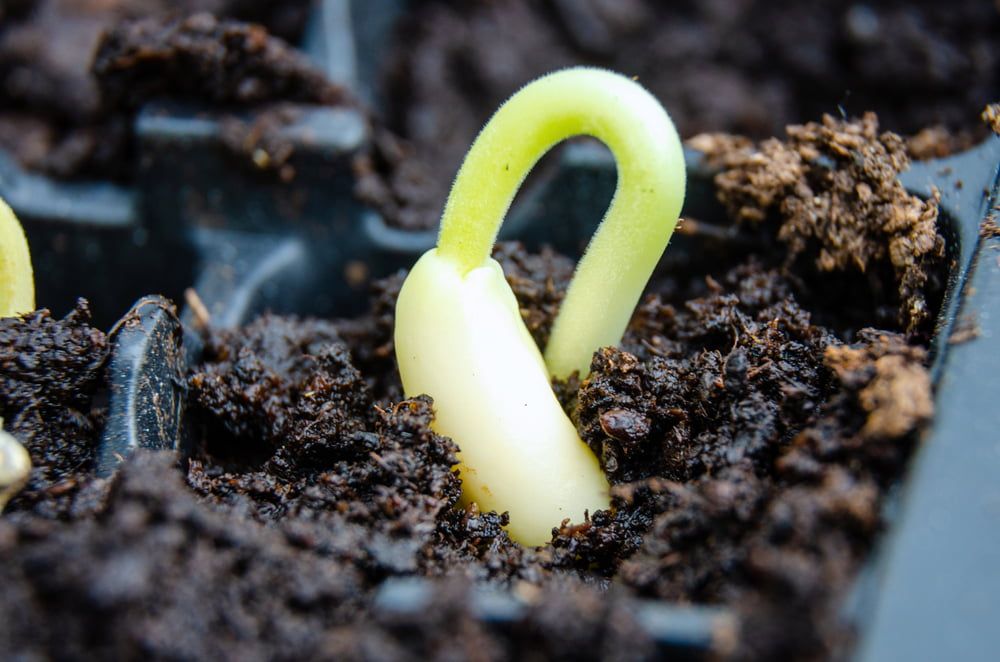
- Keep your containers somewhere warm and protected. Runner beans need a minimum of 10°C to germinate, although they’ll sprout faster if given a little extra heat
Runner beans take about one week to germinate. If you’ve given them containers that are deep enough, they’ll be happy to remain in them until they’re planted out. Make sure that you give your seedlings plenty of light and water during this time.
How to Direct Sow Runner Bean Seeds:
- Prepare your growing area by thoroughly weeding it
- Line your growing area with bamboo canes or supports of some sort. Keep each cane 15cm apart
- Sow two seeds 5cm deep at the base of each cane
- Water well after sowing
Once your seeds germinate, thin the seedlings out so that there’s just one plant per cane.
You may also want to cover your seedlings with a mesh, or even halved plastic bottles. This will protect them from rodents, birds, slugs, and all of the other creatures that consider runner bean seedlings a delicacy. You’ll only need to keep this cover on for a couple of weeks. After this, your beans should be strong enough to protect themselves.
How to Plant Runner Beans Outside
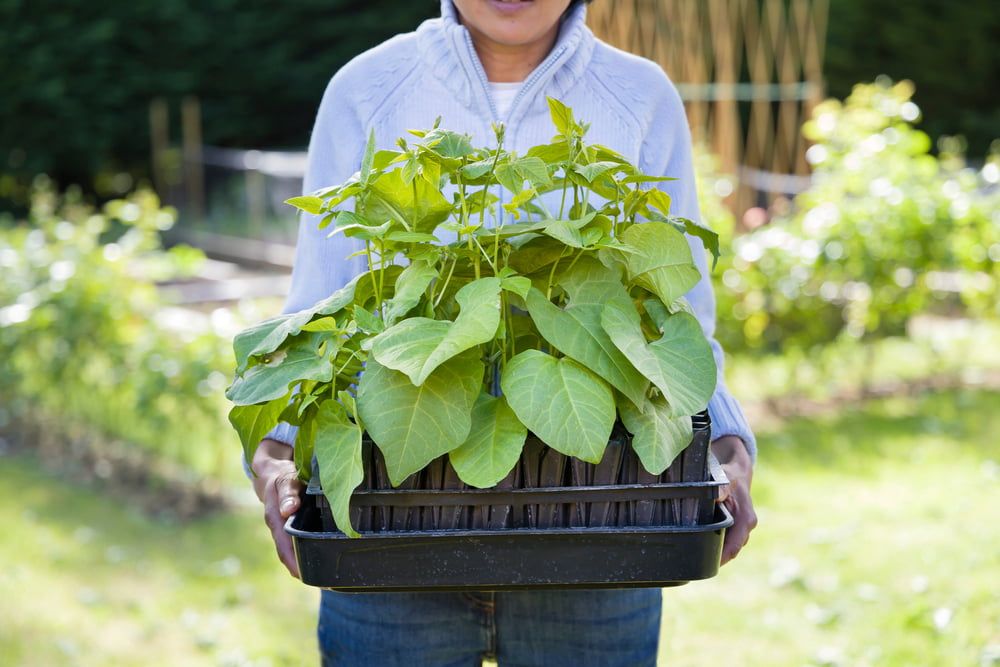
Once your indoor-sown runner bean seedlings are about 8cm tall, you can plant them out.
Before you do so, make sure that you harden them off for a week. This will help them to acclimatise to the outdoor elements, minimising transplant shock and allowing them to get off to a good start once planted.
Just like when sowing direct, place bamboo canes 15cm apart through your growing area. Dig a hole at the base of each cane, just slightly larger than the root balls of your seedlings.
Place your plants into their new homes and cover the roots over with soil. Firm the soil down and water well.
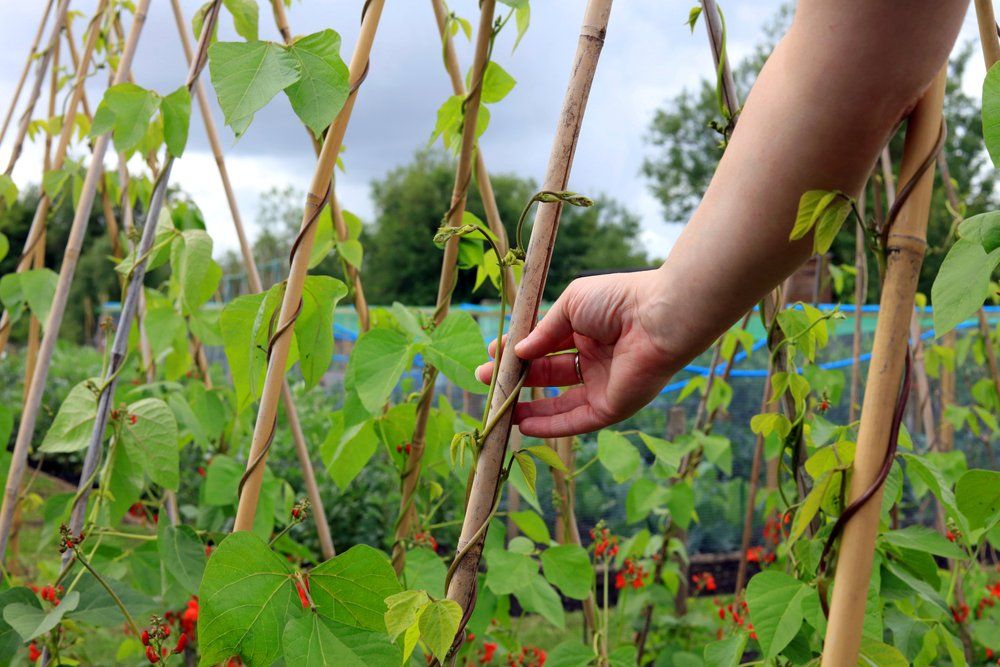
You’ll now need to loosely tie your plants to their supports with some garden twine. This only needs to be done once after planting – after this, your plants will manage to pull themselves up and climb naturally.
How to Plant Runner Beans in a Greenhouse
Runner beans aren’t usually grown in a greenhouse, and there are a few reasons for this. For starters, the heat in mid-summer can inhibit pod production, leaving you with lots of foliage but no beans. Runner beans also need plenty of water – they don’t do well if they’re constantly drying out, which is often the case in a greenhouse. Finally, unlike some other bean types, runner beans need insects for pollination, which, again, is often lacking in a greenhouse.
That said, a greenhouse is still very useful for starting runner bean seeds. Sow them directly into your greenhouse beds in early spring, before transplanting them outside once all frosts are done for the year.
Another option would be to grow your runner beans in containers. Again, start them off in the greenhouse before moving your containers outside once temperatures rise. Runner beans generally do well in a container, so long as you pick one that’s as large and deep as possible. This not only accommodates those long roots, but, the bigger your pot, the longer the soil will take to dry out.
How to Care for Runner Beans
Although runner beans are a low-maintenance crop, they do still need a basic level of care. Here’s what you’ll need to do to ensure maximum yields:
Watering Runner Beans
Runner beans are very thirsty plants. While other vegetables may be able to cope with a few dry spells, runner beans won’t. Their soil needs to be consistently moist. You’ll be able to tell if your plants are dry by taking a look at their foliage – wilting and drooping are two big signs.
Feeding Runner Beans
Just like other plants in the legume family, runner beans are able to draw up nitrogen from deep within the soil. This means that they definitely don’t need to be supplemented with more nitrogen, as this would cause excess foliage at the expense of pods.
That said, runner beans do benefit from a regular feed. Look for a fertiliser that’s low in nitrogen but high in phosphorus and potassium. Iron, calcium, and manganese are also important.
Weeding and Mulching Runner Beans
Runner beans climb quickly, so will soon tower over any weeds that are growing around them. However, if their growing area is too weedy to begin with, then this will smother out young bean plants. So, while it’s important to stay on top of the weeds, you’ll likely only need to regularly weed around your plants while they’re small.
Very few people enjoy weeding, which is why many gardeners mulch their plants instead. An organic mulch effectively suppresses weed growth. It will also help with soil moisture retention, which, as you now know, is extremely important for runner beans.
Pinching Out the Growing Tips
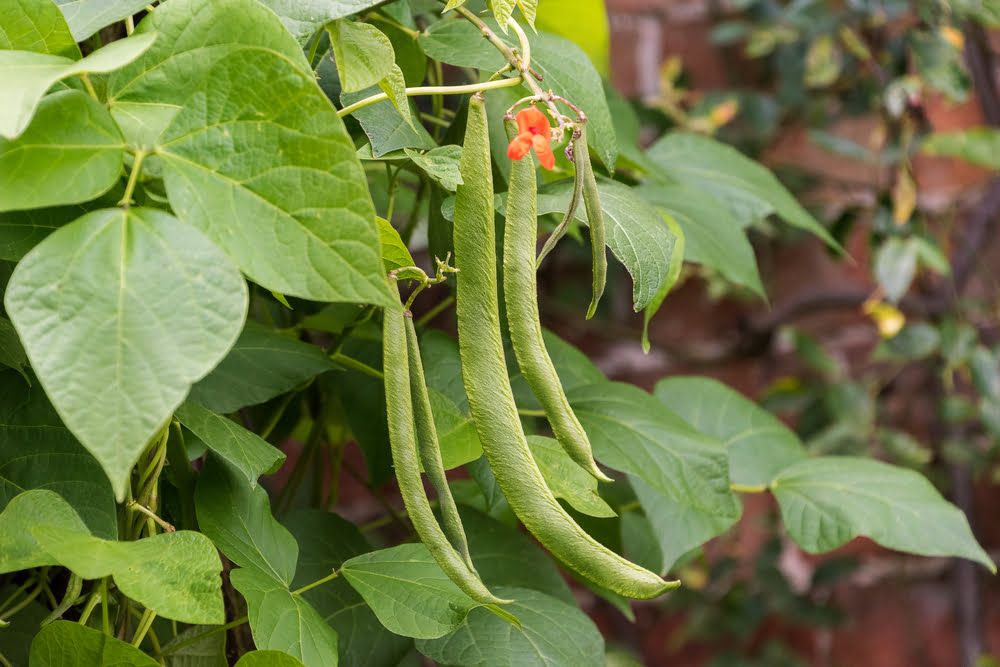
Even if you’ve chosen to use tall supports, it won’t be long before your runner bean plants reach the top of this. At this stage, it’s useful to pinch out the main growing tip from each plant. This will encourage your plants to produce multiple side stems, rather than continuing to grow upwards. Those side stems will then produce flowers, followed by pods, which will increase your yields.
How to Harvest Runner Beans
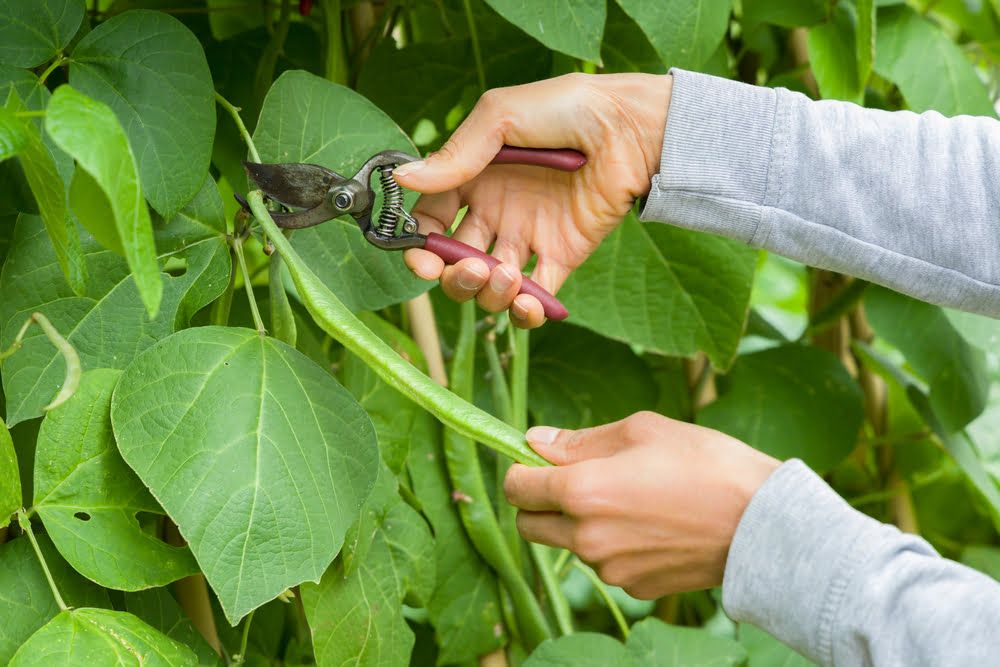
It usually takes about three to four months from sowing before runner beans are ready for harvesting. One mistake that many make is leaving their beans to grow as long as possible before picking. Runner beans taste best when they’re about 15-20cm long and still relatively flat. You definitely don’t want the pods to start swelling.
Once the pods get going, you’ll be surprised at how quickly they grow, making it important to check your plants every few days.
To harvest runner beans, simply snip off the pods that are ready. Use one hand to steady the plant as you do so, just in case you end up pulling and damaging it.
The more that you harvest your runner beans, the more flowers, and therefore pods, they’ll produce.
How to Store Runner Beans
For short-term storage, you can keep your runner beans in the fridge. They’ll be fine in the crisper drawer for about four or five days. Don’t worry if they start to go soft – you can place them into a bowl of cold water before using them to crisp them back up. Even if you don’t, they’ll still taste the same once cooked.
If long-term storage is what you’re after, freezing your runner beans is the best way to go. They freeze very well and will be good to use for about six months. Blanch them first if you want to preserve colour, or just freeze them raw if this doesn’t matter.
Try freezing your runner beans in a single layer first, so that they don’t all freeze together in one big clump. Once frozen, you can then place them all into a bag or container to be used as and when needed.
How to Prepare & Cook Runner Beans

Runner beans are easy to prepare. All you need to do is top and tail each bean and they’ll be good to go. If your runner beans were on the large side when picked, then they’ll be a little stringy, so remove any strings from larger pods too.
While runner beans can be cooked and eaten whole, most people prefer to slice them into lengths. Don’t be tempted to sample a raw runner bean – they contain a toxin that can only be destroyed through the cooking process.
Runner beans are wonderfully versatile in the kitchen. Boiling them in salted water for a few minutes is the easiest and simplest cooking method. However, if you want to get a little more creative, here are a few runner bean dishes to try:
- Runner bean ratatouille
- Sautéed runner beans with onions and garlic
- Runner bean mac ’n’cheese
- Runner bean, tomato, and coconut curry
- Runner bean and fennel coleslaw
- Runner bean chutney or pickle (this is also a good way to preserve a large harvest)
Common Runner Bean Problems
There are a few problems that you may encounter when growing runner beans:
- Aphids – these pests suck the sap from plants, distorting them and inhibiting growth. Small infestations can be manually picked off or blasted off with a jet of water. Larger infestations will need to be sprayed, but there are plenty of organic and DIY options to choose from
- Slugs – slugs love tender runner bean seedlings. They’ll munch holes in your plants, leaving their tell-tale silvery slime behind. There are numerous slug prevention techniques out there, with beer traps working particularly well
- Halo blight – this disease manifests as brown spots encircled in a “halo” on foliage. It’s caused by seed problems, such as seeds that were stored incorrectly, or seeds that were soaked for too long before sowing (soaking isn’t actually necessary). Unfortunately, you’ll need to destroy affected plants. Next year, don’t sow any runner bean seeds that look unusually wrinkled or deformed in any way
- A lack of beans – some runner bean plants produce heaps of flowers, but there aren’t any beans that follow. This could be due to a few reasons; poor pollination (plant in a sheltered spot with plenty of bee-friendly companion plants to encourage more pollinators), a lack of moisture (mulch your plants to improve moisture retention), and acidic soil (add lime to increase alkalinity)
Popular Runner Bean Varieties to Grow
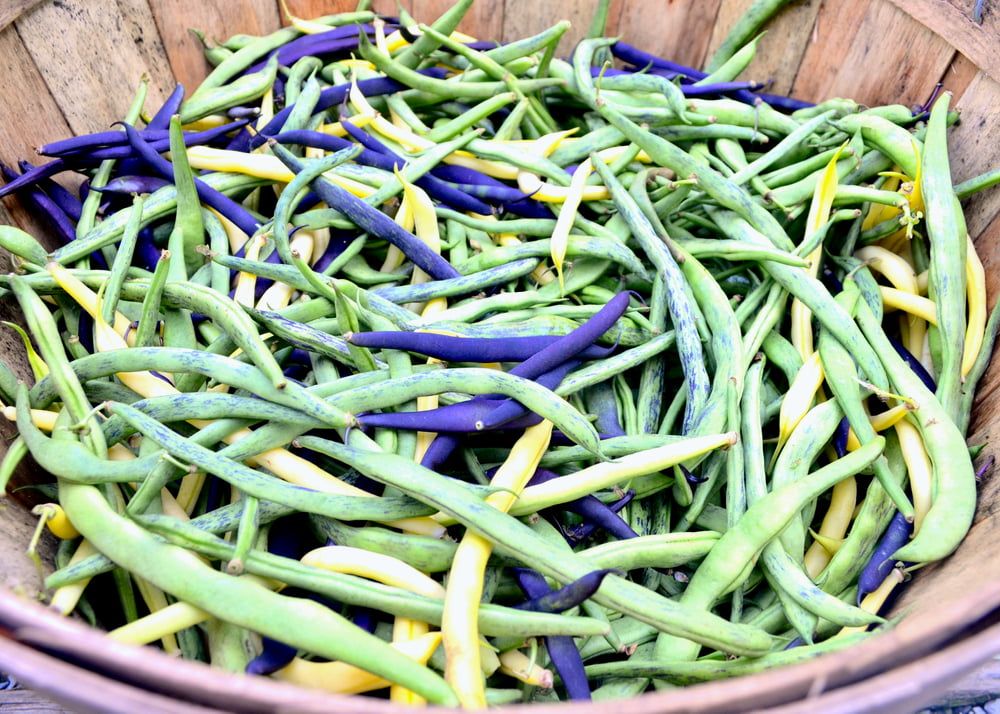
With new varieties being developed each year, runner beans are now more productive than ever. Some of the best varieties to grow are:
- Enorma-Elite – produces larger-than-average pods on plants that can grow up to 3m tall
- Lady Di – a variety that remains stringless, even when large
- Firestorm – a self-fertile variety, meaning that insects aren’t needed for pollination. This one is very ornamental, with bright red flowers
- Red Rum – a variety that produces pods earlier in the year than others
- Pickwick – a very productive dwarf variety with showy orange flowers. A good one for containers
Conclusion
It’s easy to see why runner beans are such a vegetable garden staple. They’re low-maintenance to care for, highly productive, and have a long harvesting period. The fact that their flowers are also exquisitely ornamental and capable of brightening up even the dullest of spaces is just the icing on the cake!