Read Reviews
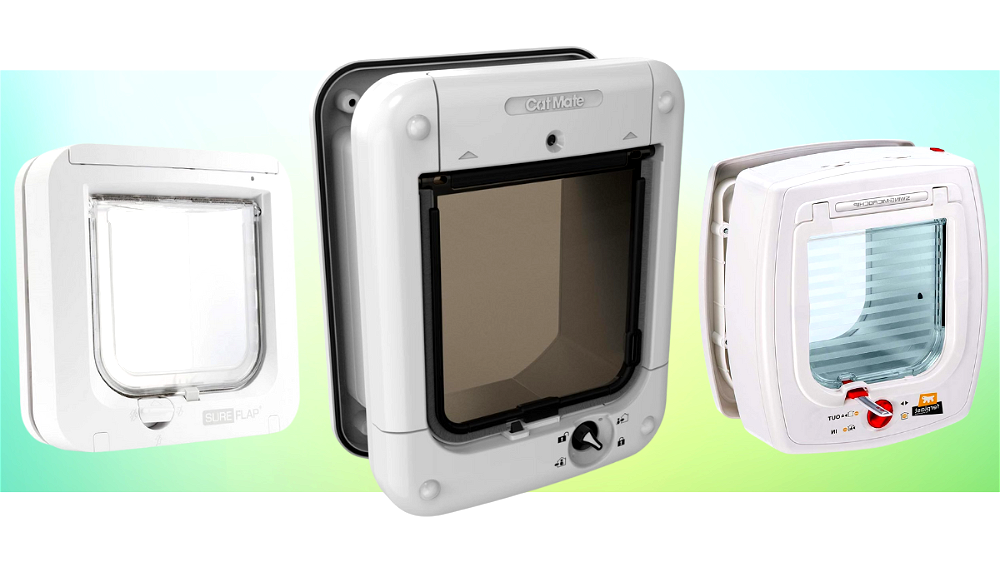
The Best Microchip Cat Flaps
-
Best for budgets and energy efficiency - Cat Mate Microchip Activated Cat Flap
-
Best simple programming - SureFlap Microchip Cat Flap
-
Best for larger cats - Ferplast Swing Cat Flap with Microchip
-
Best for wooden doors - PetSafe Microchip Cat Flap
-
Best for control and timer settings - Petporte Smart Flap Microchip Cat Flap
Microchip Cat Flap Reviews
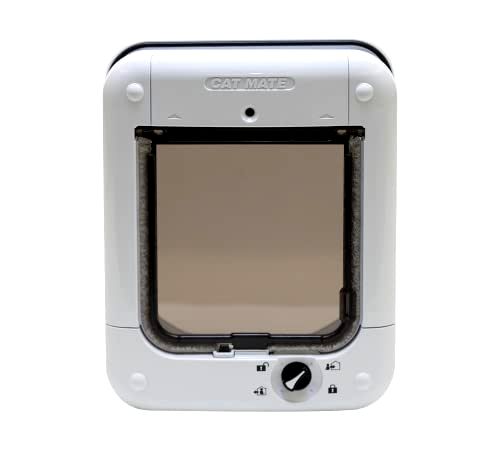
1. Cat Mate Microchip Activated Cat Flap[ SAVE 17% ]
Best for budgets and energy efficiency
- Magnetic closure reduces draughts.
- Its A+ EU energy efficiency rating ensures your batteries have a longer life.
- Four-way lock gives you multiple options: exit only, entry only, entry and exit, or locked door.
- Incredible value for money as it has a four-way lock and a high efficiency rating.
- Requires adaptor kit to be purchased separately if you want to install in a thick metal, or glass door.
- Batteries aren’t included.
- Customers report it’s not 100% wind proof, although this can be combatted by positioning it in a low-wind area of your home.
- The initial programming can be an arduous process as some cats won’t sit still for the time required.
- Size
- 14.5 x 15 cm
- Depth of Tunnel
- 11 cm
- Chips
- 30
- Locking Options
- 4
- Timer Control
- No
- Design
- 4.5
- Features
- 4.3
- Installation Ease
- 4.4
- Value for Money
- 4.5
Just because microchip pet flaps use modern technology, doesn’t mean they have to be ridiculously expensive. You can still get one with all the most important features at a reasonable price!
The Cat Mate Microchip Activated Cat Flap has good wind proofing and a four-way locking control system. It’s one of the best options if you’re on a budget because it’s so reasonably priced.
As well as being value for money, this product is highly energy efficient.
Most cat owners know that even when it’s windy and rainy, cats still want to come and go. This product’s A+ rating and magnetic closures should comfort you that you won’t be getting a storm inside, even if there’s a storm outside!
This weatherproofing gives you that extra benefit of reducing what you might spend on your heating bill, if you had a conventional cat flap.
Its four-way lock gives you multiple selective entry options: completely locked, locked for cats to come in but not out again, locked for cats to leave but not come back in, and fully open both ways.
This Cat Mate pet door is good value for money. It’s one of the best microchip cat flaps to buy on a budget because it works well, and also prevents excessive heat loss,
Did you find this review helpful?
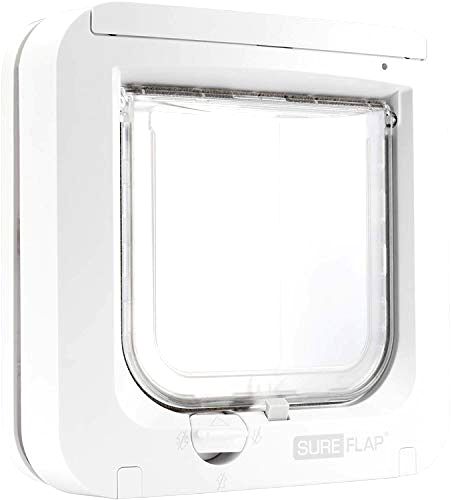
2. SureFlap Microchip Cat Flap[ SAVE 18% ]
Best simple programming
- Programming and set-up are made simple with just one button.
- Batteries last for up to 12 months so they don't require frequent changing.
- Four-way lock provides a great range of settings. The ‘entry-only’ setting can be helpful if you want your cats to stay inside until after breakfast.
- No timer control so you can’t program different night and day settings. This must be done manually.
- Blocked sensors must be cleaned regularly to avoid battery drainage. If blocked, sensors behave as if a cat was using the device and keeps flap open.
- Batteries must be bought separately.
- Size
- 14.2 x 12 cm
- Depth of Tunnel
- 7 cm
- Chips
- 32
- Locking Options
- 4
- Timer Control
- No
- Design
- 4.5
- Features
- 4.7
- Installation Ease
- 4.7
- Value for Money
- 4.6
The SureFlap Microchip Cat Flap is simple to set up and works effectively. It’s one of the best microchip cat flaps on the market. It’s reasonably priced and offers basic, reliable features.
With radio frequency identification, your cat’s chip acts as their very own house key. All they need to do is get close to the SureFlap cat flap, and the flap will unlock to let them in.
Additionally, this particular cat flat gives a lot of freedom in terms of installation. It can be fitted into a door, window or wall. It requires four AA batteries, and they’ll last for approximately 12 months.
Setting up the unit after installation is simple with one-button programming. This prevents unwanted animals from entering your home without requiring a complicated multi-step process.
This cat flap has the capacity to remember up to 32 microchips. So, even if you’re the most renowned cat lady in the country, this door will allow only your cats in, and keep anyone else out.
There are four options for locking the pet door: exit only, entry only, entry and exit, or locked. This gives you plenty of options to suit your needs, throughout the day and night.
Whilst this does mean that there’s no timer control, the available settings are enough to make sure your cat is inside or outside when you want them to be. It doesn’t take much to change the lock setting either, making it easy to alter when necessary.
One thing to be wary of is the sensors; they may require regular cleaning. When sensors are clogged with cat hair, the battery can drain because it presumes a cat is using the flap. Giving the sensors a regular wipe should reduce any problems with this SureFlap cat flap malfunctioning.
If it’s particularly windy, you may feel a slight breeze coming through this cat flap. Therefore, it’s good to be mindful of its placement in your home, and advisable to put it in a low-wind area or far away from where you sleep.
Did you find this review helpful?
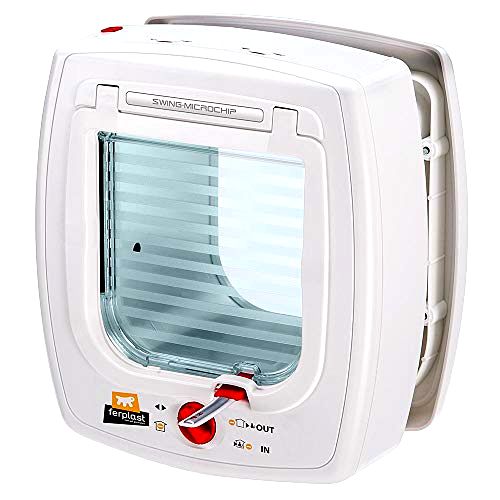
3. Ferplast Swing Cat Flap with Microchip[ SAVE 28% ]
Best for larger cats
- Available in multiple sizes, you can purchase this flap for bigger cats as well as other pets like dogs.
- This four-way closing system gives you multiple options: exit only, entry only, entry and exit, or locked door.
- You can easily see if your cat’s in or out of the house because this product has a handy ‘direction indicator’ which tells you the direction they last passed through.
- This kit provides a microchipped collar, useful if your pet’s microchip isn’t compatible with other products.
- Fierce winds can cause the flap to blow open which could be a nuisance in winter.
- Six AA batteries required and need to be supplied separately.
- Cost varies significantly between sizes.
- Young kittens might struggle at first as the swing door could be too heavy for them.
- Size
- 13.5 x 13.7 cm
- Depth of Tunnel
- 16.2 cm
- Chips
- 32
- Locking Options
- 4
- Timer Control
- No
- Design
- 4.4
- Features
- 4.6
- Installation Ease
- 4.5
- Value for Money
- 4
With the Ferplast Swing Cat Flap with Microchip, even slightly more rotund felines can enjoy the freedom of heading outside without having to ask permission. It’s available in a range of different sizes and is therefore one of the best microchip cat flap options for larger cats.
It can memorise up to 32 microchips and the four-way closing system offers: exit only, entry only, entry and exit, or locked door. There’s also a useful indicator which lets cat owners know which direction the cat last passed through – in or out!
Plus, it comes with an additional microchipped collar, eliminating the concern that your cat’s microchip type won’t be compatible with the flap’s system. Although this is unlikely anyway, it can occasionally be a problem with some cat flaps so it’s nice to have the collar just in case.
An issue that could arise with this cat flap is that smaller kittens may struggle at first with pushing themselves through. This is due to its slightly heavier-than-standard swing door. However, this will not be a long-lasting problem as your cat grows older and stronger. Also, six AA batteries are required and they don’t come included.
Overall, this is a good choice if most microchip cat flaps seem too small for your cat; plus, it could also be a good option for dog owners to consider. You can choose the size option that best suits your pet (or pets – plural!) and avoid ending up with a model that they are reluctant to use. It’s also useful that a collar comes included, in case there are any issues with your pet’s microchip.
Did you find this review helpful?
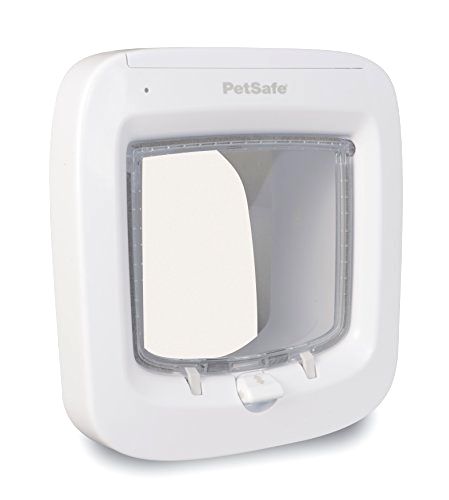
4. PetSafe Microchip Cat Flap[ SAVE 6% ]
Best for wooden doors
- This product can store up to 40 microchips.
- With a four-way locking system, you can choose between: exit only, entry only, entry and exit, or locked door.
- No additional adaptors are required if you’re installing your cat flap in a wooden door.
- With two magnetic closures, this cat flap reduces draughts in your home.
- You’ll have to buy an adaptor if you want to install your cat flap on a brick wall or a PVC, metal or glass door.
- You’ll have to purchase batteries separately.
- Only 15 digit microchip codes are compatible. It won’t allow entry to cats with 9 or 10-digit microchip codes.
- Customers report fast battery drainage, some as quickly as 15 days.
- Size
- 14.6 x 13.5 cm
- Depth of Tunnel
- 12.2 cm
- Chips
- 40
- Locking Options
- 4
- Timer Control
- No
- Design
- 4.3
- Features
- 4.5
- Installation Ease
- 4.2
- Value for Money
- 4.2
Lots of microchip pet doors get complicated when it comes to installation, requiring various additional parts to assist the process.
If you’re putting the flap into a wooden door, this PetSafe Microchip Cat Flap requires no additional parts or adaptors to install it into a wood surface.
Installation is also made significantly easier with the included cutting template – perfect if you want to reduce the time spent working out measurements.
Nevertheless, adaptors will need to be bought separately if you want to install this PetSafe cat flap in a brick wall, PVC, metal or glass doors. A tunnel extension is available for installation into thicker material.
This microchip cat flap can memorise up to 40 microchips, making it a great option for cat owners with multiple cats. It’s battery operated, and you’ll need to supply the four AA batteries yourself.
This cat flap is fairly priced as it is fitted with four-way locking options and two magnetic closures. This secure closure method will reduce draughts and prevent cold air from getting in through the pet door. By contrast, some traditional cat flaps aren’t very windproof can sometimes feel the same as leaving a window open!
Overall, this PetSafe cat flap is one of the best microchip cat flaps for wooden doors because installation is so straightforward. It’s also a great option for multiple cats due to its large memory.
Did you find this review helpful?
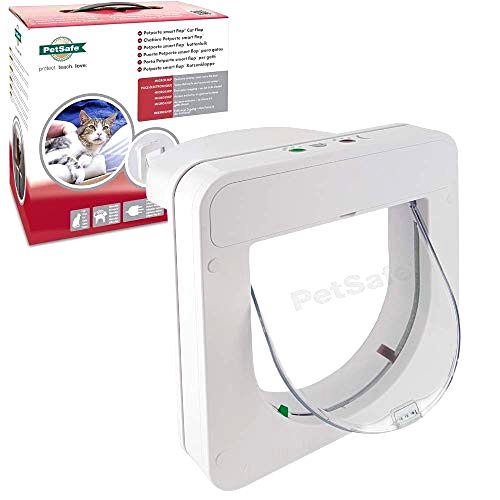
5. Petporte Smart Flap Microchip Cat Flap[ SAVE 22% ]
Best for control and timer settings
- Built in timer controls allow you to personalise locking settings to suit your daily schedule.
- Can be powered with mains power as well as batteries, so you won’t have to worry about battery drainage or buying new ones.
- Battery mode can be a brilliant back-up in case of a power-outage!
- There’s no need to buy separate adaptors to install the cat flap to glass doors or brick walls.
- Installation guide and cutting template are included, helping with the set-up of your new cat flap.
- Customers report difficulty with installation due to many fiddly parts.
- This is an expensive choice when you consider how other microchip flaps have similar features.
- Customers report that the machine doesn’t allow enough time to program their cat’s microchip details, as cats can be difficult to hold still.
- Installing a power lead across a doorway can be a complicated and risky task.
- Batteries don't come included.
- Size
- 16 x 16 cm
- Depth of Tunnel
- 5.2 cm
- Chips
- 25
- Locking Options
- Customisable
- Timer Control
- Yes
- Design
- 4.5
- Features
- 4.4
- Installation Ease
- 4
- Value for Money
- 3.8
If you’re someone with a busy schedule, you won’t want to be adjusting your cat flap’s settings every few hours.
In this case, you’ll want a microchip cat flap with adjustable timer control settings.
With the Petporte Smart Flap Microchip Cat Flap, you can set the built-in timer as needed. For example, if you have to take your cat to the vets after work, you could program the flap to be ‘entrance only’ from 6pm. This way, if your cat rolls in at 6.30pm for his dinner, he won’t be able to leave again. You’ll get home from work and can quickly scoop him up to the vets.
This product is ideal for offering full control over your cats movements thanks to the timer settings. You can personalise the lock settings according to your schedule, day through to night.
This cat flap stores up to 25 microchips and allows selective entry to different cats.
It can be powered with batteries or with a power lead, although certain features use up quite a lot of battery power. The best approach is to run it off the mains if possible, and use the battery as a backup. Batteries aren’t included, but the power lead comes as standard. A longer lead can also be purchased if necessary.
This cat flap is the most expensive on my list, perhaps as it’s the only one that offers timer control and a power lead. But if you want these additional features, it could be worth spending the extra money!
Did you find this review helpful?
Clive's Smart Buying Tips
Compare Product Features
Use the dropdown to sort the table by the feature you want to see.
Cat Mate Microchip Activated Cat Flap

- 4.4
- 14.5 x 15 cm
- 11 cm
- 30
- 4
- No
SureFlap Microchip Cat Flap

- 4.6
- 14.2 x 12 cm
- 7 cm
- 32
- 4
- No
Ferplast Swing Cat Flap with Microchip

- 4.4
- 13.5 x 13.7 cm
- 16.2 cm
- 32
- 4
- No
PetSafe Microchip Cat Flap
- 4.3
- 14.6 x 13.5 cm
- 12.2 cm
- 40
- 4
- No
Petporte Smart Flap Microchip Cat Flap
- 4.2
- 16 x 16 cm
- 5.2 cm
- 25
- Customisable
- Yes
How to Choose The Best Microchip Cat Flap
Cat owners are all-too-aware that our feline friends love their independence. However, dealing with standard cat flaps can be a nightmare. Waking up to the neighbour’s cat in your house isn’t an uncommon occurrence.
A microchip cat flap is a great solution. They’re small, weatherproof and have a technological barrier to prevent unwanted cats from entering your home.
There are a lot of different features to look out for, so check out the following advice to help you choose a new cat flap for your home:
Where to Install Your Cat Flap
The conventional place to install a cat flap is in a door. But new cat flaps are designed in a way that makes them suitable for windows and walls too.
Make sure you purchase a cat flap that can be installed in the material of your chosen area. For example, if you want the cat flap in your conservatory, ensure the model can be installed in glass. The same goes for brick walls and PVC, metal and wooden doors.
Some microchip cat doors must be purchased with additional adaptors if you want to install them in different materials (such as glass). These adaptors will be an extra cost, so its worth pre-planning to avoid any unnecessary complications.
Prepare Your Budget
Whilst conventional cat flaps generally cost between £10 and £15, microchip cat flaps are more expensive because of the technology they contain. Microchip cat flaps can vary in price depending on their features. If you choose one with a four-way lock and good weatherproofing, expect to be spend at least £40. Certain features can double this figure.
Different Control Settings
The best microchip cat flaps enable you to lock out unwanted furry visitors without taking away your pet’s freedom. The cat flap will recognise your cat’s chip and unlock the flap for them.
This is the most basic setting; however, these cat flaps can get a lot more technical. For example:
- Some microchip cat flaps can be programmed to allow entry, but not exit. This lets you lock the flap at night – so once your cat’s in, they can’t wander off again. Other settings include completely locked, completely unlocked, and allowing exit but not entrance.
- Advanced microchip cat flaps have timer settings. These enable you to pre-set a 24-hour schedule. For example, if you don’t want your cats out at night you can set it to ‘entrance only’ between 9pm and 6am.
Weatherproofing
Most products will be labelled as weatherproof, but the best way to gauge this is by looking at customer feedback. You don’t want the cat flap to let all the heating out.
Some cat flaps have magnetic strips which secure the flap when it’s not in use. This is a good protective measure against wind.
Certain cat flaps have an energy efficiency rating. This is a good measure of how weatherproof they are. The better the weatherproofing, the less money you’ll spend on heating bills!
Battery Life and Power Leads
While battery-powered microchip cat flaps are the most common, some pet doors connect to the mains. The majority of microchip cat flaps take AA batteries; however, make sure to buy the best quality batteries you can. You might grow tired of frequently rebuying new batteries depending on how energy efficient your cat flap is.
Some cat flaps have the option of being plugged into a power socket. This is a great option if you don’t want to be buying batteries again and again over its lifespan. However, as cat flaps are often installed in doors, power leads need to be set up safely. Make sure you leave enough slack for the cord, so when the door is opened and closed the cord isn’t strained or broken.
The Size of Your Cat Flap
Standard sized cat flaps measure around 15 x 15 cm, with the entire frame measuring about 21 x 21 cm.
If you have bigger cats, or even want to buy a flap for a small dog, you may need to look for a larger size. Certain cats can be fearful of getting stuck in the pet door, so it’s better to go slightly bigger rather than waste money on something they won’t use.
Some microchip cat flaps on the market offer sizes large enough to fit a Labrador! The most important thing is to measure your pet before purchasing.
Installing a Microchip Cat Flap
Not all cat flaps are the same, so make sure to check your product’s instructions before beginning. Installation generally follows these steps:
1. Measure the distance between your cat’s belly and the floor. This is the height of your cat flap. Mark a line on the door or wall at the same distance from the floor.
2. Hold up the cat flap to your chosen surface. Align the bottom of the frame with the line you have drawn. Use a spirit level to ensure the frame is straight.
3. Using a pencil, mark the shape of the inside of the frame onto your wall or door. Some cat flaps will come with installation kits including a cutting template, so you don’t have to work this bit out yourself.
4. Put aside the frame and drill holes – one in each corner of the shape you have pencilled.
5. Cut into the outlined shape using a jigsaw. This step can vary depending on the material you are working with.
6. Push the tunnel of the cat flap through the hole you’ve created. Ensure the correct side is facing inwards.
7. Swapping to the outside of your house, place the external frame onto the flap. Using a pencil, mark the spots where you’ll need to drill.
8. Remove the tunnel of the cat flap. Drill holes in the required area, ensuring you don’t go through your door all the way.
9. Place the cat flap and tunnel into position. Using a screwdriver, screw in the nails provided and place on any screw caps if included.
Microchip Cat Flap FAQs
Microchip cat flaps use radio frequency identification (RFI) technology to recognise your cat’s microchip ID. When it recognises the programmed microchip, it unlocks the flap to let your cat in. Other unregistered cats won’t be allowed in.
If , as a cat owner, you’re worried about intruder pets coming into your home at night, a microchip cat flap is a great solution. This way, your cat can still come and go, but you won’t be disturbed by cat fights in your living room! Alternatively, you can lock your cat flap at night if your cat has a good routine and won’t disturb you.
Cats can usually get through any sized hole, as long as it’s larger than their head. A standard cat flap measure about 15 x 15cm, with the entire frame measuring about 21 x 21cm. Flaps for bigger cats and small dogs could be between 21 x 21cm and 40 x 40cm.
Intruder cats may be looking for food. To minimise this risk, move any bowls of food away from your cat flap. However, the most effective method is installing a microchip cat flap. This is a proven way to deny access of intruder cats.
Although rare, be aware that a small number of cat owners owners report clever cats still finding their way in via the microchip pet door, even if they haven’t been programmed. Very determined cats may use their claws to open the flap, or run in immediately after the registered microchipped cat. But these instances aren’t common.
Share