


Read Reviews
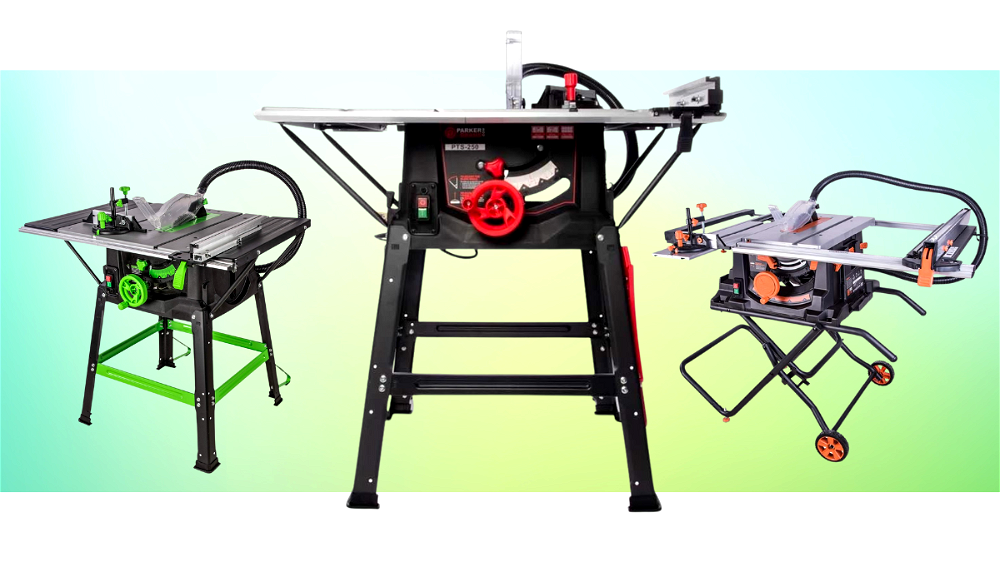
The Best Table Saws
-
Best table saw for multi-material cutting - Evolution Rage 5S Table Saw
-
Best budget multi-purpose table saw - Evolution Fury 5S Table Saw
-
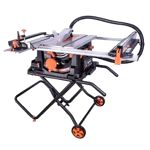
Best contractor table saw for the money - ParkerBrand PTS-250 Table Saw
-
Best benchtop table saw - Bosch Professional Table Saw GTS 635-216
-
Best budget contractor table saw - Einhell TC-TS 2025/2 U Table Saw
-
Best budget benchtop table saw - Excel Portable Table Saw
-
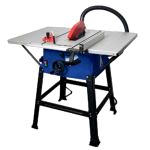
Best benchtop table saw for beginners - Lumberjack BTS210 8" Table Saw
-
Best lightweight table saw - Bosch AdvancedTableCut 52 Portable Table Saw
-
Best contractor table saw for beginners - Tooltronix PTL-91 Table Saw
-
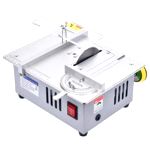
Best mini table saw for craft work - NovelLife Mini Hobby Table Saw
Table Saw Reviews
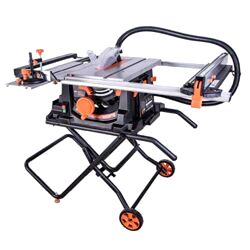
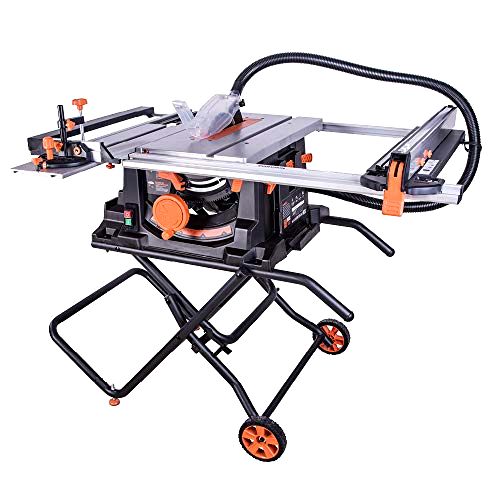
1. Evolution Rage 5S Table Saw[ SAVE 15% ]
Best table saw for multi-material cutting
- Evolution’s brilliant multi-material blades save you time and money. You don’t have to swap blades around, and if you happen to hit a nail, no problem!
- This is a truly portable table saw. The frame has wheels and it’s easy to fold up when not in use.
- The fence locks at both ends, making it seriously stable. Compared to the flimsy one on the Parker Brand PTS250 it’s rock solid.
- The table extends in both directions, meaning it can accommodate larger workpieces compared to the competition.
- There’s an awful lot of plastic used in the table saw’s construction. I’d prefer to see more durable parts, and only hope it will last for more than a couple of years.
- The table clearance insert is incredibly thin and flimsy. It can bend when you cut narrow pieces of timber, so be careful!
- Some users have complained about the fiddly setup process. Adjusting the fence and blade for accurate cuts can take a while.
- There are large gaps inside the space under the blade that collect dust. The dust collection facility isn’t the best on my list.
- Power
- 1,500W
- No-Load Speed
- 2,500rpm
- Blade Diameter
- 255mm
- Blade Supplied
- 1x28TCT
- Max Cut @ 90°
- 83mm
- Max Cut @ 45°
- 58mm
- Max Table Size
- 1200x640mm
- Weight
- 28.5kg
- Build Quality
- 4
- Performance
- 5
- Ease of Use
- 4
- Value for Money
- 3
The Evolution Rage 5S Table Saw stands out from its table saw competition thanks to its revolutionary 255 mm multi-material cutting blade. You don’t have to worry about extracting nails embedded in wood. This blade doesn’t care! It will rip through all kinds of material, from reclaimed wood and studwork to box section, RSJ’s and roof flashings!
This table saw is not just powerful but versatile too. It features the largest table size on my list with maximum dimensions of 1200 x 640 mm, so larger workpieces can be handled with ease. It comes with transport wheels so it can easily be manoeuvred into the correct working position. The folding stand means it can be collapsed and conveniently stored after use.
The cutting height and angle can be easily adjusted with the hand wheel and calibrated gauge. You can cut down to 83 mm with the blade in a vertical position and 58 mm if tilted to 45 degrees. Complex projects are no problem for this table saw either. It can accommodate common compound cuts with its 60-degree mitre cut and 45-degree bevel cut capacity.
The aluminium fence clamps into place at one end parallel to the blade to ensure accurate rip cuts and the mitre gauge fits snugly into its slot on the table for accurate cross-cut work.
In terms of performance and versatility this Evolution table saw is one of the best contractor table saws on the UK market.
Did you find this review helpful?
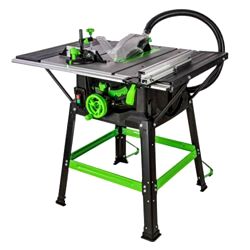
2. Evolution Fury 5S Table Saw[ SAVE 5% ]
Best budget multi-purpose table saw
- Almost all the features of the Rage 5S without the high price tag.
- Evolution’s multi-material blades are great. They save having to swap out blades for cutting a range of materials.
- The switch cover doubles up as a safety device. Simply press down on the big red cover and it turns off.
- An impressive no-load speed compared with the size of motor. It makes cutting materials much easier.
- Like the Rage 5S, there are a lot of plastic moving parts. It would be better to see more durable metal parts.
- The mitre fence is short. Keeping the workpiece steady isn’t as easy compared to longer mitre gauge fences.
- Just like on the Bosch GTS 10J, Evolution haven’t used a standard “T” track fence rail. You can’t swap out the fences for universal fitting ones.
- Some users have had trouble assembling the table saw. It comes as a kit that you need to assemble upside down, so be warned!
- Power
- 1,500W
- No-Load Speed
- 3,250rpm
- Blade Diameter
- 255mm
- Blade Supplied
- 1x24TCT
- Max Cut @ 90°
- 85mm
- Max Cut @ 45°
- 65mm
- Max Table Size
- 938x642mm
- Weight
- 20.25kg
- Build Quality
- 4
- Performance
- 5
- Ease of Use
- 4
- Value for Money
- 5
The Evolution Fury 5S is the Evolution Rage 5S’s “cousin”. Both table saws share Evolution’s patented technology and most design features. In comparison, the Fury’s main table size is smaller (938 mm x 642 mm compared to 1,200 mm x 640 mm). The Rage’s folding stand and transport wheels have been replaced with a non-collapsible stand and rubber feet.
The Fury is a budget table saw that inherits its underlying technology from the upmarket Rage. In terms of build quality, the Fury even has an anti-bounce device to ensure the table remains stable during cutting. Like the Rage the hand wheel and calibrated gauge allow for easy adjustment of the cutting height and angle.
Depth of cut is 85 mm with the blade in a vertical position and 65 mm when tilted to 45 degrees. Compound cuts are also no problem for the Evolution Fury. The mitre gauge angle extends to 60 degrees on either side of the vertical and the angle for bevel cuts tilts to 45 degrees.
The aluminium fence clamps into place at one end parallel to the blade to ensure accurate rip cuts. The mitre gauge fits snugly into its slot on the table for accurate cross-cut work as well.
Like the Evolution Rage table saw, the Fury features the proprietary multipurpose blade. It effortlessly cuts through wood, plastics, aluminium, mild steel, ferrous metals, non-ferrous metals and much more. Probably the best budget table saw for keen DIYers, this is an attractively priced tool that’s seriously worth considering.
Did you find this review helpful?
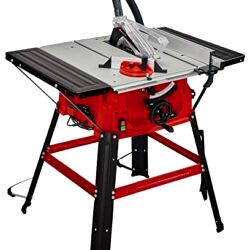
3. ParkerBrand PTS-250 Table Saw
Best contractor table saw for the money

- The table stand is chunky and rock solid. You can’t fold it up and take it with you, but for shop use it’s brilliant.
- The table is heavy and stable for a “lightweight” table saw. It doesn’t vibrate and feels accurate.
- Compared to the other table saws on my list, this one’s a bargain. It’s an ideal starter table saw for any keen DIYer.
- There’s some assembly required, but it’s straightforward and should only take an hour.
- The comfortable soft start motor reduces jolt and kickback.
- Some users have had to make some manual adjustments to the table saw for it to cut square.
- The included saw blade is fine to get started, but serious DIYers should upgrade it for the best results.
- You can’t fold the stand up or reduce the size of the table saw at all. It’s not ideal if you need to move it around, and it takes up a lot of room.
- The rip fence feels a bit flimsy compared to the Bosch GTS 635-216, but it’s also a lot cheaper!
- Power
- 2,000W
- No-Load Speed
- 5,000rpm
- Blade Diameter
- 250mm
- Blade Supplied
- 1x24TCT
- Max Cut @ 90°
- 85mm
- Max Cut @ 45°
- 65mm
- Max Table Size
- 938x642mm
- Weight
- 22.5kg
- Build Quality
- 4
- Performance
- 4
- Ease of Use
- 4
- Value for Money
- 5
The Parker Brand PTS-250 is probably the best budget table saw for DIY enthusiasts.
In many instances it is hard to differentiate many of its features from equivalent ones belonging to its more expensive competitors. For example, the (non-folding) stand is as strong and sturdy. The table size is large and extends to the sides (642 mm x 938 mm when extended). The aluminium fence system is rigid and has a decent length (approx ¾ the length of the table). The single-point locking mechanism is sturdy too.
The mitre gauge is easy to secure in position and can accommodate cross-cuts between +/- 60 degrees. The hand wheel that controls the blade rise, fall and tilt also works smoothly. The motor, rated at 2,000 Watts, is more powerful than all its competitors. It can generate an impressive no-load speed of 5,000 rpm that’s more than adequate for most jobs. In terms of safety features, the blade guard and riving knife are well-constructed and connect to the dust extraction port.
The on-off switch is well-positioned, protected, and easy to operate. For a cheap table saw there is a lot to admire about this tool in particular.
Did you find this review helpful?
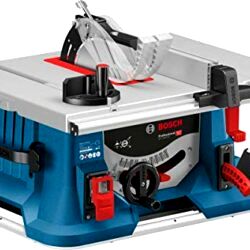
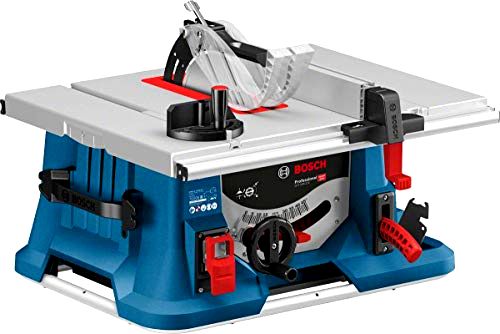
4. Bosch Professional Table Saw GTS 635-216
Best benchtop table saw
- The table saw is easy to operate and all the adjustments can be made easily and smoothly.
- The blade that comes with this table saw is good. If you do want to swap it out, the process is nice and easy, and only requires one spanner thanks to the stop lever.
- I think this has one of the best dust collection systems on a table saw. Compared to some of the competition, it picks up a good percentage of waste.
- You can lock off the fence rail at the front and back to stop it moving out of square.
- The fence rail and mitre gauge can slop about inside the rail guide. Unfortunately, it’s a non-standard shape so you can’t swap them out either.
- For the money, you might think this table saw would include a stand. You’ll have to put it on a table or buy a stand separately.
- Some users have noted that the blade height mechanism gets clogged up with dust too easily.
- Power
- 1,600W
- No-Load Speed
- 5,500rpm
- Blade Diameter
- 216mm
- Blade Supplied
- 1x30 TCT
- Max Cut @ 90°
- 70mm
- Max Cut @ 45°
- 50mm
- Max Table Size
- 658x500mm
- Weight
- 22kg
- Build Quality
- 5
- Performance
- 4
- Ease of Use
- 5
- Value for Money
- 3
The Bosch GTS 635-216 is a high-quality portable table saw and comes from the Bosch Professional range, aka Bosch’s ‘blue’ tools. These tools are specifically “engineered for excellence” and designed with durability and longevity in mind.
The carry handles are built onto the sturdy frame and the motor and blade are protected by two layers of insulating material. The table surface can extend to allow sheets of up to 8′ x 4′ to be ripped, with a maximum table size of 500 x 658 mm.
The powerful 1,600 Watt motor can create a no-load speed of 5,500 rpm. It also has a soft start, from a large well-positioned on-off switch, and runs with overload protection. Its 8″ blade can cut to a depth of 70 mm when set at 90 degrees and 50 mm when set at 45 degrees.
Dust is removed efficiently using both a dust collection port at the rear of the table saw and one attached to the blade guard. The latter is part of what Bosch refer to as its ‘click and clean’ system. This also incorporates a transparent blade guard to get a better view of the work in progress. More efficient dust collection is not only healthier in general, but also prevents dust from clogging up the table saw. It also helps to improve efficiency and tool life.
Overall, this is a high-quality table saw, and we consider it the best table saw for the UK market if you are looking for a portable model. It’s very well designed and is engineered for both DIY and professional use.
Did you find this review helpful?
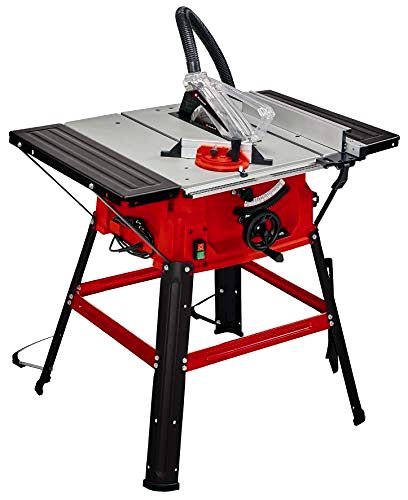
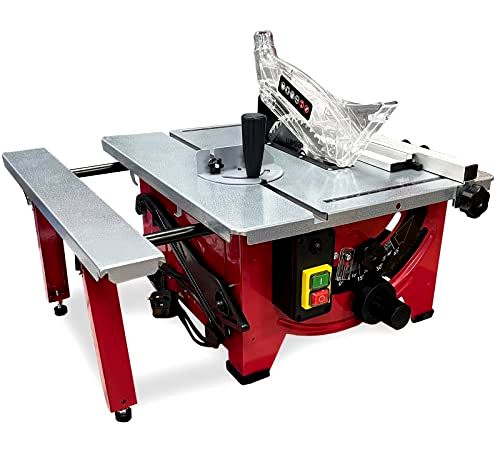
5. Einhell TC-TS 2025/2 U Table Saw[ SAVE 19% ]
Best budget contractor table saw
- The generous 85 mm cut depth means you can run seriously big pieces of timber through it.
- The table size is impressive, especially with the extensions attached. You can easily work with large sheet materials if you remove the rip fence.
- With large rubber feet and a rigid base, this is a sturdy bit of kit. It doesn’t feel like it will rock or tip over easily.
- The dual dust extractor ports work well to keep most of the dust out of the air during use.
- Some users have noted that this is a loud table saw. You should always wear ear defenders, but especially with this beast!
- The saw table could be thicker. It just doesn’t have the stiffness required for perfectly accurate work.
- It would have been a much more flexible table saw if the extensions could fold away. The footprint is a bit too big for a small workshop.
- As the motor housing is made from plastic, it might put off some customers.
- Power
- 1,800W
- No-Load Speed
- 4,700rpm
- Blade Diameter
- 250mm
- Blade Supplied
- 1x24TCT
- Max Cut @ 90°
- 85mm
- Max Cut @ 45°
- 65mm
- Max Table Size
- 913x563mm
- Weight
- 19.2kg
- Build Quality
- 4
- Performance
- 4
- Ease of Use
- 4
- Value for Money
- 4
The Einhell TC-TS 2025 /2U table saw is a well-made, robust quality tool. I think it’s another table saw option to consider when browsing for the best table saw for the UK market.
The top is supported by a sturdy frame with rubber feet. The 563 mm x 583 mm tabletop can be extended both to the left and to the right by another 165 mm to accommodate larger work pieces.
Solid parallel and cross stops help to secure the workpiece in place. If you’re performing cross-cuts the cross stop contains an angle scale of +/- 60 degrees to ensure accuracy. A dual-purpose handle controls both the height and angle of the blade. The blade guard is also transparent to provide greater visibility when cutting. The table saw can cut to a depth of 85 mm when positioned at 90 degrees and 65 mm when angled at 45 degrees.
To minimise the prospect of escaping dust, the blade is enclosed in a metal housing that also includes a chip extractor port at the rear of the saw.
The large on-off button is easy to operate, and the powerful 1,800 Watt motor can generate a no-load speed of 5,000 rpm. The motor features a soft start with built-in overload protection.
The table saw comes with the standard 250 mm (10″) diameter blade with 24 TCT tipped teeth. All in all, this is a quality tool at a very respectable price.
Did you find this review helpful?
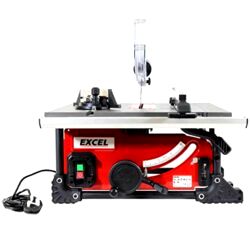
6. Excel Portable Table Saw
Best budget benchtop table saw
- If you have a flat surface to put it on, you can use this bench-top table saw anywhere.
- The dust extractor comes with a universal hose adapter that should fit most small and large size connectors.
- The side extension system is smooth an easy to use. It gives you a lot more working space to play with.
- The mitre gauge sits solidly inside the track with little slop. Compared to some of the more expensive table saws, this was a pleasant surprise!
- There’s no safety “off” switch on the saw. I like it when you can simply hit a big red button to power down, and this saw should have one.
- Some users have found it a bit tricky to set up. It can also take a long time to adjust the blade to cut square.
- I think the two metre power cable is a bit too short. You’ll end up plugging it into an extension cable.
- Power
- 1,500W
- No-Load Speed
- 5,000rpm
- Blade Diameter
- 210mm
- Blade Supplied
- 1x24TCT
- Max Cut @ 90°
- 70mm
- Max Cut @ 45°
- 50mm
- Max Table Size
- 620x550mm
- Weight
- 14.4kg
- Build Quality
- 4
- Performance
- 4
- Ease of Use
- 4
- Value for Money
- 5
Another excellent budget-friendly saw on my list is the Excel 210 mm portable table saw. Doing away with bulky stands, you simply put this table saw on your workbench, and get to work. It’s ideal if you’ve got a small workshop or you want to take the table saw to the job with you.
Making use of a 1,500 Watt motor, this little devil has a decent no-load speed at the blade of 5,000 rpm. It’s the best budget table saw for DIYers on a budget, who still want to achieve good results.
Seeing as it’s a very portable tool, you can forgive the small table size. At just 620 x 550 mm, it’s tiny compared to the Evolution Rage 5S, but it also means you can tuck it away when not in use. If you need that bit more table size, you can slide the bed outwards as well.
The cut depth of 70 mm at 90 degrees isn’t bad when you consider the 210 mm blade size. You can also cut up to 50 mm at 45 degrees. The included mitre gauge runs on a “T-shaped” track and can be swapped out if you have the right fittings.
There’s a clear plastic blade guard on top that you can attach a dust extractor to, and it seems to do the job well. This is a solid but lightweight saw that comes in at just under 14.5 kg. I think it’s one of the best budget table saws for hobbyists, DIYers and light trade use.
Did you find this review helpful?
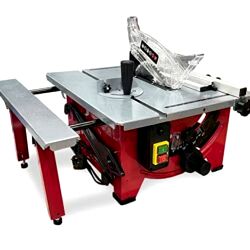
7. Lumberjack BTS210 8" Table Saw
Best benchtop table saw for beginners
- The price. This is the best value benchtop table saw that I’ve seen so far. If you’re just getting serious about woodworking and don’t want to break the bank, it’s a good choice.
- The blade depth and angle adjustments are solid and accurate. It’s easy to set how wide you want to cut a board, and fine adjusting the angle to a specific degree is no problem at all.
- The quality of the aluminium table is excellent. Although not as stable as an expensive cast iron version, the one on this saw is flat and the work slides easily on the surface.
- The small 210 mm blade severely limits the maximum cutting depth you can achieve with this table saw. It will struggle to cut all the way through standard 2” x 4” timbers.
- Several users have complained about the aluminium fence. It’s easy to set, but it’s not hugely sturdy. If you want repeated and completely accurate cuts, this isn’t good enough.
- Thanks to the less-than-perfect instruction manual, putting the table saw together could have been easier. There aren’t many parts, but a few more pictures would help.
- Power
- 1,200W
- No-Load Speed
- 4,800rpm
- Blade Diameter
- 210mm
- Blade Supplied
- 1x48TCT
- Max Cut @ 90°
- 48mm
- Max Cut @ 45°
- 45mm
- Max Table Size
- 630x485mm
- Weight
- 24.0kg
- Build Quality
- 4
- Performance
- 4
- Ease of Use
- 4
- Value for Money
- 5
British tool brand Lumberjack have made a pretty good reputation for themselves with their budget-friendly but hard-working kit. They make all sorts of woodworking kit, but their BTS210 8” table saw is one of their best. It’s compact, relatively easy to set up and feels like a saw that costs a lot more money.
Because this is a benchtop saw, it’s surprisingly compact. It has a brushed aluminium table and features two slide-out sections that increase the overall working size but can still be stowed away when it’s not in use.
It comes with a 1,200 Watt motor that can spin the blade up to a lightning-fast 4,800 rpm. This might be explained by the relatively small 210 mm blade that comes installed on the saw. You can cut to a maximum depth of 48 mm when set at 90°, and 45 mm at 45°.
Adjusting both the height and angle of the blade is accomplished with a pair of wheels, and you get an adjustable fence that can be positioned on both sides of the blade.
Dust collection comes in the form of a clear plastic hood that sits on top of the blade, and you get a decent size push stick that can be stowed away on the side of the saw. There’s a mitre gauge that slides along the table channel, and easy to reach ON/OFF button too. For the money, it’s an impressive saw.
Did you find this review helpful?
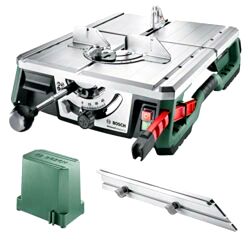
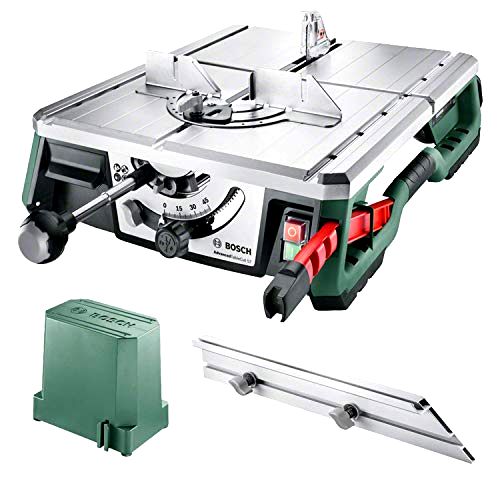
8. Bosch AdvancedTableCut 52 Portable Table Saw
Best lightweight table saw
- The self-lubricating Nanoblade requires no maintenance and should last for ages.
- Weighing just 8.5 kg, this is a truly portable table saw. Compared to the Einhell TE-CC 2025 UF/S, it’s practically a one-handed saw!
- By moving the blade and not the workpiece, you can keep well clear of danger.
- It’s not just light but compact as well. If you have limited space, it’s hard to beat this table saw’s footprint. In comparison with the ParkerBrand PTS-250 it takes up a lot less room.
- The Nanoblade is not great for precision work. It creates a lot of tear-out compared to circular saw blades.
- Some users have had problems with the blade wandering. It’s not as rigid as a circular saw blade and moves about in thicker materials.
- You can’t adjust the blade height. This means you can’t score sheet materials or cut long dadoes.
- To avoid tear-out or blade wandering, you need to saw very slowly. It’s not a practical tool for professional carpenters.
- Power
- 550W
- No-Load Speed
- 8,200rpm
- Blade Diameter
- Nanoblade
- Blade Supplied
- Nanoblade
- Max Cut @ 90°
- 52mm
- Max Cut @ 45°
- 35mm
- Max Table Size
- 637x435mm
- Weight
- 8.5kg
- Build Quality
- 5
- Performance
- 4
- Ease of Use
- 5
- Value for Money
- 4
The Bosch AdvancedTableCut 52 Table Saw is another quality portable table saw from Bosch.
This is a more affordable, lighter, and more compact version of the top-of-the-range Bosch GTS 635-216 table saw featured above. The AdvancedTableCut 52 weighs just 8.5 kg, less than half the amount of the GTS10J.
This noticeably smaller footprint is down to Bosch’s new Nanoblade technology. The traditional circular saw blade is replaced with a saw bar and revolving micro-chain. The saw blades are also maintenance-free.
This revolutionary mechanism minimizes the vibration typically associated with a traditional table saw. It also gives you the option of “pulling” the blade through the fixed workpiece for shorter cuts, rather than pushing the workpiece through with a push stick or riving knife. The pull function is also a great safety feature as it keeps your hands clear of the sawing area.
A large carry handle is built into the machine for easy transport and there is a useful built-in drawer for storing saw blades and other accessories.
This table saw can make vertical cuts to a depth of 52 mm (hence its name). It can also make horizontal mitre cuts of +/- 60 degrees and vertical mitre cuts of 45 degrees.
This innovative design makes the Bosch AdvancedTableCut 52 Table Saw an extremely attractive option for many DIYers and it comes at a very respectable price.
Did you find this review helpful?
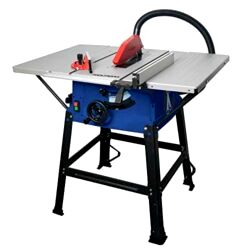
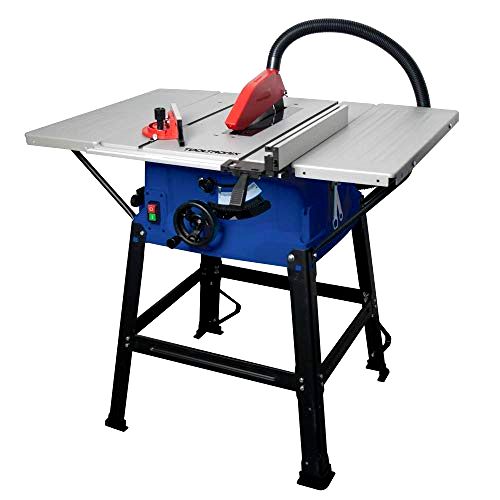
9. Tooltronix PTL-91 Table Saw
Best contractor table saw for beginners
- The 1,800 Watt motor is powerful. It won’t struggle to cut through anything you throw at it.
- The base is nice and sturdy. Large rubber feet help to stop any skidding, and the weight will help keep down vibrations.
- Even though the base is sturdy, you can do away with it and mount it on your bench if you want.
- Some users have had a lot of trouble setting up this table saw. They complained of some missing parts and a difficult manual to read.
- Locking off the guide fence takes a bit of getting used to. Especially when new, it’s a bit stiff and hard to set.
- The included blade isn’t the best quality. You’ll need to replace it if you want to do any fine work.
- It’s certainly not a low-noise table saw. The 1,800 Watt motor is powerful but loud.
- Power
- 1,800W
- No-Load Speed
- 5,000rpm
- Blade Diameter
- 250mm
- Blade Supplied
- 1x30TCT
- Max Cut @ 90°
- 80mm
- Max Cut @ 45°
- 65mm
- Max Table Size
- 1094x478mm
- Weight
- 22.2kg
- Build Quality
- 4
- Performance
- 4
- Ease of Use
- 4
- Value for Money
- 4
Introducing the simple but sturdy Tooltronix PTL-91 table saw. Standing tall on a sturdy frame, you’ll be surprised at the power you can get from its 1,800 Watt motor.
Weighing in at a respectable 22.2 kg, it’s not the lightest table saw on my list. It’s still very portable though, and the 250 mm blade puts out an impressive 5,000 rpm no-load speed.
For the money, I was surprised that it has such a large table size. At 1094 x 487, it has a larger workspace compared with the more expensive ParkerBrand PTS-250. The extending side tables are easy to fit and give you a flexible footprint when space is at a premium.
What really impressed me about this table saw is the cut depth. 80 mm at 90 degrees and an impressive 65 mm at 45. The blade height and angle are controlled with a dual-purpose handle that is made from hard plastic.
There’s a red plastic blade guard and mitre gauge, and you lock off the fence with a quick-release handle. It’s an affordable table saw for DIYers and hobbyists who want to get into woodworking. It wouldn’t cut it on a building site, but for the keen DIYer, it’s a sturdy bit of kit.
Did you find this review helpful?
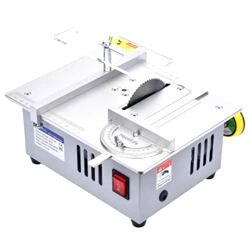
10. NovelLife Mini Hobby Table Saw
Best mini table saw for craft work
- If you’re a model maker, this tiny little table saw will speed up your construction process immediately.
- It’s so simple that there are no clever features that can break down too easily.
- The power supply can be adjusted to change the blade speed.
- Most users have been pleased with the packaging. It arrives well-wrapped and prepared.
- Changing the blade isn’t difficult, but you must undo plenty of screws just to get there. Compared to some quick-change features on my list, this one’s slow.
- You can’t change the blade angle. If you’re planning on making compound cuts, get another table saw!
- The table saw lacks a proper blade guard. The clear plastic “guard” above the blade won’t protect your fingers, concentration is always required.
- It’s obvious that this is a hobby table saw. Don’t try to cut thick materials or push the motor too hard.
- Power
- 96W
- No-Load Speed
- 3,800rpm
- Blade Diameter
- 75mm
- Blade Supplied
- 3x
- Max Cut @ 90°
- 20mm
- Max Cut @ 45°
- n/a
- Max Table Size
- n/a
- Weight
- 1.9kg
- Build Quality
- 4
- Performance
- 4
- Ease of Use
- 4
- Value for Money
- 4
If space is at a real premium or you plan on doing seriously small-scale woodworking, this is the table saw for you. The NovelLife mini table saw is indeed a small bit of kit. It can’t compare to the full-size saws on my list like the Bosch GTS 10J, but for little jobs it’s hard to beat.
Design-wise, this is a quality but no-frills setup. The saw comes in a silver metal and plastic case, with a small table size and no dust extraction hoses in place. You get three different blades for cutting a range of materials, and a clear plastic guard for safety.
Even though the saw blades are tiny at just 75 mm, the 96 Watt motor can spin them up to 3,800 rpm. Not bad for such a small bit of kit. If you want a table saw but you don’t have space for one, this is the best one you’re going to get.
What I like about using this table saw is the mitre gauge track position. It’s set up so that you can use the mitre gauge like a cross-cut sled at 90 degrees. This helps to keep small pieces of material straight and speeds up the cutting process considerably.
It’s lightweight at just 2.4 kg, relatively quiet and it’s amazingly simple to operate. Changing blades is a basic process and can be done by simply unscrewing the top. It must be the best mini table saw for model makers.
Did you find this review helpful?
Harry's Smart Buying Tips
Compare Product Features
Use the dropdown to sort the table by the feature you want to see.
Evolution Rage 5S Table Saw

- 4
- 1,500W
- 2,500rpm
- 255mm
- 1x28TCT
- 83mm
- 58mm
- 1200x640mm
- 28.5kg
Evolution Fury 5S Table Saw
- 4.5
- 1,500W
- 3,250rpm
- 255mm
- 1x24TCT
- 85mm
- 65mm
- 938x642mm
- 20.25kg
ParkerBrand PTS-250 Table Saw
- 4.3
- 2,000W
- 5,000rpm
- 250mm
- 1x24TCT
- 85mm
- 65mm
- 938x642mm
- 22.5kg
Bosch Professional Table Saw GTS 635-216

- 4.3
- 1,600W
- 5,500rpm
- 216mm
- 1x30 TCT
- 70mm
- 50mm
- 658x500mm
- 22kg
Einhell TC-TS 2025/2 U Table Saw

- 4
- 1,800W
- 4,700rpm
- 250mm
- 1x24TCT
- 85mm
- 65mm
- 913x563mm
- 19.2kg
Excel Portable Table Saw
- 4.3
- 1,500W
- 5,000rpm
- 210mm
- 1x24TCT
- 70mm
- 50mm
- 620x550mm
- 14.4kg
Lumberjack BTS210 8" Table Saw

- 4.3
- 1,200W
- 4,800rpm
- 210mm
- 1x48TCT
- 48mm
- 45mm
- 630x485mm
- 24.0kg
Bosch AdvancedTableCut 52 Portable Table Saw
- 4.5
- 550W
- 8,200rpm
- Nanoblade
- Nanoblade
- 52mm
- 35mm
- 637x435mm
- 8.5kg
Tooltronix PTL-91 Table Saw
- 4
- 1,800W
- 5,000rpm
- 250mm
- 1x30TCT
- 80mm
- 65mm
- 1094x478mm
- 22.2kg
NovelLife Mini Hobby Table Saw
- 4
- 96W
- 3,800rpm
- 75mm
- 3x
- 20mm
- n/a
- n/a
- 1.9kg


How to Choose the Best Table Saw
The table saw (aka bench saw, saw bench, saw table or even table saw bench) is an extremely powerful and versatile cutting machine. Most table saws work by using a circular saw blade, driven by a motor, and mounted on an arbor secured with trunnions, protruding through a slot in the saw table top.
Types of Table Saw
There are different types of table saw. The cabinet table saw and hybrid table saw are stationary. A jobsite table saw (aka contractor table saw) rests on a portable stand whilst a portable table saw sits on a benchtop.
Stationary table saws tend to be quieter than portable ones because the motor is enclosed within a cabinet. Stationary table saws use an induction motor and the blade arbor is driven by a belt or pulley system. On portable table saws, the universal motor drive shaft itself behaves as the arbor so vibrations are transmitted back to the unit itself, resulting in greater noise levels.
With portable table saws, you do have to make separate provisions for dust collection. Dust collection ports are built-in, but they need to be hooked up to a standalone vacuum system.
Cabinet Table Saws
Cabinet table saws are the best-engineered, largest, heaviest, most powerful, and most accurate of table saws. These are stationary table saws. They consist of a cast-iron tabletop, most likely with table extensions to each side. The table saw itself sits on top of a heavy cabinet that encloses a belt-driven motor. The cabinet protects the motor and stops dust from escaping. This would be the table saw of choice for a professional workshop and costs many hundreds of pounds.
Hybrid Table Saws
Hybrid table saws are a ‘cut-down’ version of the cabinet saw with similar features. They too are stationary table saws but smaller, lighter, less powerful, and less costly.
However, for most people, the best table saws will be portable ones. These are the contractor table saw (aka jobsite table saw) and the benchtop table saw. They are smaller and lighter than the cabinet and hybrid table saws, but significantly cheaper and much more versatile.
Contactor Table Saws
Contractor table saws are designed with portability in mind and come fixed to a stand, often with wheels. In general, these portable table saws are larger and more powerful than benchtop saws with larger motors and more robust components. Most can hook up extension tables and come supplied with them. They may also come with induction motors and are belt driven, so are quieter and more comfortable to use. In general, the design of this type of table saw is more generic so you can for example swap out fences and mitre gauges and replace them with aftermarket versions.
Benchtop Table Saws
The benchtop table saw is the entry-level saw in the portable table saw market and can be operated from any flat work surface. It does not come with a stand (although you can purchase one separately). Apart from the hobbyist’s mini and micro table saws they are the smallest, lightest, and most portable table saws, and can be carried by hand from one location to another.
To achieve this versatility their components are made from lighter material (the main table top is often made from aluminium rather than cast iron for example), but this does not detract from their durability. The saw table size would obviously be a constraint when attempting to work with larger stock. Unlike contractor table saws table extensions are not really an option with a benchtop table saw.
Also with portable table saws, the saw blade is usually positioned towards the front of the table so there is less room to manoeuvre a mitre gauge for example. Rip fences are usually made to fit the table according to the manufacturer’s specific design so you can’t replace them with more generic aftermarket versions.
Correct Table Saw Blade Selection
Apart from the table, the most important feature of the table saw is the saw blade itself. For vertical cuts, the table saw has a handle to raise or lower the saw blade. For angled (bevelled) cuts another handle can tilt the table saw blade up to 45 degrees to the left or right. A throat plate surrounds the saw blade to ensure dust does not fall past the blade’s edge through the slot in the tabletop to the arbor or driveshaft (if direct drive motor). A blade guard – ideally made of clear plexiglass – hinges to the saw table to protect the user from the table saw blade.
Most table saws come with a generic table saw blade designed to work to that saw’s specification. That may sound obvious but there are so many variations of table saw blades that if you ever wanted to replace one you need to be very sure you choose the correct type. A mistake could not only spoil your workpiece but also cause you serious injury. For example, both table saw and blade are designed to work to a maximum operating speed (rpm). If the former exceeds the latter the centrifugal force created by the mismatch will destroy the saw blade.
Apart from operating speed, the next thing you need to consider is the blade size – specifically its diameter, width, and hole size – to ensure compatibility with the table saw. The most popular blade size is 250mm, equating to a maximum cutting depth of about 80mm.
Next up you need to think about the materials you will be cutting and how coarse or fine you want your cut. For example, a rip blade is more suitable for ripping softer wood. It has fewer larger teeth, feeds more quickly, but leaves a coarser finish. Conversely, crosscut blades have more teeth that are smaller, leave a finer finish but the cut takes longer.
Most of the time however you will want the option of both cuts (and more) and not want to change the blade, so a combination blade is a better choice. This could also be used for cuts into other softer materials. For regular cutting into hardwoods and metals, you would be better off with a blade dedicated to that purpose. For more specialist joinery tasks, such as cutting slots, you would need a dado stack (check the arbor is long enough to accommodate it).
Finally, consider the composition of the saw blade teeth. Steel-tipped teeth are the norm, but for cutting metals tungsten carbide-tipped teeth are more suitable and for brick and masonry diamond-tipped blades are best.
Dust Collection for Lung Protection
The collection and removal of sawdust, debris and any other burr from the table saw is essential to having your table saw run efficiently. A dust collection system also helps maintain the table saw in peak working condition and most importantly keeps it safe. Why keep it safe? Because any build-up of debris coming into contact with a fast-spinning table saw blade will cause friction, heat and eventually the table saw could catch fire.
On cabinet table saws the problem is relatively easily solved since dust collection takes place within the cabinet itself and the dust falls onto a slanting shelf that funnels it into a dust extraction port (usually 4″ diameter) to which a hose is attached. You then just apply suction from a vacuum.
Contractor table saws and benchtop table saws however are obviously not designed in that way. Even though most of their debris will also be diverted into dust collection ports (usually 2½” diameter) onto which you attach a vacuum hose, more sawdust will collect naturally due to the more ‘open’ design of the portable table saw (and fall from the base of the table saw to the ground). So further vacuuming will be required to keep your work area pristine.
Table Extensions for Working with Larger Materials
A table saw extension comes in very useful when you want to work with and support material significantly larger than the original table size. Some table saw extension tables are standalone and need to be attached to the main saw table via supports before use, whilst others come already attached to the table via a hinge or telescoping mechanism.
Safety Features to Look For
Most people consider the table saw the most dangerous of all power tools because you are guiding the material towards the table saw rather than guiding the saw towards the material. You are essentially faced with a thin metal blade with incredibly sharp teeth spinning at thousands of revs a few inches away from your body. The saw blade is your number one enemy! But you also have a number two enemy and that is kickback. Kickback happens when your workpiece binds and buckles during the cutting operation (because it is not correctly aligned) and is then projected at force back in your direction.
To protect yourself you need to take all the safety precautions you can think of!
In this next section, we’ll discuss the most common safety features that are built into or come with the table saw. Then we’ll consider the common sense things you should be thinking about as the operator of this potentially dangerous piece of equipment. If your table saw does not come with the following features maybe you should look for another one that does.
On-Off Switches that Keep You Safe
The On-Off switch is of course an essential item on any electrical appliance but on a table saw there are some extra safety features of the switch to look for.
Since you could often be working with large pieces of material, you’re more than likely to be using both hands. What if you need to hit the power-off button in a hurry? The table saw switch needs to be as large as possible. And with the possibility of no hands-free, you’ll need to engage your knee, so the switch should be as close to knee height as possible. If you’re working with a table saw that sits on a bench, then the knee might not work so your elbow would be the next best (the switch would be higher anyway).
These days, the best table saws come with a magnetic switch. This is a great idea because in the event of a power cut the magnet automatically stops the table saw from starting up when power is restored from the mains supply.
And finally, if the on-off button is recessed behind a protective flap that mechanism protects the button from being accidentally pressed.
Blade Guards Keep Your Hands Away from Danger
A blade guard system is probably the most obvious safety feature a table saw should have. The blade guard sits over the blade and protects your hands and fingers from it. Clearly, the guard should be applied as often as possible but there are times when it does need to be removed. For example, if you are not cutting completely through some material, when you want to change the blade, or when the material has got stuck. ALWAYS PUT THE GUARD BACK AFTERWARDS! Also, try and look for a transparent (as opposed to opaque) plexiglass guard as you have more control and visibility over the cut.
Automatic Braking and Flesh Detection, the Magic Finger Saver
A very clever relatively recent table saw safety feature is the automatic brake. This detects when flesh meets a spinning blade and then stops the blade almost instantly (within 5 milliseconds)! It relies on the fact that wood is a poor conductor of electricity and flesh is a good one. If a small amount of electric current is applied to the blade, that current can be monitored, and if there is a change in the current’s level due to the proximity of flesh, an aluminium brake block is forced into the blade to retract it.
There are a couple of provisos, however. This won’t work with wet wood (since wet wood is a better conductor than dry) and you will need to replace the blade and braking mechanism if the feature is used. On the plus side, you retain your thumb or finger!
Further Safety Precautions
Before you even think about using the table saw, take some time to give yourself the once-over! Check you’re not wearing anything that can get tangled up in machinery, such as loose clothing or jewellery. Always wear suitable clothing. Protect your eyes from dust particles and debris with certified safety goggles. Protect your ears from the high noise levels table saws emit (especially direct drive table saws) with a good pair of ear defenders. Where you can, protect your hands with a quality pair of workman’s gloves. Even protect your head with a hard hat and your mouth with a face mask.
Safety When Using the Table Saw
You’ve read the instructions, right? This is blindingly obvious but if you don’t make time to do this and then proceed to make a rookie mistake you only have yourself to blame! The instructions will also contain a section describing how to keep your table saw in good working order. It should be cleaned from its previous use and the components checked for readiness. If you are using a table saw on a work surface, make sure it is secure.
Set the rip fence or the mitre gauge, position the workpiece against it, offer the workpiece up to the blade and switch on the table saw. Take your riving knife (supplied as an accessory with the table saw) and guide the workpiece through the blade with it. Never use the riving knife to PUSH your workpiece onto the saw blade. It will feed through under its own inertia. Be patient – if you try to force it through it could kick back. One other tip – if you are making a cross-cut do not use the mitre gauge and the rip fence together – that too will result in kickback as the workpiece will bind against the rip fence – so just remove the rip fence.
And that’s it! Follow these precautions and you should come out unscathed!
Table Saw FAQs
The rip fence is a metal gauge that is fixed towards the edge of the saw table and aligned parallel to the saw blade. It acts as a fixed guideline against which you offer up your workpiece when making a rip cut. The more accurately the rip fence is aligned the truer will be the cut. It is particularly important to ensure you are able to fine-tune the rip fence’s alignment accordingly and that the sliding/adjustment/locking mechanisms are smooth, precise and well-machined. If you get this wrong, then the workpiece is likely to bind in the table saw and cause kickback.
In the same way a rip fence acts as a straight edge for rip cuts along the grain, so does a mitre gauge act for cross or angled cuts against the grain. The mitre gauge is made up of a guide and an adjustable half-moon section. The guide sits inside and moves up and down a slot or track in the table surface that is set parallel to the saw blade. The half-moon section pivots on the guide up to an angle of 45 degrees on either side of the vertical.
You select your cutting angle, lock the half-moon section into place, position your workpiece against it and slide the gauge and workpiece together towards the saw blade. As with the rip fence, look for a well-machined smooth gliding mechanism and avoid any play or wobbling between the guide and the slot. More sophisticated versions have an upside-down T-slot profile (instead of a plain slot) to accommodate the guide and provide a tighter fit.
The riving knife is a fin-shaped piece of metal that sits very closely behind the table saw blade. The riving knife is not only designed to protect the operator from the blade, but also to prevent kickback by keeping the two sawn pieces separate as they move past the saw blade, preventing any binding against it.
Anti-kickback pawls are small spring-loaded metal arms attached to the blade guard to which downward-facing teeth are attached. The arms hover over the 2 cut pieces so if kickback occurs the teeth bite into the wood to keep it in place.
Share