Read Reviews
The Best Shed Bases

-
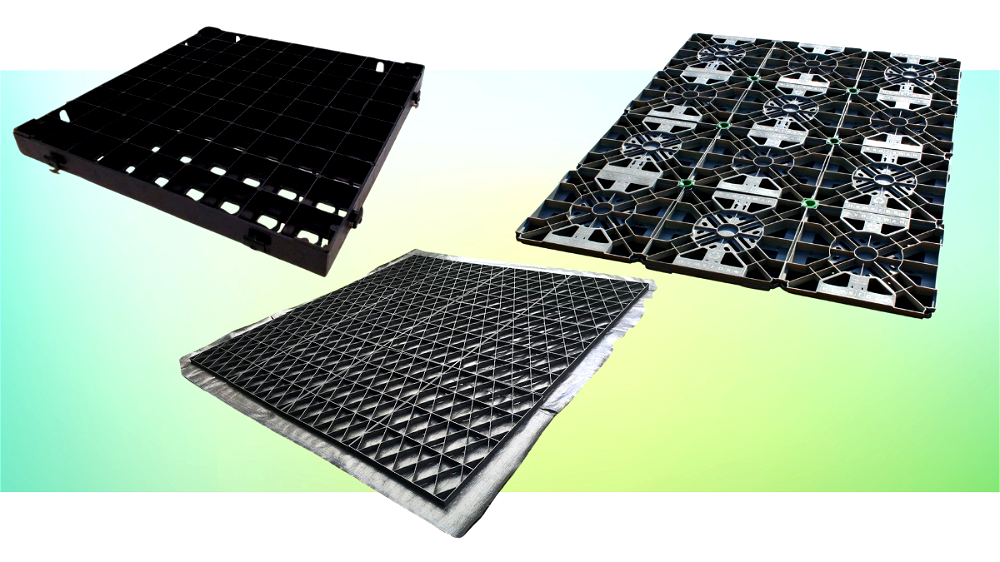
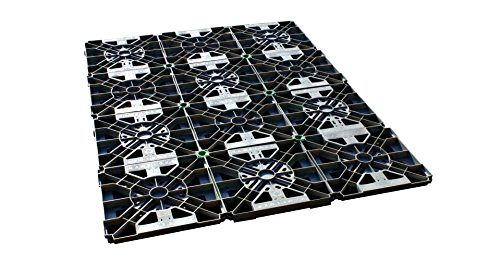
Eco Deck Garden Shed Base
-
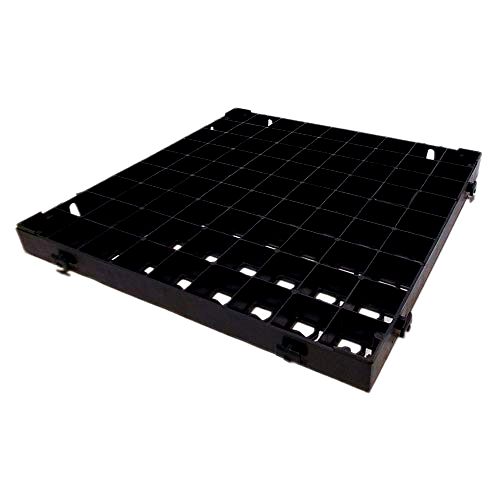
CrazyGadget Garden Shed Base Grid 5 Square Meter
-
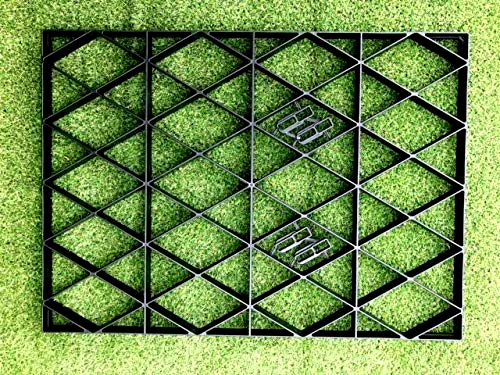
Hawklok Garden Shed Base with Membrane 6 x 4 Feet
Shed Base Reviews
- Creates a very strong base that can withstand a lot of weight even when not filled with gravel
- Comes with a weed membrane included which keeps the base looking tidy
- Grids are made from 100% recycled materials
- Fits well as a base for an 8 x 6 ft shed (2.4 x 1.8 m)
- Grids are larger than average which makes them easier to work with
- Ground underneath will need to be flattened before installation
- Instead of slotting together, the panels need to be connected together with clips
- Some users have opted to use cable ties to secure the squares together instead of the included clips to make installation easier
Eco Deck is a company based in the midlands, and their strong Garden Shed Base is made from UV-stabilised recycled polyethylene. In testing they claim that even unfilled it can withstand over 150 tonnes of force, and in practise it seems both strong and durable.
This particular option measures 2.4 x 1.8 m (8 x 6 ft), although other sizes are available, and is suitable for acting as the foundation for similarly sized sheds. It can either be used for sheds of the same size, which are relatively standard as sheds go, or smaller models which will leave a parameter of base visible around the shed.
It creates a flat, level foundation which is unnoticeable within the shed itself, creating a way for water drainage and ventilation to benefit the structure.
Overall, assembly is relatively easy, and it comes in separate squares that need to need to be clipped together. Clips come included to make this possible, as the pieces aren’t interlocking, but many people choose to use heavy-duty cable ties instead to make the process easier. One of the most challenging part of the process can be levelling the ground in the first place before setting the grids in place.
A sheet of weed membrane is also provided, to stop weeds from growing up under the base. Although it’s not 100% necessary to use gravel to fill in the grids, and some people choose not to, the weed membrane helps keep the base appearance tidy either way.
Not only is this a useful product for sheds, but it can also be used to make paths that are suitable for wheelchairs, pushchairs, mobility scooters and even cars, so it’s one of the best shed bases in terms of versatility and functionality, with a wealth of uses around the garden.
Overall, this is an easy option that is a lot quicker, and more environmentally-friendly, than using concrete. The grid is sufficiently strong without being filled that it doesn’t have to be used with gravel, but both options are available.
Did you find this review helpful?
- Conforms to slightly unlevel ground
- Easy to connect the grids - simply interlock together
- Can be strong enough for driveways as well as sheds, and will withstand the weight of a car if installed correctly
- Grids are relatively easy to cut using a jig saw so they can be fitted to any awkwardly shaped sheds
- One pack (consisting of 20 squares) is enough to fit a standard 8 x 6 ft (2.4 x 1.8 m) shed
- If the grids aren’t properly filled then their strength may be compromised
- No membrane included so a separate purchase will be required to prevent weeds growing through into your hedge
This CrazyGadget Garden Shed Base gains a spot on this list as one of the best shed bases because it is relatively inexpensive but offers good value for money. 20 plastic grids come included, which connect together to make a secure base of 5 m²; this is a larger coverage area than the other products on this page, yet the price stays low.
The overall quality may not quite be as high as with the Eco Deck base, and you don’t get peace of mind of buying a product made from recycled materials, but it still works well as both a shed base or pathway.
It seems that the strength of these grids is greatly improved by packing them with sand, gravel or soil, and when installed correctly they can form a strong foundation for both wooden and plastic sheds.
Installation is relatively straight forward, though the ground needs to be levelled first which can be the most time-consuming part. Care needs to be taken not to force the tabs when fitting the grids together as well, as they can be prone to breaking.
The main disadvantage of this shed base is that it does not come with weed membrane, so you’ll need to find one of the appropriate size to purchase separately, in order to prevent weeds from growing up through the grid.
Even so, it still remains a good value purchase that will create a good foundation for the shed, you just need to make sure that you follow the instructions to make sure it’s as strong as possible.
Did you find this review helpful?
- Once the ground is leveled, laying out the membrane and clipping it together should take less than 30 minutes
- Can be cut to size using a saw if necessary
- Does not need to be filled with gravel
- Made from recycled plastic
- Ground must be level before laying this base
- Not large enough to provide the base for a 8 x 6 ft shed (2.4 x 1.8 m)
If you don’t want to worry about using gravel to help drainage, this Hawklok Garden Shed Base is self-ventilating and free draining. It’s not necessary to use any gravel, and it’s therefore likely to save both money and time.
Overall, this is a simple product that works effectively for its intended function. Although not the cheapest, it comes with a weed membrane included and is straight forward to clip together.
Given that it isn’t necessary to fill with gravel, it’s one of the easiest shed bases to move and reposition, making it possible to change the location of the shed in barely any time.
Putting the grids together can take as little as 10 minutes, and will be easily completed in under 30. Like most shed bases, it needs to be installed over level ground and this is the part of installation that can take the most time.
The grids are made from 100% recycled plastic, similarly to the Eco Deck base, making this a relatively eco-friendly option.
All in all, it’s an easy shed base to install, taking very little time to lay out the membrane and click the grid pieces together. It’s a simple, eco-friendly, cost-effective alternative to laying a concrete or wooden base, and one of the best shed bases for keeping the shed ventilated and free of damp without having to use gravel.
Did you find this review helpful?
How to Choose The Best Shed Base
The Benefits of a Shed Base
Why use a shed base in the first place? Here are some of the main reasons:
- Using a shed base can extend the life of your shed by protecting it from damp and subsidence. Having invested several hundred pounds in a new shed, it’s worth making sure that it will last as long as possible – so don’t skimp on the base!
- Without a base, water can cause damage. Wooden structures soon begin to rot when in constant contact with damp earth and metal structures will likely succumb to rust very quickly. Even if the exterior of a plastic shed can withstand being in contact with a damp surface, tools and items inside the shed will likely be affected by damp.
- Similarly to the point above, shed bases help with air circulation. Making sure that moisture doesn’t get trapped inside the structure is very important.
- If you don’t use a base you may find that the soil moves and your shed does not stay level. This will cause the building to warp, and doors and windows will become distorted, eventually failing to open and close properly.
Different Shed Bases
Traditionally, sheds have been constructed on bases made of concrete poured over a sub-base. Nowadays, there are a lot more options available. Whilst some people still use concrete, others opt to lay a paved area, use plastic grids, or build a wooden frame. So, which option makes the best shed base?
Concrete
Concrete has often been a popular choice for shed bases because it creates a very solid, flat surface and keeps insects out. It can take a lot of weight if installed correctly.
However, it’s not as waterproof as you might initially think – concrete is porous and this means that water can absorb into it. If a wooden shed is in prolonged contact with concrete, it may rot overtime. The likelihood of damp can also be increased. Additionally, concrete will also be prone to crack if the absorbed water freezes and expands.
The permanent nature of concrete is both a blessing and a curse – it won’t require a lot of maintenance, but if you want to move your shed, you’ll be stuck with a concrete plinth in the garden.
You’ll likely want to get a professional in to do the job, if you go for a concrete base. This will give you the best chance of laying the concrete in a way that ensures it won’t crack and is as strong as possible.
Concrete can also be quite expensive, even without professional installation, so it definitely isn’t the most budget-friendly shed base material.
Finally, many people have been put off concrete in recent years because it creates a lot of CO2. In fact, around 5% of the world’s total CO2 emissions come from the making of concrete. So, it’s becoming something that a lot of people are looking to cut back on.
Paving Slabs
Using paving slabs as a shed base can create a level and structurally-sound foundation. However, the process of laying slabs can be tricky, especially if you’re not familiar with how to do it.
You will need to dig an area to place the slabs in, making sure the ground is completely level. The process will likely require the use of cement; to create a really water-tight finish, you’ll need to point the slabs (fill in the gaps with mortar and cement), which means that this isn’t necessarily a very eco-friendly option.
Simply placing slabs on the ground and then putting your shed on top will spell disaster in terms of damp. If you want to use paving slabs as a base, it’s better to go to the effort of doing it properly – otherwise it’ll only end up costing you more in the long run.
Plastic
A plastic shed base is an effective, low-cost, easy-to-install option. Some people don’t like plastic because of how it looks, but it can be quite well disguised by filling it in with gravel.
Using plastic grids might not sound environmentally friendly, but it’s actually one of the more planet-conscious options – a lot of manufacturers make their grids from recycled materials. If you make sure that this applies to the plastic base that you purchase, it can really cut down on the carbon footprint.
It’s also important to make sure that the plastic base comes from a reputable company that customers have shown their satisfaction with. The biggest disadvantage of plastic bases is that they can crack under heavy weight (like the weight of a shed) if they’re not made strong enough. Therefore, checking reviews to make sure that other customers haven’t had this experience is a very useful tactic.
In terms of installation, a plastic shed base can be assembled easily, and normally takes just minutes to put in place (as long as the ground underneath has been levelled first!). They can be laid on grass, sand, or pea shingle, eliminating the need for expensive excavation, concrete pouring, or constructing a wooden base. Plastic bases come in the form of interlocking grids which simply clip together.
Some people choose to strengthen the connections of the base further by using cable ties.
The nature of the grids means that they work well to provide drainage and ventilation around the shed, keeping it elevated off the ground. You may need to use gravel to improve drainage, although some companies are confident that their bases provide sufficient drainage without. Plus, you won’t need as much gravel as you would if you made the base out of a wooden frame filled with gravel.
Wooden Frame
To create a wooden frame as a shed base, you will need to construct a wooden boundary, and then fill it with gravel.
A wooden frame offers good drainage and is relatively environmentally friendly (just make sure the wood is responsibly sourced and FSC approved). Whilst not as easy to put together as a plastic base, wooden frames can still be assembled by most people with basic DIY skills.
Seeing as the shed will sit on top of gravel, any water will easily drain away from the structure. Therefore, a wooden base is pretty good at stopping damp or rot becoming an issue in your shed.
Compared to using a plastic base filled with gravel, with a wooden frame you will need to purchase a lot more gravel to ensure there is enough to create a really firm base. This is also where wooden bases can run into difficult; if insufficient gravel is used, it will shift and won’t offer a stable support for your shed. Therefore, it’s important to make sure the wooden frame is sufficiently filled.
Wood needs to be treated to protect it from insects and rot; therefore, there is some maintenance involved in having a wooden base. You will need to treat the wood before laying it, and continue to do so every year.
Installation with a Weed Membrane
Damp-proof weed membrane should be placed between the ground and the shed base.
This adds another effective layer that will protect your shed against damp.
The more distance you can put between your shed and the ground, the better. Damp-proof membrane creates an effective barrier between the damp of the ground and the base of your shed.
This weed membrane will also stop weeds and grass from growing in this area, which is highly beneficial. If weeds and grass grow under the shed, this will make the area damp which can ultimately cause rotting, rusting, or other damage.
Measuring for Your Shed Base
Check the measurements of your shed and allow for a little extra when choosing the base, this will help ensure proper drainage and ventilation.
For the most part, it’s a good idea to leave at least 30 – 40 mm extra room on all sides of the shed, but you can leave more. Not only will this extra space help with rain run-off, it will also allow a little room for error.
If using a plastic base, you will likely also want to purchase weed membrane (unless some came included).
Again, you should buy slightly more membrane than the size of the space. You’ll want it to cover any edges so as not to leave any gaps. It’s always better to buy more membrane and trim it than not have enough. You may even use a double layer.


Share