Watching the birds in the garden while I eat my breakfast is one of life’s great pleasures, if you ask me.
To attract more British songbirds to my little patch of green, I thought I’d build them a bird table.
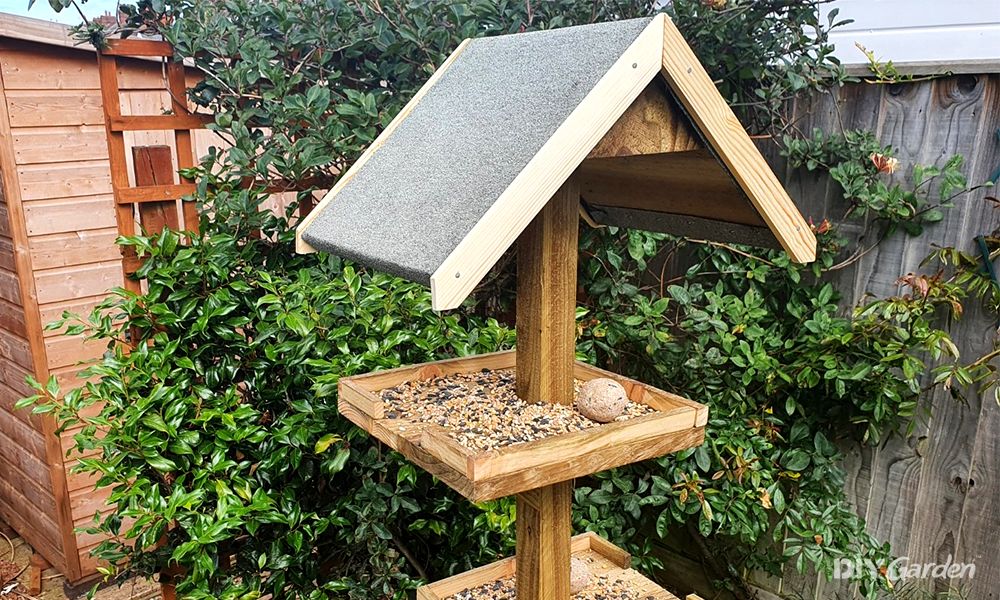
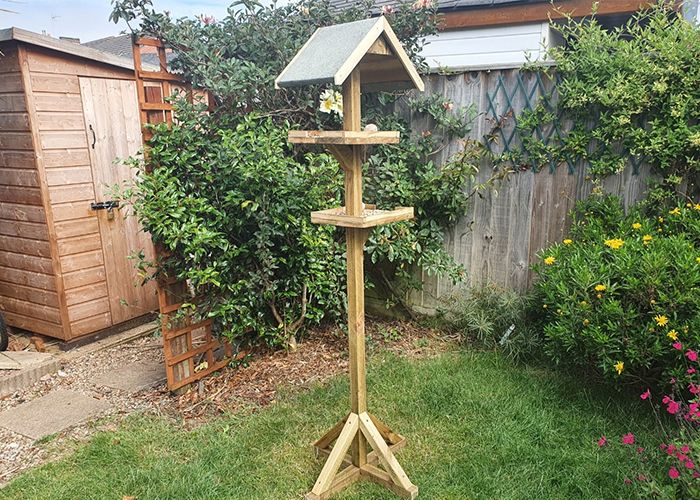
This guide will give you a step-by-step plan to make your very own dual platform bird table.
I’ve included all the tools, materials, and fixings you’ll need to get to job done too.
Planning the Bird Table Build
I started off by doing what all serious DIYers do when they start a new project. I watched videos online, scoured the far corners of the internet for bird table plans, then threw it all out and made my own!
Because I wanted this to be a simple build that just about anyone could attempt, I opted for a straightforward but interesting design. That meant no difficult joinery to do or expensive woodworking equipment to buy!
You only need to be able to make straight and 45° cuts. Both of which you can achieve with the handle of most panel saws. I used my mitre saw, but most of this project is perfectly doable with simple hand tools.
I opted for a simple design that was still a bit interesting but also easy to keep clean. The whole thing was made from 50 x 50 and 150 x 22 mm treated timber, except for a bit of trim that I had laying around.
The best way to make this bird table is to cut all the pieces to length, sand then weatherproof them, then put it all together like a big jigsaw puzzle! It’s a project you can complete by yourself. The longest waiting time is for the glue to cure, so it’ll take a couple of days to complete.
Tools You’ll Need to Build Your Own Bird Table
- A combination drill driver
- Pencil and speed square
- Tape measure
- Hammer
- Tenon saw and mitre box (a mitre saw and jigsaw are great but not necessary)
- A few clamps
- Sandpaper (a powered belt or random orbit sander would be helpful)
- Staple gun for the roofing felt
- Craft knife
Materials You’ll Need
- Treated timber- 50 x 50 mm and 150 x 22 mm, a couple of lengths of each
- Wood strip- 30 mm wide to cover the roof edges, at least a couple of metres
- Outdoor rated wood glue, at least 250 ml
- Wood preservative (I used boiled linseed oil)
- Decking screws- 75, 50, and 40 mm long, a handful of each
- Stainless steel nails- 25 mm long, at least 26 of them
1. Building the Bird Table Platforms (and Part of the Roof)
Making the table parts of this bird feeder was straightforward. Letting the size of the material decide the dimensions, I cut down eight pieces of the 150 mm wide timber to 300 mm length.
Placing two of these pieces side by side made a 300 x 300 mm square, an ideal size for a feeding platform and either side of the pitched roof.
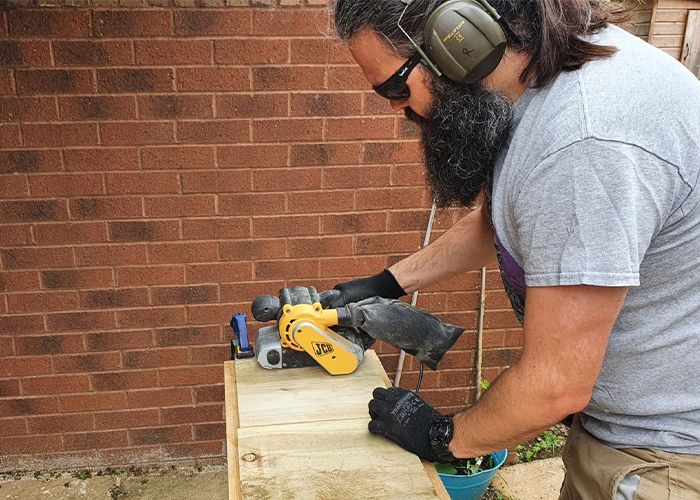
The next step was to join the boards together, but as the treated timber I bought was pretty rough, they needed some work before they could be glued up. If I had a jointer or a planer, I would have run them through there, but I don’t.
I used my belt sander to remove the roughest bits and finished off with some sandpaper wrapped round a square piece of scrap timber. You don’t need a powered sander, but it does make the job much quicker.
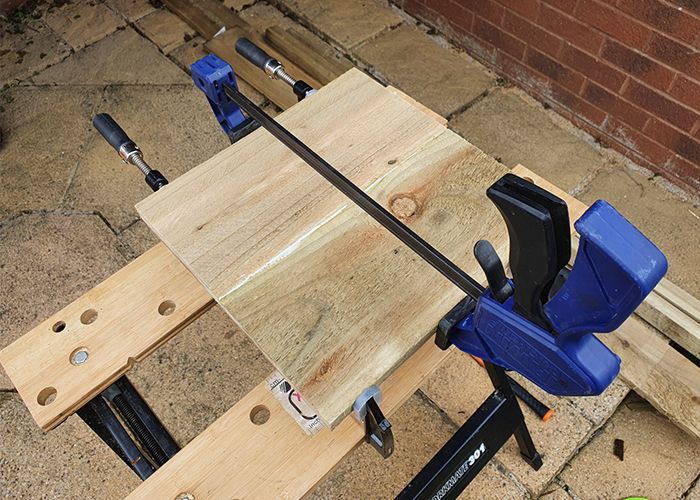
Once the faces were straight enough, I spread outdoor rated wood glue along each face and brought them together on a flat surface. Using three clamps (you can never have enough clamps, trust me) on both sides of the wood, I left them to cure.
Once fully cured after leaving them overnight, I sanded them down until they were reasonably square and flat then gave them a liberal coat of boiled linseed oil.
2. It’s All About the Base
Making sure that this bird table was stable meant building a strong and heavy base for it to stand on. This meant using the simplest type of joint I could think of- the cross lap.
There are many ways to skin a cat, and twice as many ways to notch out a piece of timber. You could use a hand saw, a router, a circular saw, or a table saw to carry out this task.
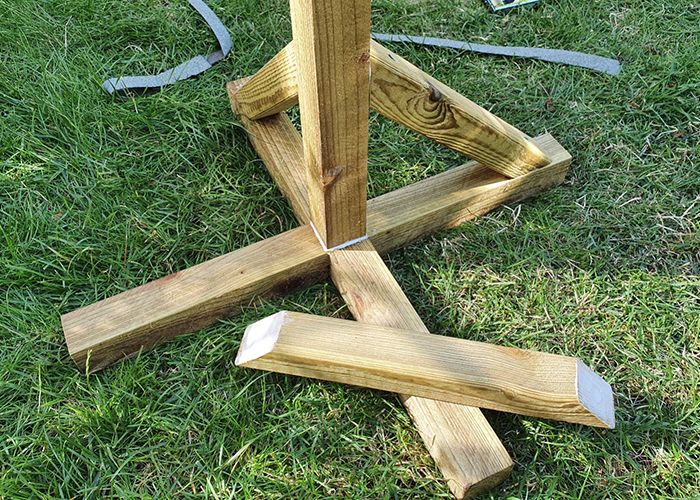
To make the cross lap, I chopped a piece of the 50 x 50 mm timber into three, leaving two 600 mm pieces to make a cross-shape.
I found the middle point on each piece and made a mark with my pencil and square. On the 50 x 50 timber this was 25 mm from the edge. I then laid the other piece across it at a right angle, again using the square, and marked where it laid.
Repeating this step on both pieces, I then measured down 25 mm to the mid point and marked that too. Shading in the part that needs to be removed helped to avoid any mistakes here! I highly recommend using a sharp pencil and a ruler to get this as accurate as possible.
Once marked out, I used the ruler again and carefully scored along the edges with my craft knife. This helped to break some of the wood fibres and made for a more accurate edge.
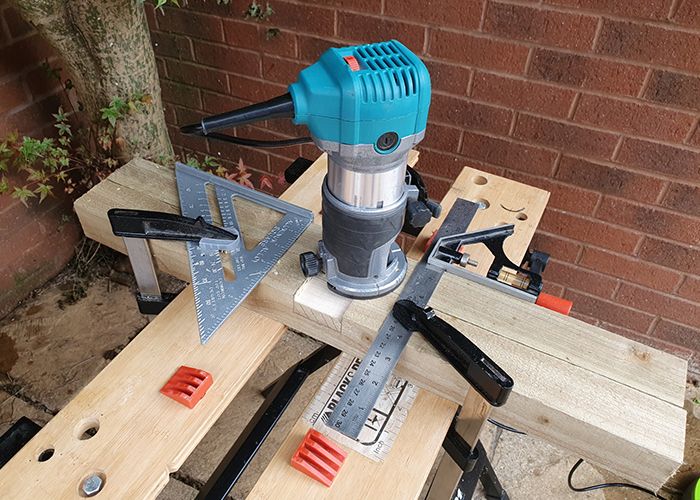
I decided to try out two different ways of notching out the timber. I used my router with a straight cut bit to cut one notch by making several passes, dropping the bit down by a few millimetres each time.
For the other notch, I decided to do it the old-fashioned way. Using a small tenon saw I cut vertically down to the line, then used a hammer and chisel to knock out the waste.
Cleaning up the notch with sandpaper wrapped around some square timber finished the job slowly, but accurately. This works for either method. Honestly, the saw and chisel method are almost as quick, and creates a lot less mess! Try it out.
It’s a good idea to cut your notch slightly smaller than it needs to be, then widen it for a tight fit. Always remember when working with wood – you can take it away but you can’t put it back!
I slapped some exterior wood glue on to all the faces that would touch, then drilled a pair of pilot holes through both pieces in the middle of the cross lap, for attaching it to the post later.
3. Building Belt and Braces to Strengthen the Base
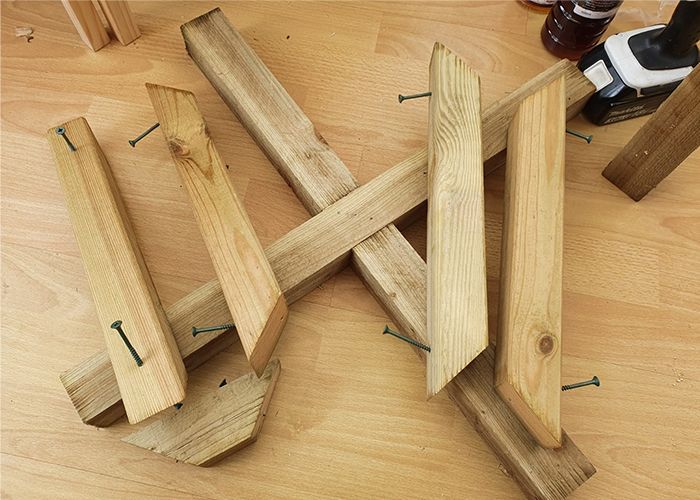
The next job was to strengthen up the base, platforms, and roof with braces– all cut at a 45° angle on each end.
Using the 50 x 50 timber, I made four small braces that were 150 mm on the long side and 50 mm on the short side. Two of them to hold up the platforms and two to go on either side of the top of the post to hold the roof on. These got a pair of pilot holes in each end and a 50 mm screw started in each.
Next up, four big braces for the base. These ones were cut at 350 mm on the long side and were ready to attach to the post with more 50 mm decking screws. I drilled pilot holes and started the screws in these too.
4. Putting a Roof on It
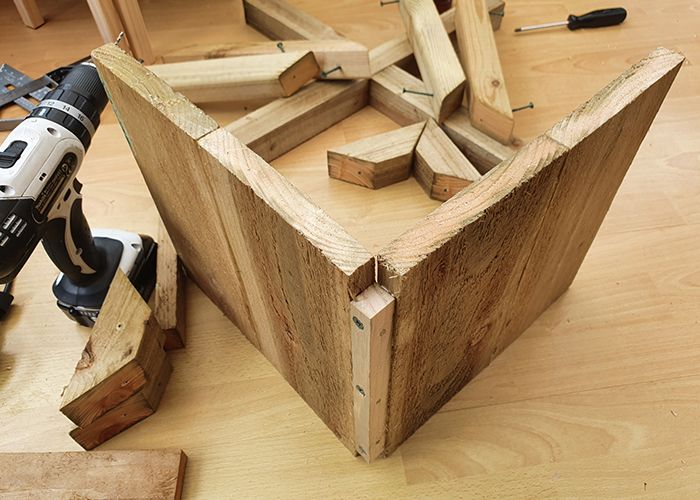
Any self-respecting bird table has a roof on it to keep out the worst of the weather. I used my second pair of 300 x 300 mm panels (made from two pieces of the 150 mm timber jointed together) to make a simple 45° pitched roof.
I glued then screwed a 22 x 22 mm strip of timber that I’d cut down to size on to one edge of one of the roof panels. I then glued and screwed the other roof panel using 40 mm decking screws onto the next face of the timber, making a right angle.
The strip of wood became the roof ridge, but for some reason I’d made it too short. I glued a couple of pieces of scrap onto the ends to complete the ridge all the way across the roof. Avoid this by making your ridge piece span the whole 300 mm long roof in the first place!
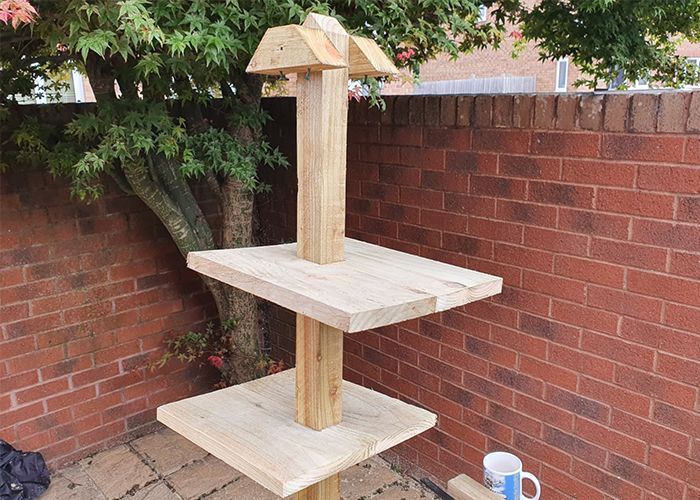
5. Making the Platforms Fit the Post
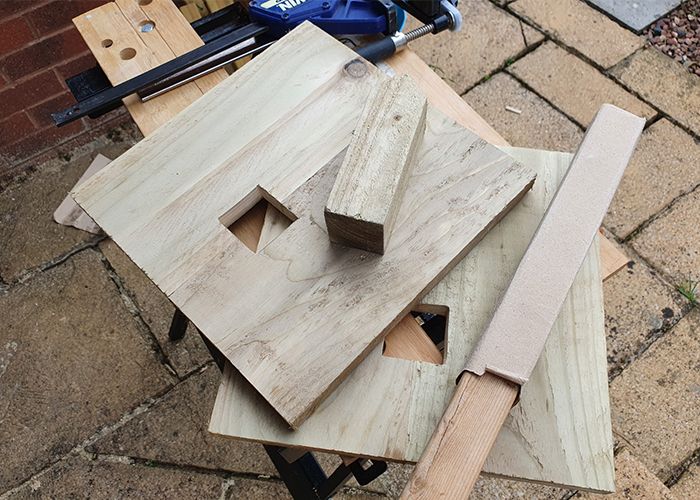
The next job was fitting the dual platforms to the post. Keeping things simple but interesting, I decided to cut out a square hole in each square platform. Making them just big enough to slide down over the main post was easy but took a bit of time to get right.
I used the line where the two pieces of timber had been joined together to find the centre of each platform. I then measured 100 mm in from the edge and traced round a scrap piece of the 50 x 50 mm timber as a template.
I drilled out all four corners and used my jigsaw to cut the square hole. You could use a chisel for this job; it works just as well, if a bit slower. Then it was just a case of wrapping more sandpaper round a square bit of timber and widening the hole until the 50 x 50 post just passed through.
6. Putting a Lip on the Platforms
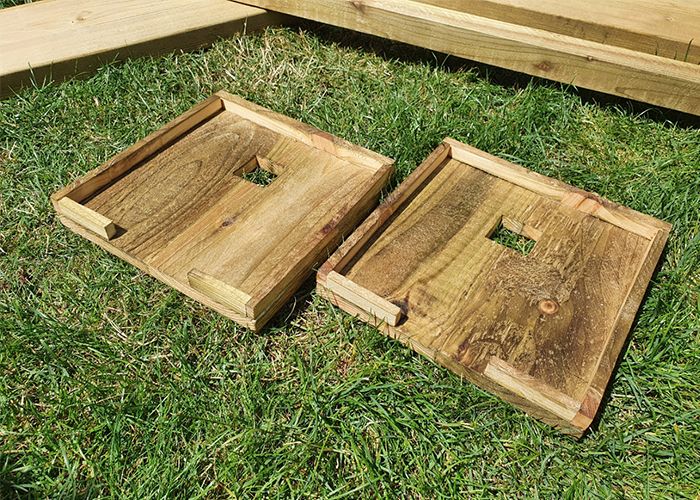
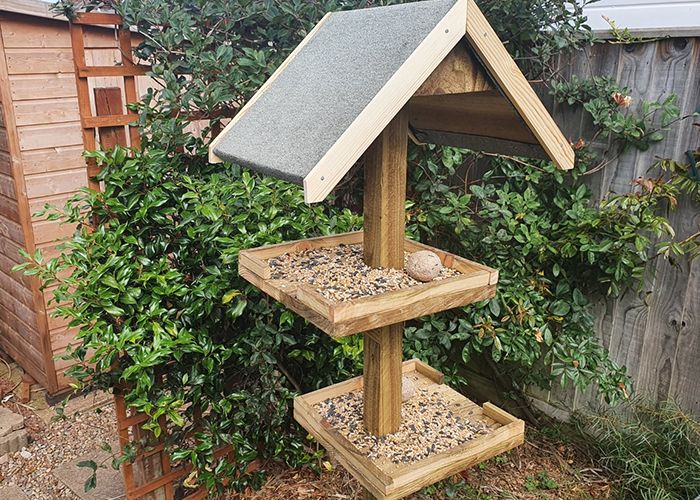
A flat topped bird table is pretty useless. Your carefully placed bird seed or bread crusts are soon scattered across the garden! I decided to glue a lip around the outside of both platforms but left a gap on one side to make sweeping out easy.
I cut down a piece of the 150 mm wide timber into eight strips 300 mm long and around 20 mm wide on the mitre saw. You could do this with a hand saw, but it would take a while! I arranged them around the perimeter of each platform, leaving a small gap for rain water to get out, and glued them down.
I wanted to leave a gap in the front of each platform so I could sweep off any old seed or bird deposits off easily. To leave a 100 mm gap in the middle, I cut down four of the strips to 85 mm and glued them on.
I used clamps and weights to help the glue take hold. I considered using screws or nails, but the strips were a bit thin, and I worried I’d split them. A decent blob of glue seemed to do the trick!
7. Building the Main Build Table Post
Fitting a square topped post onto a 45° pitched roof took a bit of thinking. I cut the end off the post at a 45° angle, then marked the centre and cut 45° across in the other direction to make a nice pointy end.
Using two of the small 150 mm long 45° braces, I glued and screwed them on to the top of the post. By positioning them underneath the pointy end of the post, the roof pitch was matched, and I had four screws ready to attach the post to the roof.
To hide the braces that held the roof together, I cut out a pair of triangles on the mitre saw measuring 180 mm on the long side, and 130 mm on the other two.
I cut down the overall length of the main post to 1800 mm. You can make yours shorter or taller if you want, it depends on how much timber you have left!
8. Sanding and Oiling
This is probably the most boring, but completely necessary, part of any project. The treated timber I bought was rough, so it needed sanding. I attacked every piece with my belt sander and sanding block to improve the fit and finish.
Next up was oiling every single piece of timber in the whole project. I used boiled linseed oil. I like how it goes on with a rag, it provides a good level of protection, and because it’s usually pretty cheap.
Even though sanding and oiling every bit of timber isn’t exactly a rollercoaster of fun, it’s an important step if you want a bird table to last for more than a few months outdoors.
9. Felting the Bird Table Roof
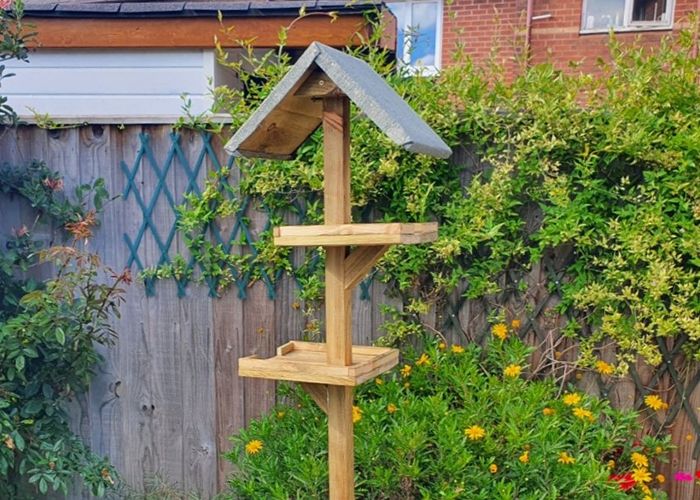
I had a piece of roofing felt left over from my shed, so I decided to use it on my bird table. It’s not vital and you could get away with a plain wooden roof, but I liked how it looked and it added an extra layer of protection for the timber underneath.
I laid out the scrap of felt on the floor and put the roof section on top upside down. Using an old pair of garden secateurs, I cut the piece to roughly 400 mm wide and 700 mm long to cover the roof. I stretched it out to the corners, folded over the ends and stapled them in place.
Trying my best to create hospital bedsheet corners, I folded the roofing felt over at the ends and put a nail through the folds to hold it tight.
Once it was fixed in place, I worked along the edges with some 25 mm long stainless steel nails. Tapping them in helped to pull the roof covering tight and made the roof look good. Don’t be tempted to hammer these nails through the width of the board as they’ll poke through to the other side!
To hide the nails and make the roof look a bit prettier, I used a strip of 30 mm wide wood as edging. Cutting them at 45° on the top end meant they fitted together at the ridge and then cutting two 45° angles on the bottom end neatened it up.
10. Assembling the Bird Table
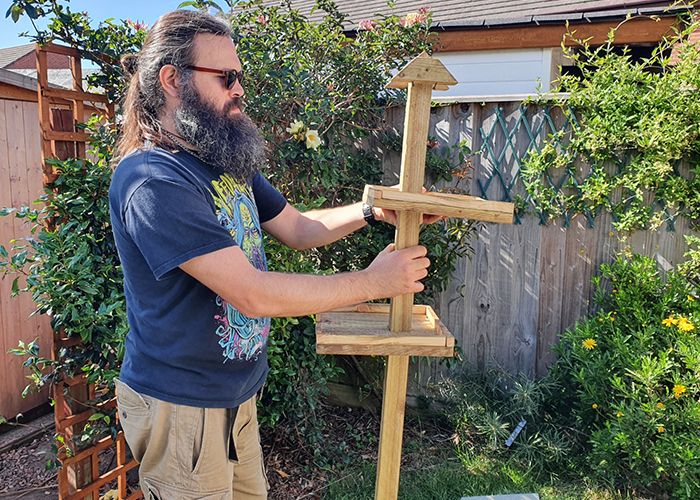
Now that all the components were sanded down and oiled, and all the pilot holes were drilled with screws started in the holes, it was time to put this thing together.
I should have fitted the base piece first and then feed the platforms on from the top down. Don’t do what I did and glue and screw the small braces on the top of the post first!
I fed the platforms onto the post so that they faced away from each other and were in line with the roof pitch. I didn’t fix them in to place just yet as I still needed to glue and screw the base on.
I used my speed square to help line up the base piece with the post. Spreading plenty of glue onto the bottom of the post, I held it in place and drove two 75 mm screws up from the bottom of the base.
Next, I glued and screwed the four big braces from each side of the base piece into the post. I slid them around a bit until both 45° faces were flush and drove the screws home. Now that that base was solid, it was time to fix on the platforms.
I played around with the heights of the platforms until they looked about right. The measurements I settled on were 200 mm from the bottom of the roof to the top platform, then 300 mm down to the bottom platform.
Gluing and screwing the small braces on to the bottom of both platforms was straightforward. I’d recommend screwing into the post first, then bracing the platform before driving in the other screw. The 45° cut on the braces meant that the platforms were both relatively straight and didn’t need any more levelling.
On to the roof piece! I placed it on the top of the pointy post with the two small braces attached. Measuring about 80 mm from each side centred the roof piece. Bracing the roof from above, I glued all the touching faces then drove home the four screws up into the roof.
Putting on the Finishing Touches
Now to add the triangles that hide the roof fixings. I spread glue along the two 130 mm long sides and used the 45° angle on the other to wedge up inside the roof. Holding it in place, I then hammered in a couple of the 25 mm nails to hold it fast.
Last part. To hide the nails in the roofing felt edges and finish off the bird table, I glued on the 30 mm wide edging strips. The glue held them in place, then a couple more 25 mm nails made them solid.
Finished! It was time to stand back and drink yet another cup of tea. Oh, and to pop to the garden centre for even more wild bird feed…
P.S. Of course if all this sounds a bit beyond your capabilities, it might be worth checking out our best bird table recommendations here!