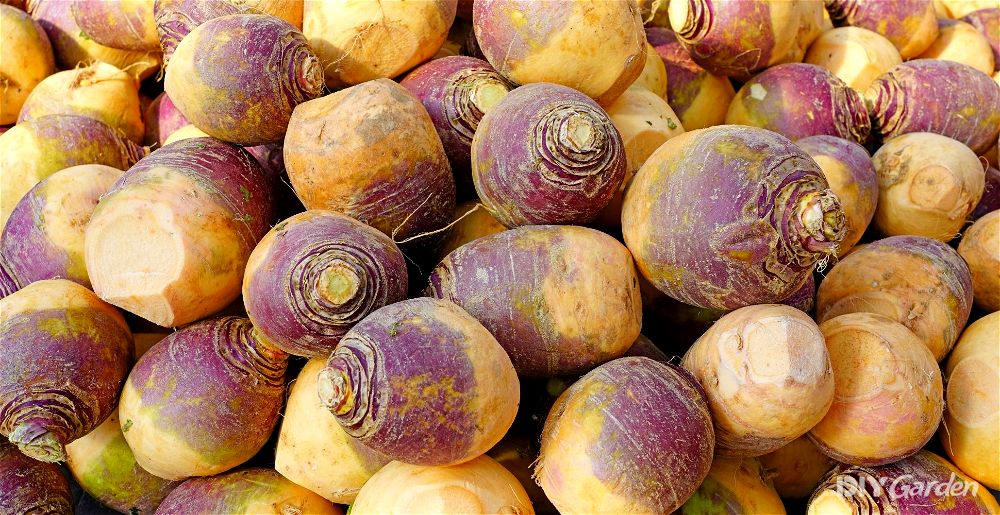
Also known as rutabaga, a swede is a cross between a cabbage and a turnip. It’s a cool-weather crop that can be harvested through the winter, giving you a sweet and nutty root vegetable to enjoy when not much else is growing in the garden.
Growing Swedes: A Quick Snapshot
When to Sow – Apr-Jun
When to Plant – May-Jul
When to Harvest – Sep-Jan
Average Yield per Plant – 600g
Spacing – 20cm
Depth – 2cm
How to Grow Swedes at Home
Although a member of the brassica family, swedes are grown for their delicious roots, rather than their leaves. Many confuse them with turnips, and although the two are related, swedes are much sweeter and hardier, and can be harvested later in the year. Experienced gardeners would also say that swedes are easier to grow, so long as you’re able to give them the right conditions.
Growing Requirements for Swedes
Swedes do best when planted in an area that receives full sun. While they’ll tolerate partial shade as well, too much shade will result in an excess of foliage and very small roots.
Swedes also require plenty of moisture as they grow, meaning that their soil needs to be well-draining. Soggy conditions will cause the roots to rot.
While a rich soil containing plenty of organic matter is what you need for growing the tastiest swedes, you’ll need to also turn your attention to pH if you want to maximise your yields. Your soil should ideally be at a pH of between 7-7.4 – anything too acidic will result in your plants developing club root, which swedes are very susceptible to.
How to Grow Swedes from Seed
Swedes need a growing season of about 4-6 months before the first frost of the autumn hits. While starting your seeds off indoors can help to give you a head start on this, this crop also does well when direct sown outdoors in late spring, especially if you live in a warmer region.
One other thing to keep in mind is that, unlike most other brassicas, you don’t need to successionally sow swedes. Once mature, they’ll keep in the ground for quite a few months, so you can go ahead and sow all of your swede seeds at the same time.
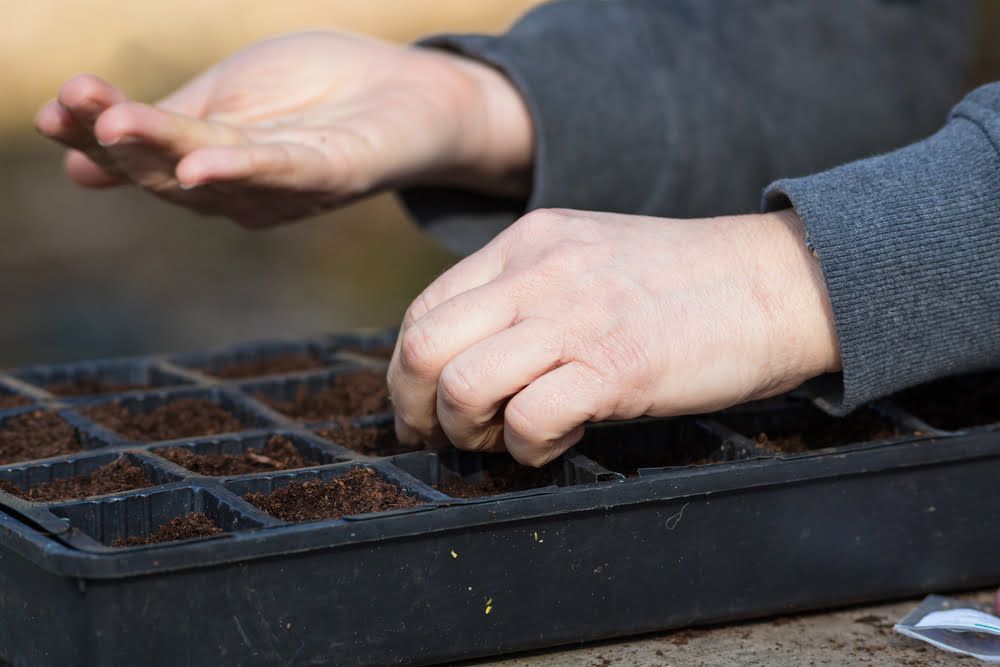
How to Sow Swedes in Module Trays:
- Fill your module trays with a multi-purpose compost
- Water the compost, making sure that excess water drains away from the bottom. Remember that swedes hate to be waterlogged!
- Make an indentation in the centre of each module, about 2cm deep
- Place a swede seed into each indentation and then cover back over with compost
- Lightly water once more to settle the seeds in place. Then, move your trays somewhere warm. A minimum of 7°C is needed for germination, although your seeds will get going a little faster if you can give them some extra heat
It takes about 12 days for swede seeds to germinate. Once you notice seedlings emerging, move your trays somewhere bright to ensure that your seedlings get enough sun. If you accidentally sowed more than one seed per module, wait until your seedlings are a couple of weeks old before thinning out the weaker ones. Keep your seedlings well-watered until they’re ready to be planted out.
How to Direct Sow Swedes:
- Prepare your growing area by mixing in some compost or well-rotted manure. Adding a general-purpose fertiliser to your soil at this stage can help too, since swedes need plenty of trace elements
- Create shallow furrows in your soil, about 2cm deep. Space each row at least 25cm apart
- Sow your swede seeds thinly and then cover them back over with soil
- Water your growing area after sowing to help settle the seeds in place
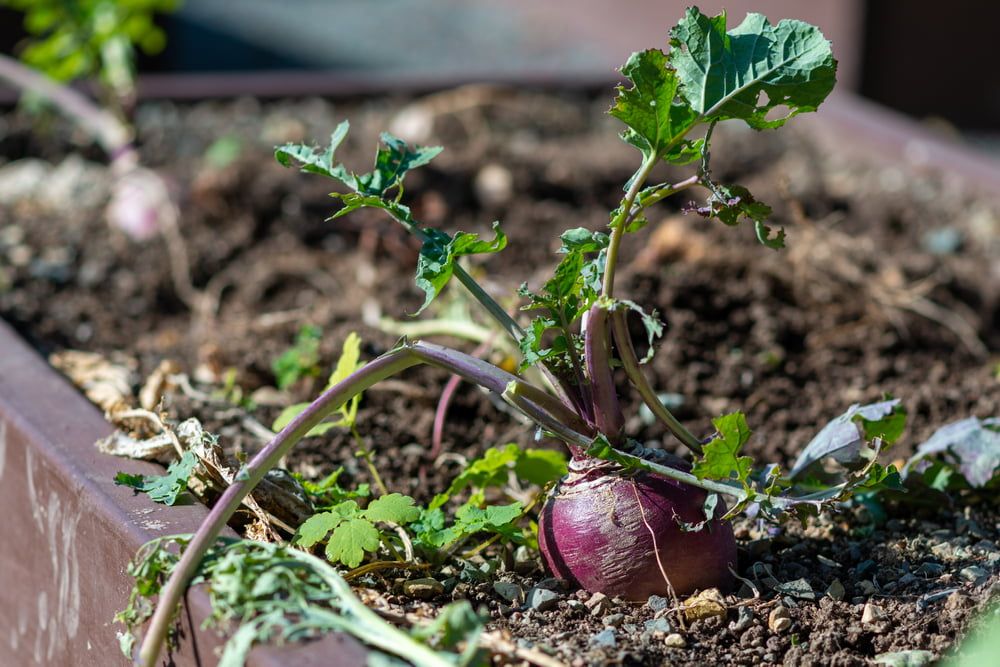
Once your seeds germinate, wait a couple of weeks before thinning them out, leaving about 25cm of space between each plant. Swedes may not seem quite so large, but their foliage is bushy and needs plenty of space. The more space your swedes have, the larger and healthier their roots will be.
How to Plant Swedes Outside
Mature swedes can tolerate even a hard frost, but seedlings are much more delicate. Because of this, you’ll need to wait until after your last spring frost before planting your swedes outside.
If your seedlings have been growing in a warm environment, harden them off for a week or two before planting them out. This will reduce transplant shock, allowing them to set root easier.
Once you’re ready to get planting, dig holes in the ground that are large enough to accommodate each swede rootball. Space each hole about 25cm apart. Then, gently ease your seedlings out of their modules and place them into their new homes. Cover the roots back over with soil and then firm the soil down – swedes prefer a firm growing area. Water your seedlings well after planting.
How to Plant Swedes in a Greenhouse
Since swedes are a cool-weather crop, they aren’t commonly grown in a greenhouse. Too much heat will cause the plants to bolt early.
However, those of you in colder regions may have success with this, especially when sowing directly to minimise root disturbance. Giving your swedes that extra protection during a bitter winter will extend your harvesting period, making it worth trying if you have some extra greenhouse space.
Use the same methods as when planting swedes outside. Alternatively, create a seed bed in your greenhouse and start your swedes off in that, before moving them outside once the weather warms up.
How to Care for Swedes
Although they have a long growing season, swedes are generally quite a low-maintenance crop, so long as you’re able to provide them with all of the basics.
Watering Swedes
Swedes need plenty of moisture while growing. If the roots dry out, they’ll start to crack and will also taste very bitter. However, irregular watering, or even too much watering, can also cause splitting, making it important to get this right.
Ideally, water your swedes whenever the top couple of centimetres of soil feels dry. Give them a deep watering to ensure that the water reaches those roots.
Feeding Swedes
While swedes aren’t particularly heavy feeders, a top-up of nutrients a couple of times during the growing season can help with growth. An organic general-purpose fertiliser is the best option – fish, blood, and bone works well.
If you decide to use a chemical fertiliser, it would be worth diluting this down to about half the recommended strength. Too much nitrogen will prevent the roots from swelling to their mature size.
Weeding and Mulching Swedes
Swedes produce plenty of foliage but this sits quite high up off the ground, leaving lots of empty space underneath for weeds to take over. As you can imagine, weeds will inhibit growth by competing with your swedes for nutrients, water, light, and space.
Regularly weeding around your swedes is a must. However, to help cut back on the amount of weeding that you’ll need to do, lay an organic mulch around your plants. In addition to smothering out any weeds, this will also help with soil moisture retention. Plus, as the mulch breaks down, it will release nutrients to your plants, meaning that you may not need to fertilise either.
How to Harvest Swedes
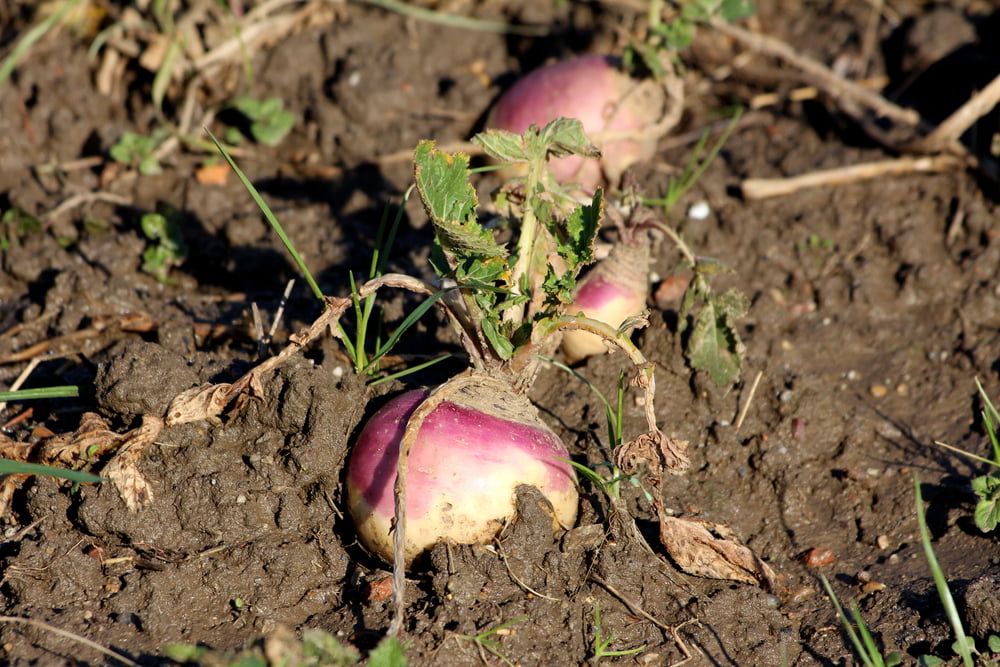
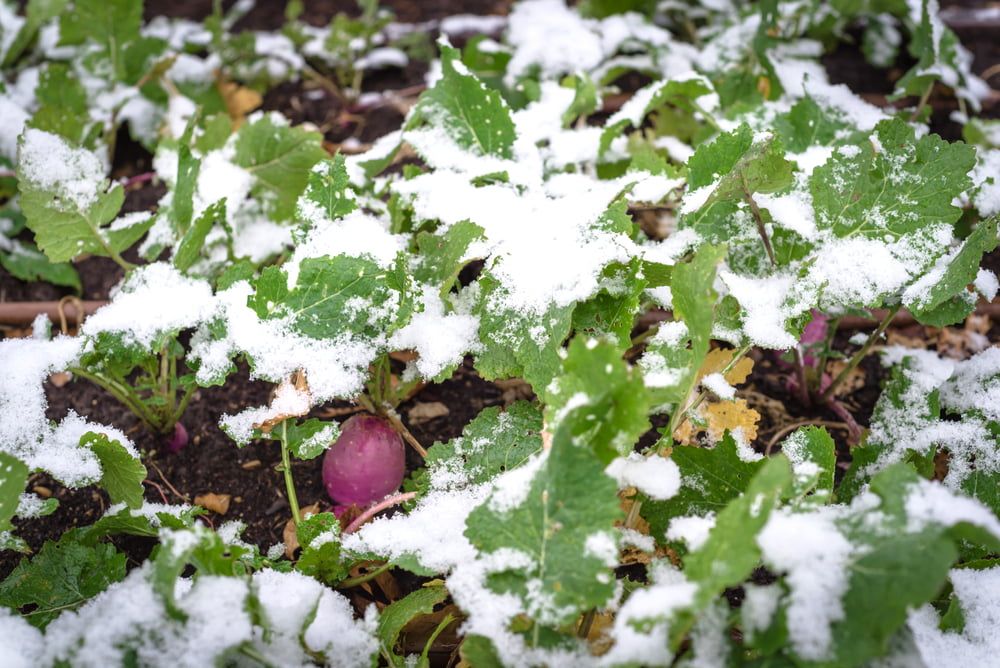
Once the days turn shorter towards the end of the summer, swede growth slows down. You’ll also notice that some of the leaves die back and the roots begin to push themselves upwards.
Ideally, wait until your swedes are about the size of a large apple before you begin to harvest them. Waiting until the first few frosts of the autumn will give you even sweeter roots. Don’t forget that your swedes will also store in the ground for a few months, so don’t be in a rush to pull them all out.
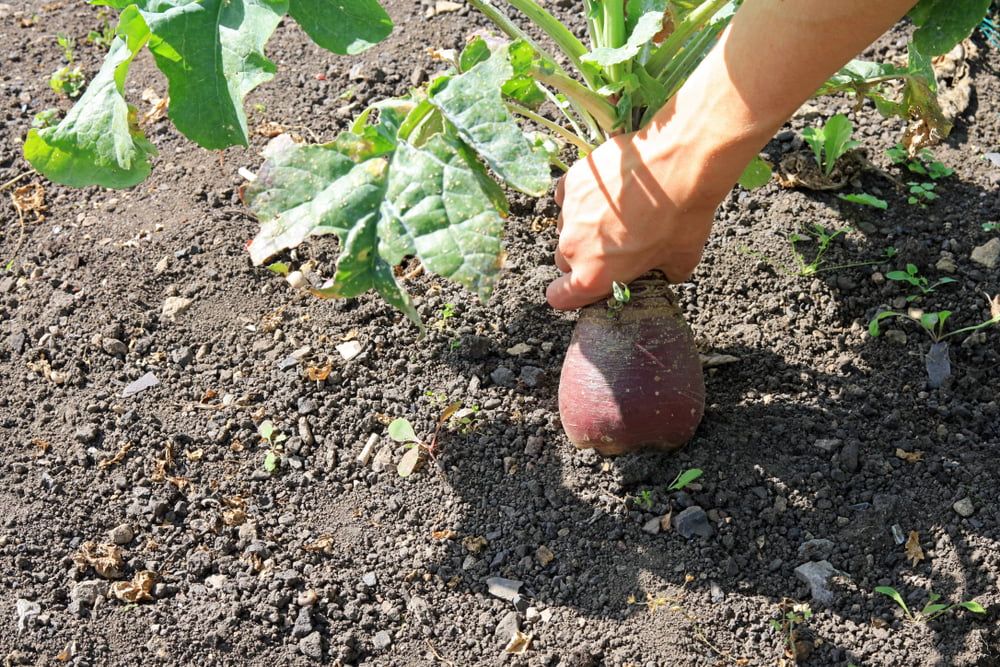
To harvest a swede, you should be able to simply grab hold of a plant at the base of its leaves and gently pull. If your soil is too firm for this, then use a garden fork to lever the swede out, pulling it with your other hand.
How to Store Swedes
While many brassicas do well when stored in the fridge, swedes are a little different. Keeping them in a fridge for too long will cause them to lose moisture and shrivel up.
Instead, to keep them fresh for several months, store them in a cool, dark, and slightly damp place. Root cellars work well, but you could even layer the roots in a box with some moist sand and then keep the box in a cool room.
If you would prefer to have a supply of swedes ready to use in the kitchen, then consider freezing your harvest. Whether raw or cooked, swedes freeze well and will last for about 6 months.
Of course, since swedes don’t actually need to be harvested all at once, most gardeners will simply leave them in the ground and pull them out as needed, doing away with the need for storage.
How to Prepare & Cook Swedes
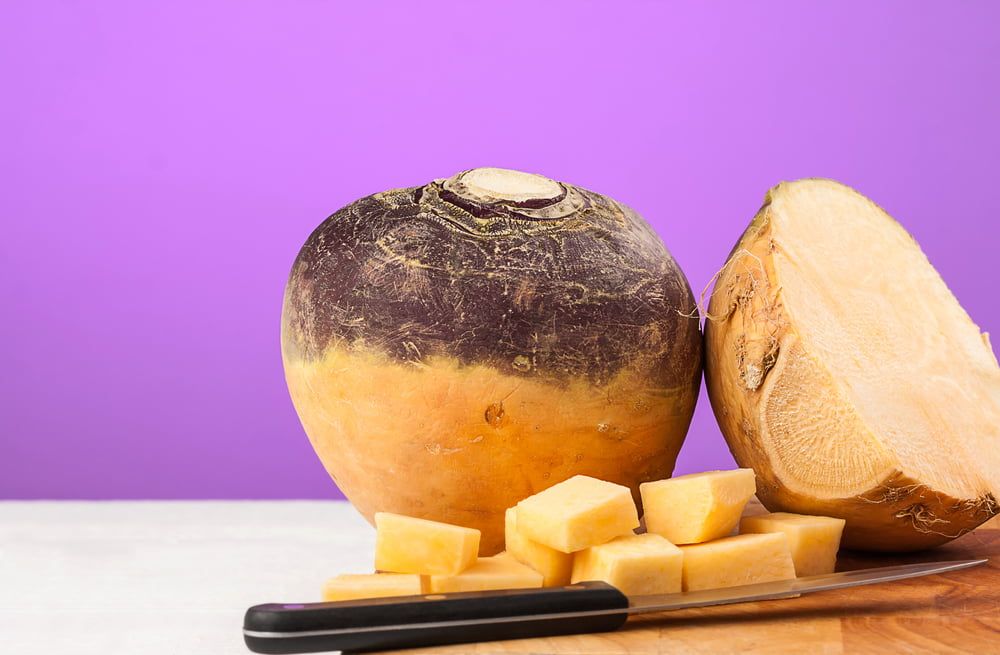
If you’ve never cooked with a swede before, then this vegetable can seem a little intimidating at first. However, don’t worry, they’re easy to prep. All you need to do is cut the root off, peel the skin, and then chop the swede into chunks.
After this, they’re ready to be cooked. Swedes are far more versatile than many realise, with some of the best dishes for showcasing their flavour and texture being:
- Mashed swedes with butter
- Roasted swedes with garlic
- Swede chips
- Fried swede with onions and bacon
- Swede gnocchi
- Swede soup
- Swede dauphinoise
- Swede and potato rosti
Common Swede Problems
There are a few issues that you may encounter when growing swedes, with the most problematic being:
- Club root – this disease occurs when swedes are grown in waterlogged or acidic soil, causing the roots to swell in a distorted way, followed by yellowing foliage. Improving drainage and amending your soil to make it more alkaline will help to treat this problem
- Brown heart – this condition causes the centre of a swede to turn discoloured and hollow, and is caused by a boron deficiency in the soil. Swedes are very sensitive to this, but adding a small amount of household borax to your growing area can help to bring boron levels back to normal
- Cabbage root fly – The small white larvae from this pest feed on swede roots, resulting in the plants withering and dying. Cover your seedlings with a mesh to prevent eggs from being laid around your plants. You can remove the mesh as your swedes start to mature, since the pests only really damage seedlings and younger plants
Popular Swede Varieties to Grow
There are numerous swede varieties out there to choose from. Some of the tastiest varieties to grow are:
- Brora – extremely hardy and resistant to many diseases, with a deep purple skin and beautifully sweet flesh
- Ruby – developed for its intense sweetness, this is another dark purple variety with creamy flesh
- Gowrie – winter-hardy, disease-resistant and very productive
- Marian – another disease-resistant variety that has yellow, nutty-tasting flesh
- Helenor – produces large and sweet roots that store very well
Conclusion
Although swedes may not be quite as popular as some of the other root vegetables out there, their superior flavour and nutrient-packed flesh make them more than deserving of a place in your garden. The fact that they’re easy to grow, can be harvested over the winter, and store well for several months is also a huge bonus. If this is a crop that you haven’t yet tried growing, sow a few seeds and see what you think – chances are that swedes will soon become a staple in your autumn/winter vegetable garden.