Read Reviews
The Best Plastering Trowels
-
Best lightweight twin blade - OX Pro 16″ UltraFlex Finishing Trowel
-
Best for quality and long life - Marshalltown MPB145GSD 14×5″ Gold Stainless Steel Plasterers Trowel
-
Best for replaceable blades - Refina Plaziflex 16″ Plastic Skimming Trowel
-
Best finishing trowel - Nela FLEX II 16 Trowel Gold Edition
-
Best budget plastering trowel - Spear & Jackson 13″ Stainless Steel Plastering Trowel
-
Best plastering trowel for beginners - Draper Redline 11” Soft Grip Plastering Trowel
Plastering Trowel Reviews
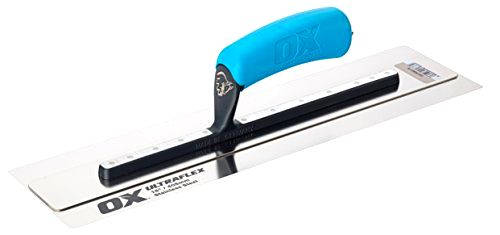
1. OX Pro 16″ UltraFlex Finishing Trowel[ SAVE 17% ]
Best lightweight twin blade
- You get the huge benefit of twin blade technology for less money. Compared with the Nela Flex II, it’s a remarkably similar trowel except for the price!
- The size of the handle is spot on. The large, rubberised grip is extremely comfortable, and really helps with fatigue over time.
- The ultra-thin 0.3 mm blade is incredibly flexible but strong enough for professional use. It’s made from tough stainless steel that will last for as long as you take care of it.
- It’s not quite ready for the best result straight out of the box. Some users have complained that it hasn’t been pre-worn at the factory. It might make a few marks until it’s worn in.
- This is a fantastic finishing trowel, but it’s not what you’d use for laying on plaster. It’s not the most versatile tool for beginners, but a brilliant tool for the final pass.
- Some users have complained that the trowel had been delivered with corner damage. It could be a fault with the packaging, so make sure you inspect it thoroughly on arrival.
- Size
- 16" x 4.3"
- Blade Material
- Stainless steel
- Flexible Blade
- Yes
- Double Blade Technology
- Yes
- Rounded Corners
- Yes
- Build Quality
- 5
- Ease of Use
- 5
- Value for Money
- 5
Aussie tool heroes OX make rough and tough kit for professionals and DIYers alike, and they’ve been doing it since 1974. They know a thing or two about the best lightweight twin-blade plasterer’s trowel.
The 16″ UltraFlex finishing trowel is a wonderfully light and easy-to-use tool. Just like the NelaFLEX, the stainless steel blade makes use of clever twin blade technology. The extra plate of ultra-thin steel helps to reduce weight and improve durability while allowing for flexibility where it’s needed.
You’ll recognise the signature bright blue OX handle on this trowel. It’s a replaceable blue rubber grip that is ergonomically designed and fits well in the hand. It helps to keep everything well balanced and proves to be comfortable to use for long periods of time.
The corners of the trowel have been rounded off to help you avoid gouging wet plaster, which is a nice touch. The only thing I’d improve about this trowel is a factory pre-wear process. It does need a bit of adjustment before it works to its full potential.
Did you find this review helpful?
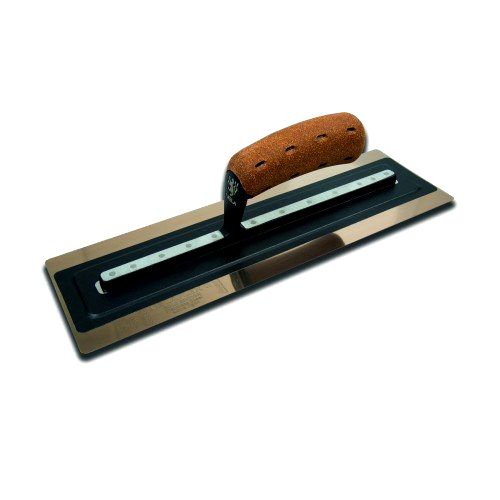
2. Marshalltown MPB145GSD 14×5″ Gold Stainless Steel Plasterers Trowel[ SAVE 5% ]
Best for quality and long life

- Marshalltown have an excellent reputation for good reason. Made in the USA, the level of workmanship and quality control is hard to beat. It’s the best trowel for build quality.
- It makes a lot of difference to the beginner plasterer if a trowel is pre-worn. The edges have been rounded off slightly and the surface has been smoothed to avoid lines on your plaster.
- I’m a big fan of the DuraSoft grip style. They’re non-slip in all conditions and help to reduce arm fatigue. That’s important when dealing with heavy plaster all day long!
- Replacing the grip is easy. It’s held in place with a nut that can be removed when the current handle wears out. It’s another thing that makes this a long-lasting tool.
- Even though this is a great trowel for beginners, it doesn’t come at a beginner’s price. Unless you’re a professional plasterer it’s hard to justify spending this much on a single tool.
- Compared with the NelaFLEX, the corners are not rounded off on this trowel. It’s pre-worn but most plasterers will also round off sharp corners for the best finish possible.
- Compared to more technologically advanced trowels like the OX P530114, the Marshalltown doesn’t have a double blade system. It’s not quite as flexible, the handle is attached directly to the blade.
- The SuraSoft handle isn’t to everyone’s tastes. I like them because of their grip, but some plasterers prefer a handle that can be easily repositioned inside the hand.
- Size
- 14" x 5"
- Blade Material
- Gold stainless steel
- Flexible Blade
- No
- Double Blade Technology
- No
- Rounded Corners
- No
- Build Quality
- 5
- Ease of Use
- 4
- Value for Money
- 4
Founded all the way back in 1890, US brand Marshalltown are famous for making the best plastering trowel. Favoured by professional plasterers as well as savvy DIYers, the MPB145GSD gold stainless steel plasterers’ trowel is an amazing bit of kit.
The first thing you’ll notice about this trowel is the colour. Marshalltown have used top quality tempered gold stainless steel that is built to last. It gives this trowel the ultimate balance of stiffness and flexibility without making it too heavy.
Marshalltown have broken the trowel in at the factory, it comes with pre-worn edges to help you get the best finish possible. The handle uses a DuraSoft grip which offers supreme comfort and helps to keep the whole trowel balanced.
Did you find this review helpful?
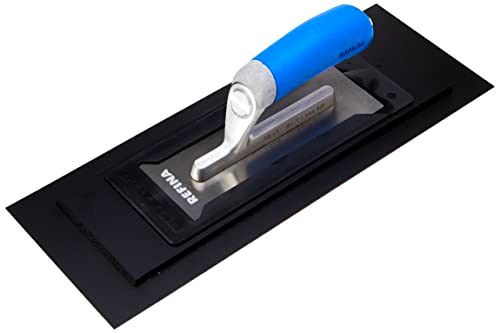
3. Refina Plaziflex 16″ Plastic Skimming Trowel[ SAVE 5% ]
Best for replaceable blades
- The plastic blade is tough but incredibly flexible. Compared with the Marshalltown MPB145GSD you can really work it into corners and around doorframes.
- Having a replaceable blade system means you can always have different blade sizes on hand. It’s a versatile system that will save time and money during its working life.
- The plastic blade is ideal for finishing work. It’s well suited for gliding over the top of plaster for the last bit of skimming work. You won’t need to splash water on the final coat.
- Compared with the OX Pro, this trowel doesn’t come with rounded corners. Even though it’s plastic, it can still dig in and gouge wet plaster.
- Plastic trowels are made for finishing work and skimming. They’re not designed to lay on plaster and won’t replace steel blade trowels for that job.
- Plastic trowels are usually complimented for being lighter than their steel rivals. Compared with the Spear & Jackson 10613SF, the Refina is more than 100 g heavier!
- Size
- 16" x 5.5"
- Blade Material
- Stainless steel
- Flexible Blade
- Yes
- Double Blade Technology
- Yes
- Rounded Corners
- No
- Build Quality
- 5
- Ease of Use
- 5
- Value for Money
- 4
With more than 35 years of experience, Dorset’s own Refina are one of the best skimming trowel brands around. The Refina Plaziflex 16″ skimming trowel is a lightweight and refined tool that’s more versatile thanks to replaceable blades.
Rather than superfine stainless steel, this skimming trowel uses a 1 mm durable plastic blade. It leaves an excellent finish on plaster and thanks to the “flexiback” design, it’s rigid along its length but flexible across the blade.
Refina proudly claim that this trowel glides across walls and puts less stress on your joints and arms. The large 16″ blade lets you cover wider areas without having to apply too much pressure.
What makes this trowel stand out from the crowd is the replaceable blade system. At the core is one of Refina’s mini trowels. You’re then free to slot it into any one of Refina’s plastic blades that range from 12″ – 24″. Replacing these blades works out cheaper than buying a new trowel every time as well.
Did you find this review helpful?
4. Nela FLEX II 16 Trowel Gold Edition
Best finishing trowel
- Nela have used a high performance bonding tape to join the handle to the blade. It’s a lightweight and extremely durably fixing that’s protected against solvents and heat.
- The BiKo cork grip is ideal for long plastering sessions. Compared with the Marshalltown’s DuraSoft grip, it’s easier to reposition in your hand as well.
- The ultra-fine 0.3 mm gold stainless steel blade makes this the best finish trowel available right now. With rounded corners and excellent flexibility, it’s hard to beat.
- The aluminium alloy handle is light but incredibly stable. It gives you all the strength and control you need without adding too much extra weight.
- Several users have commented that this is not the ideal trowel for laying on plaster. It’s only suitable for finishing work.
- The Nela isn’t the most expensive trowel on my list. But compared to the Spear & Jackson 10613SF it’s a professional-level tool. DIYers don’t need to spend that much for adequate results.
- This trowel isn’t as well worn-in compared with the Marshalltown MPB145GSD. Some users have stated it still needs wearing in before the finish is superb.
- Weighing in at 491 g, it’s not the lightest plasterers’ trowel on the market. The double blade system adds extra weight.
- Size
- 16" x 4.3"
- Blade Material
- Gold stainless steel
- Flexible Blade
- Yes
- Double Blade Technology
- Yes
- Rounded Corners
- Yes
- Build Quality
- 5
- Ease of Use
- 5
- Value for Money
- 4
The Nela FLEX II 16 Gold Edition Trowel is a robust yet lightweight plastering trowel with a super flexible gold stainless steel blade. The Nela FLEX trowel is one of the best finishing trowels on the UK market.
Nela have made use of dual blade technology to improve the strength and flexibility of the trowel without compromising on blade thickness. At just 0.3 mm, it’s about as thin as you can get but it’s still strong enough for professional plastering jobs.
Nela use a high-performance BiKo grip made from cork. It’s the ideal compromise between a soft grip and one that gives you ultimate control over the blade. The overall balance of this trowel is what makes it one of the best finishing trowels you can get.
Even though the blade hasn’t been completely pre-worn at the factory, the corners have been nicely rounded. There’s no reason why you won’t be able to produce plastered walls or ceilings with this trowel that are as smooth as glass.
Did you find this review helpful?
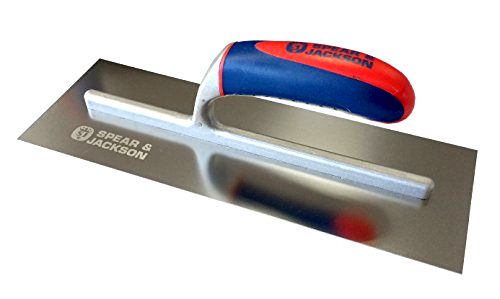
5. Spear & Jackson 13″ Stainless Steel Plastering Trowel
Best budget plastering trowel
- If you’re an occasional plasterer or on a tight budget, this trowel is hard to beat. Compared to the expensive Marshalltown MPB145GSD, you don’t always need to splash out on tools.
- The 13” blade is easier to handle for beginners than the large 16” ones on some trowels. It doesn’t cover as much wall, but it’s more forgiving if you’re still learning.
- The aluminium handle and softgrip section help to keep the trowel well balanced. For an inexpensive tool, it handles well for plaster finishing jobs.
- Compared with the NelaFLEX, this trowel is only a single blade tool. It’s not going to be as rigid along the length or as flexible across the width.
- The corners haven’t been rounded off on this trowel. You’ll need to round them off yourself unless you want to scratch wet plaster when working on it.
- It’s obviously not been designed with longevity in mind. Compared with the Marshalltown MPB145GSD, you can’t replace the handle to extend its working life.
- The blade steel isn’t as thing compared with the 0.3 mm thickness of the OX Pro 14”. It’s not going to be quite as flexible against the wall or ceiling.
- Size
- 13" x 4.5"
- Blade Material
- Stainless steel
- Flexible Blade
- No
- Double Blade Technology
- No
- Rounded Corners
- No
- Build Quality
- 4
- Ease of Use
- 4
- Value for Money
- 5
The Spear & Jackson 13″ Stainless Steel Plastering Trowel is an ideal DIYers plastering trowel. This is a small plastering trowel that offers a good quality blade at a very reasonable price. It might not have all the features compared with the Nela Flex II, but it’s one of the best budget trowels you can get.
With a flexible blade and comfortable soft-grip handle, you’ll be surprised how well this trowel handles for the price. Spear & Jackson have used thin stainless steel that feels ideal for finishing work but could be used for laying on plaster at a pinch.
The grip itself isn’t replaceable, but it’s got a decent finish on it that makes it easy to hang onto. It’s got a decent girth as well, which helps fight arm fatigue. What makes this one of the best plastering trowels is the weight. Weighing in at just 436 g, it’s ultra-light but still very capable.
Did you find this review helpful?
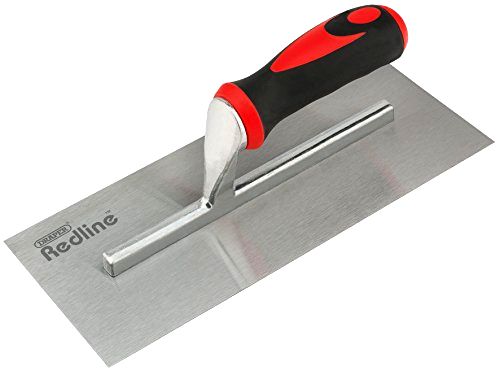
6. Draper Redline 11” Soft Grip Plastering Trowel[ SAVE 15% ]
Best plastering trowel for beginners
- For the money, this trowel is comfortable to hang on to and leaves a good enough finish. It’s ideal for the DIYer that wants to patch up some rough areas without breaking the bank.
- The size of this trowel, compared to the big Marshalltown, is much easier to handle for the casual DIYer. It’s not as heavy when loaded up with plaster either.
- The biomaterial handle is really good for a budget piece of kit. The rubberised plastic gives excellent grip, with or without gloves on. It makes all the difference for beginners.
- Carbon steel is an interesting choice of metal for a plastering trowel. This tool will rust over very quickly unless it’s oiled and stored properly between uses. Stainless steel is much better.
- Don’t expect this trowel to have much flex in the blade for smooth plastering. It’s harder to work with compared with the excellent Refina Plaziflex’s plastic blade.
- If you’re not a confident plasterer, you might make gouges in wet walls with the sharp corners on this trowel. The OX Pro’s rounded corners are much more forgiving.
- Size
- 11" x 5"
- Blade Material
- Carbon Steel
- Flexible Blade
- No
- Double Blade Technology
- No
- Rounded Corners
- No
- Build Quality
- 3
- Ease of Use
- 4
- Value for Money
- 5
One of the bigger British tool brands out there, Draper are well known for their hand tools. Found in sheds, garages, and workshops across the country, I think their 11″ soft grip plastering trowel is a serious bit of kit for the money. A fraction of the price of a pro-level trowel, this is still a very comfortable tool to work with and ideal for the DIY plasterer.
This is a medium-sized plastering trowel with a carbon steel blade. Smaller in size than the big professional Marshalltown equivalent, it’s 280 mm long and not overly flexible. It’s a responsive blade to work with and has the ideal shape for getting all the plaster out from the bottom of a bucket.
The soft grip handle is of a biomaterial construction. The black section is softer than the red, so it fits nicely in hand and won’t slip easily. Even though this budget-friendly tool isn’t the sort of thing you’ll see a proper plasterer using, for the home DIYer it’s pretty hard to beat.
Did you find this review helpful?
Harry's Smart Buying Tips
Compare Product Features
Use the dropdown to sort the table by the feature you want to see.
OX Pro 16″ UltraFlex Finishing Trowel

- 5
- 16" x 4.3"
- Stainless steel
- Yes
- Yes
- Yes
Marshalltown MPB145GSD 14×5″ Gold Stainless Steel Plasterers Trowel

- 4.3
- 14" x 5"
- Gold stainless steel
- No
- No
- No
Refina Plaziflex 16″ Plastic Skimming Trowel

- 4.7
- 16" x 5.5"
- Stainless steel
- Yes
- Yes
- No
Nela FLEX II 16 Trowel Gold Edition

- 4.7
- 16" x 4.3"
- Gold stainless steel
- Yes
- Yes
- Yes
Spear & Jackson 13″ Stainless Steel Plastering Trowel

- 4.3
- 13" x 4.5"
- Stainless steel
- No
- No
- No
Draper Redline 11” Soft Grip Plastering Trowel

- 4
- 11" x 5"
- Carbon Steel
- No
- No
- No
How to Choose The Best Plastering Trowel
The plastering trowel is one of a set of plasterers tools that the plasterer uses for his trade. It is used in conjunction with a plastering float and a plasterer’s hawk.
Traditionally plastering trowels have a flexible stainless steel blade attached to a base plate and a wooden or plastic handle. These are ergonomically designed to make them comfortable to use. Many plastic handled trowels have a soft grip finish making them grippy and extra comfortable.
Recent innovations have brought plastic plastering trowels onto the market. These are excellent for finishing as they are very light and flexible. They also have replaceable blades.
Plasterers trowels can range in size from 12″ to 20″. Larger trowels are great for getting lots of plaster on the walls quickly. However, they can be heavy and harder to handle, requiring some strength to use. For detailed work, a smaller trowel would be preferable.
Plasterers’ trowels have rounded edges to prevent the sharp blade from nicking the plaster. They often come pre-worn which means the edge has been sanded and rounded. However, it may still be necessary to wear in the trowel before it is used for finishing.
Plastering Trowel FAQs
Firstly, you should ensure all the tools you use are spotlessly clean as any trace of dirt, grit or old plaster will ruin the finish of your wall.
Protect the surrounding areas with dust sheets.
Repair any large cracks.
Clean the wall you are plastering to remove any dust or lose debris. Begin by brushing the wall with a stiff brush and then wipe it down with a damp cloth.
Prepare the wall with PVA glue. Mix the PVA one part glue to four parts water and brush or roll this onto the wall.
Once the glue is tacky you can begin to plaster.
Fill a large bucket to the halfway mark with cool, clean water. Pour the plaster into the water and mix. Stir the plaster continuously until it thickens and is smooth and free of lumps. Once the stirrer can stand up on its own in the plaster you have reached the right level of consistency.
Heap plenty of the plaster onto your hawk. Slide the flat edge of the trowel under one end of the plaster and pick up enough plaster to complete a strip from floor to ceiling. Make sure the plaster is sitting in the centre of the trowel.
Hold the trowel at a slight angle to prevent it sucking the plaster back off the wall. Now, starting in the bottom corner, smear the plaster across the wall. You are aiming for a layer of about 1/2″, but you don’t need to apply it precisely at this point as you will be smoothing it down later.
Once you reach the top of the wall slide the trowel along about 2-3 inches and then bring it back down the wall. Continue this process refilling the hawk as necessary and scooping up the plaster into the trowel until the wall is covered.
Once the plaster is in place, you are ready to smooth it. If the plaster has already begun to dry you might need to spray it with clean water to wet it again. Now clear and clean your trowel and run it over the wall in all directions, applying a consistent amount of pressure. Focus on any spots where the plaster is thicker.
Once you have an even first coat you should lightly rake the wall with a notched trowel to give the next layer something to adhere to.
The final layer of plaster, called the skim coat, should be applied in the same way except you are aiming for a depth of around 2 mm.
Opinions vary on how to break in a plastering trowel. Common methods include 20 minutes on an oilstone or sanding it with an orbital sander. Using your trowel to work with concrete will also wear it in.
A good plastering trowel will have a strong yet flexible blade that will stand up to wear and tear and hold its shape. If you have a lot of plastering to do, then it is worth investing in a professional quality trowel. This will make the job easier and ensure you get a better finish. However, for small patching jobs, or areas where the finish is not so essential, a cheaper trowel will suffice.
Note that stainless steel blades can lose their shape over time so try and invest in the best quality possible. For example, the Marshalltown Gold Stainless Steel Permashape Trowels will hold their shape and not distort or bend.
When applying a first coat the finish is not important so most trowels will do the job. However, the finishing coat will need to be perfectly smooth and you cannot achieve this without a trowel that is perfectly flat, clean, smooth and free from nicks.
The size of your trowel is a key factor when considering which one to buy. Professionals tend to use a larger trowel when they have large areas to cover as they get the plaster onto the walls more quickly. However, beginners may find a larger trowel difficult to handle. It also requires some strength to apply enough pressure to apply the plaster securely to the wall and that can be difficult to achieve with a large trowel. A smaller trowel will give you better control.
You can, of course, buy more than one plastering trowel if you have a lot of work to do and have some experience. You might choose an 18″ trowel to apply the plaster to the wall and a smaller one for finishing. However, if you just want to buy one plastering trowel, a 14″ trowel provides the best balance of efficiency and ease of use.
If you are choosing a plastic trowel, then you might want to go for a slightly larger size as it is lighter in weight. Plastic-bladed trowels also make working on curved surfaces easier, so this is something to consider if you are plastering anything other than a flat, level surface.
Share