While the Flymo may not be the most advanced of robotic lawn mowers, simplicity is sometimes all that you need. This is particularly the case if all you want to do is maintain a small-sized lawn, and this is something that the Flymo really excels in. It has proved to be reliable in all conditions and has kept to its promise of giving me an effortlessly manicured lawn. In fact, I’d say that my lawn is looking much healthier, which is probably down to the machine’s mulching capabilities.
Its useful features make it easy to customise things to suit you and your garden, and the app is a handy little extra. All in all, if you love having a neat and tidy lawn but don’t enjoy cutting it, then the Flymo EasiLife 150 GO Robotic Lawn Mower would be a great investment.
Flymo EasiLife 150 GO Robotic Lawn Mower[ SAVE 5% ]
- Ease of Setup
- 4
- Design
- 4
- Power
- 5
- Performance
- 5
- Features
- 5
- Safety
- 5
- Value for Money
- 5
- Lawn Size
- 150m²
- Weight
- 6.1 kg
- Cutting Width
- 16cm
- Cutting Height
- 20-50mm
Robotic lawn mowers designed for small-sized lawns have been rapidly rising in popularity, which is where the Flymo EasiLife 150 GO Robotic Lawn Mower comes in. Manufactured by parent brand Husqvarna, a company with a solid reputation for high-quality outdoor products, this robotic lawn mower promises to provide a beautifully manicured lawn with zero effort required on the user’s part. I put it to the test on my own lawn to find out just how true this claim is – and whether it can actually replace your traditional mower…
How I Tested
Read our product testing methodology here.
Ease of Setup
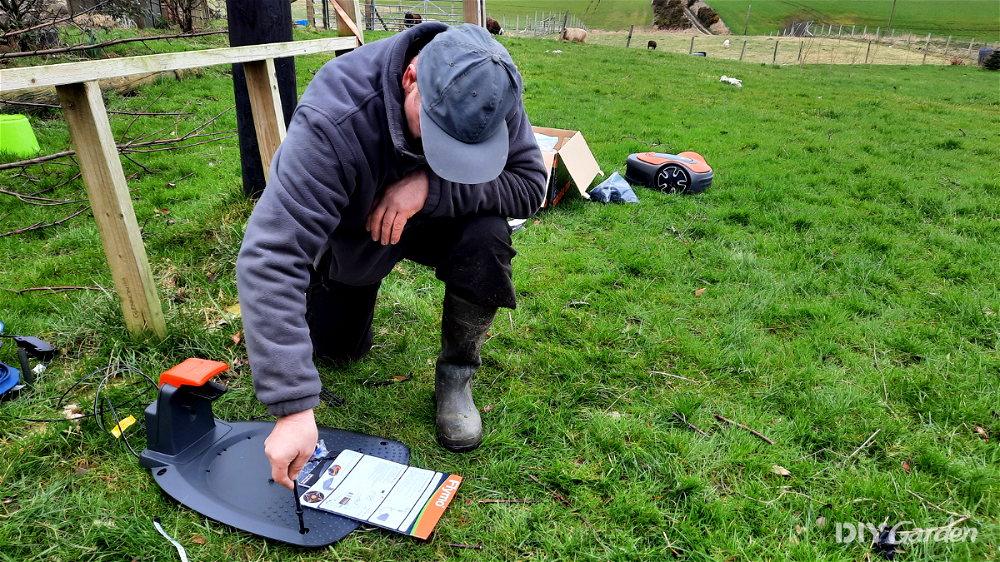
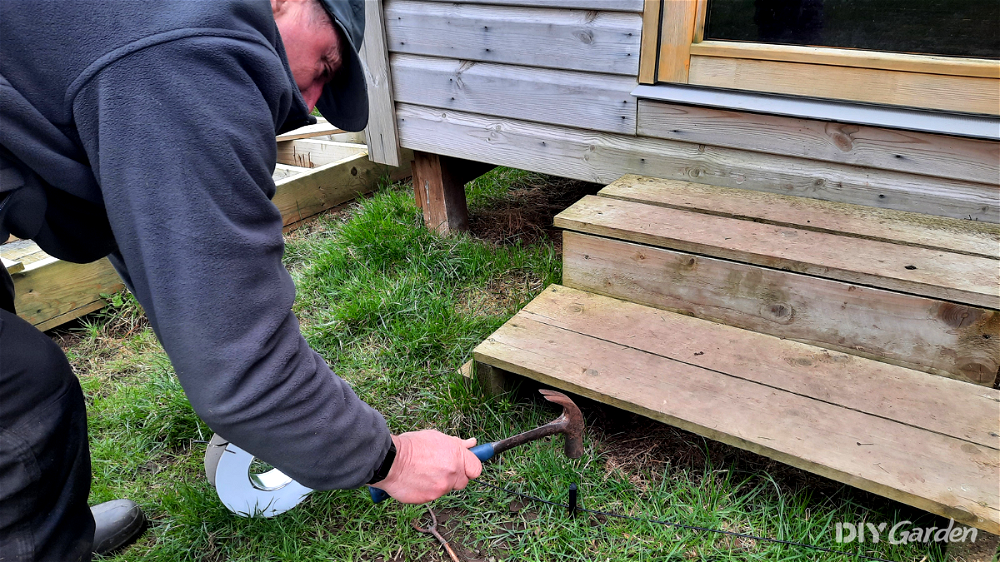
In many ways, setting this Flymo lawn mower up is pretty simple. The lawn mower itself is already assembled, so all you need to do is secure the base to the ground and then lay and connect the cables.
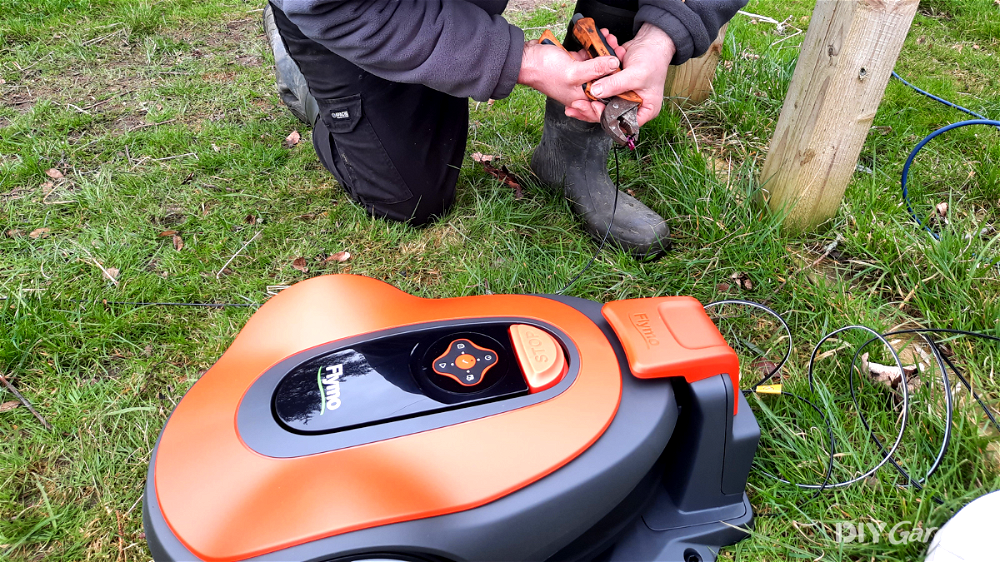
A long reel of cable is supplied with the machine, along with plastic pegs to hold the cable at ground level. Keeping the cable at ground level is extremely important, which means that the pegs will need to be quite close together if your ground is uneven. If the cable is even slightly raised, the lawn mower will simply cut right through it. I found this out right at the beginning but was able to use a connector to rejoin the cut cable. I added more pegs in and didn’t have this problem again.
Once you’ve set the cable up and are happy with how the lawn mower works in your chosen perimeter, you have the option of burying the cable so that it isn’t visible. However, after a couple of weeks of leaving the lawn mower running, I couldn’t see the cable anymore. The grass around it grew quickly and covered it over, but the lawn mower was still able to recognise it and function properly, meaning that there wasn’t really any need for me to bury the cable.
In addition to setting up the main boundary wire, you also have the option of installing a guide wire. According to the instructions, this helps the lawn mower to find its way back to its base if it’s working within a complex perimeter. So, to start with, I didn’t set a guide wire up since the lawn mower’s boundary was a pretty simple square-ish shape. However, after a couple of days of “rescuing” the lawn mower after it ran out of power in the middle of the lawn, I installed the guide wire and it was then able to find its way back home much easier.
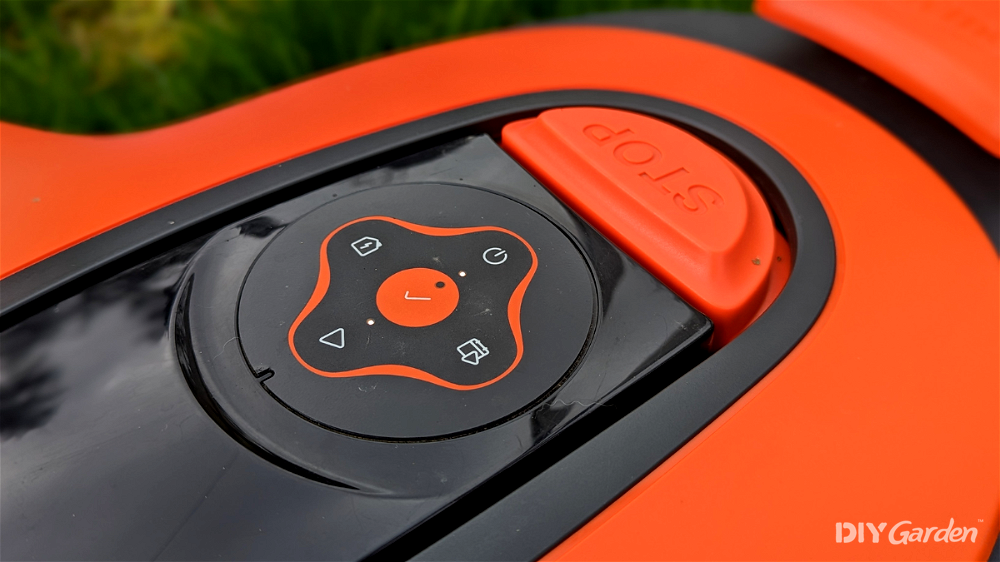
Turning the lawn mower on to get it going is relatively easy as well. It’s quite a simple machine in that it doesn’t have a screen. Instead, there are five buttons with an LED light beside each one to show you which button has been pressed. Place the lawn mower into its base and then enter the pin number to get it started (it’s a factory-set pin that requires you to press a few buttons in a specific order). To change the more complicated settings, such as the cutting schedule, you’ll need to download the Bluetooth app, which, again, is easy to do.
All in all, it took about 40 minutes to get this Flymo set up before I was able to sit back and watch it get to work.
Design
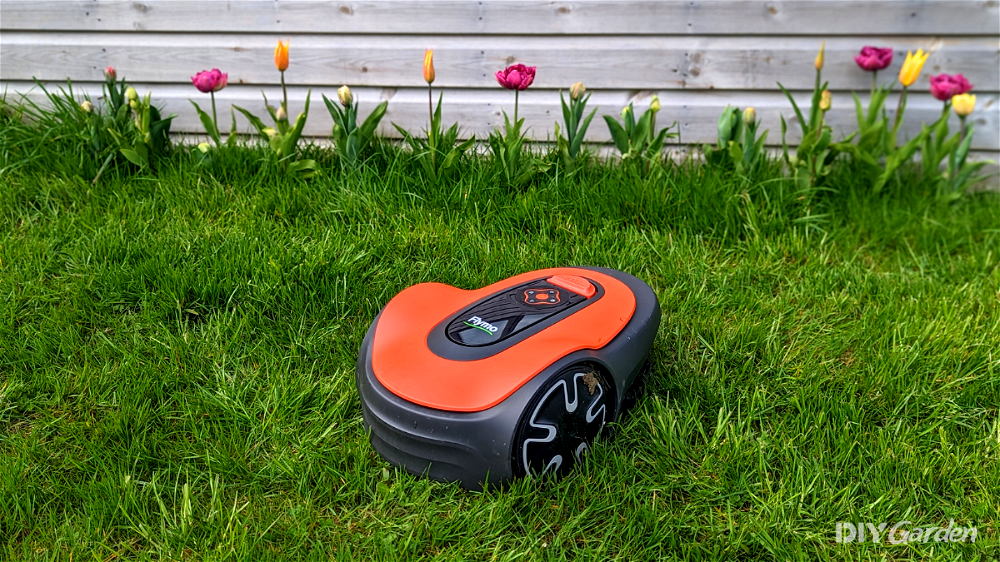
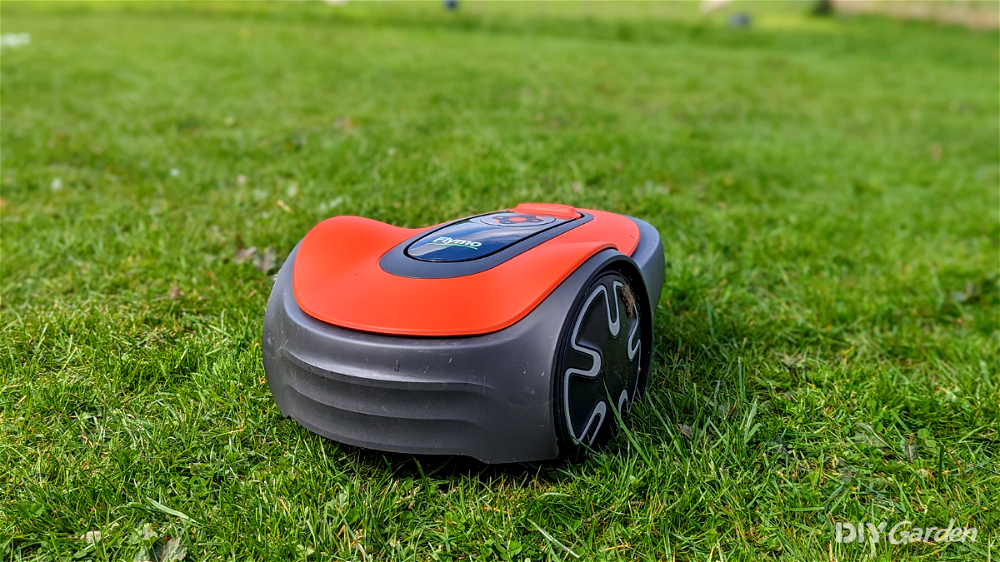
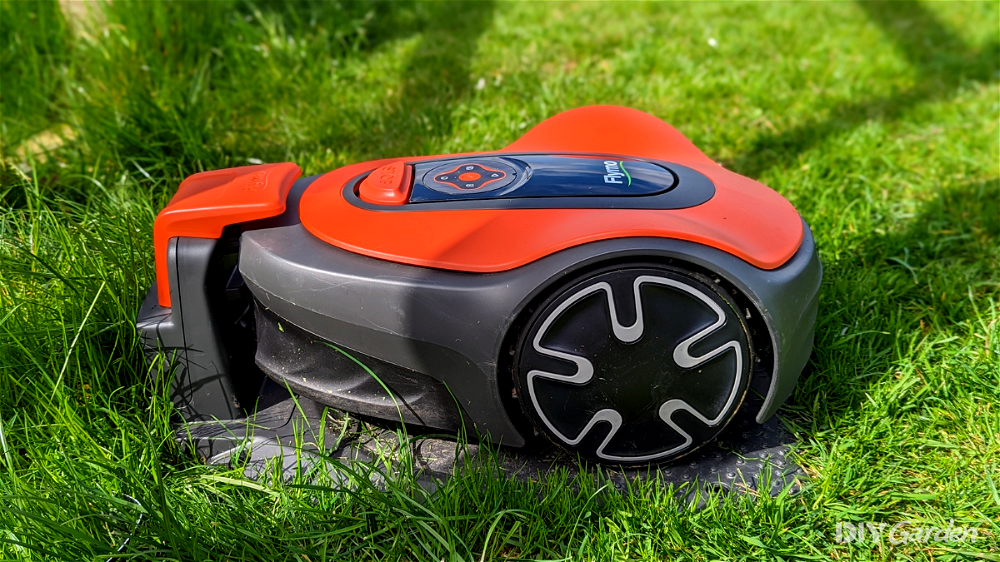
Bright colours seem to be the norm when it comes to many of the robotic lawn mowers out there, and the Flymo’s vivid orange body continues with this trend. It may not be to everyone’s taste, but there’s definitely no missing it while it’s out on the lawn, meaning that you’ll never end up accidentally tripping over it!
It definitely delivers on its promise of a compact design – I wouldn’t say that it was necessarily more compact than its direct competition, but it’s certainly smaller than some of the heavier-duty robotic lawn mowers out there. In some ways, this is great. However, it does also mean that its wheels are quite thin and light, which could prove to be a challenge if you’re using it on very rough ground.
Flymo has a few different robotic lawn mowers available, with each one designed to cut a lawn of a specific size. This machine is the smallest and was designed for a small lawn, with a maximum cutting area of 150m². Its 16cm cutting width is well-suited for a lawn of this size, and the cutting height ranges from 20-50mm. Unfortunately, it hasn’t been designed to make adjusting the cutting height an easy task. Rather than giving you a dial to turn, you’ll need to flip the lawn mower over, pull up some casing, and manually adjust the blade height from there.
However, it does have a simple touch-and-go interface – some will appreciate the lack of a screen while others won’t. I personally find that robotic lawn mowers with a screen, such as the WORX Landroid that I also tested, are a little easier to operate. That said, the fact that this Flymo doesn’t have one wouldn’t necessarily put me off buying it, especially since the models that do have a screen can be significantly costlier.
Just like all of the other robotic lawn mowers out there, the Flymo has been designed to mulch and release the grass as it cuts, rather than collecting it. This is good news for your lawn as all of that grass contains vital nutrients that will help to promote thicker and lusher grass in the future.
Overall, this lawn mower boasts a thoughtful design. It offers just about everything that you would need to maintain a small lawn and, other than its recommended cutting area, its design doesn’t differ much from the more expensive Flymo models available.
Power
The beauty of a robotic lawn mower is how it drives itself back to its base to be charged, and the Flymo is no exception. It usually makes its way back home once its battery level drops to about 20% (the app will show you its current battery life), and then it takes about an hour to fully charge. Once fully charged, it will get back to work for just over an hour before it needs to be charged again.
The lawn mower’s base needs to be connected to mains electricity in order for all of this to work. Since I don’t have an electric outlet near my lawn, I hooked it up to an extension lead, which gave me much more flexibility in terms of where I placed the base.
It’s worth noting that the battery for this mower is built into the machine, as opposed to being easily removable and swappable. In some ways, this is good, as it keeps the battery safely tucked away. However, if you ever need to replace the battery (which you likely will after it has been running for a few years), you’ll need to either invest in a set of tools that will enable you to remove the battery or take it to a professional.
Performance
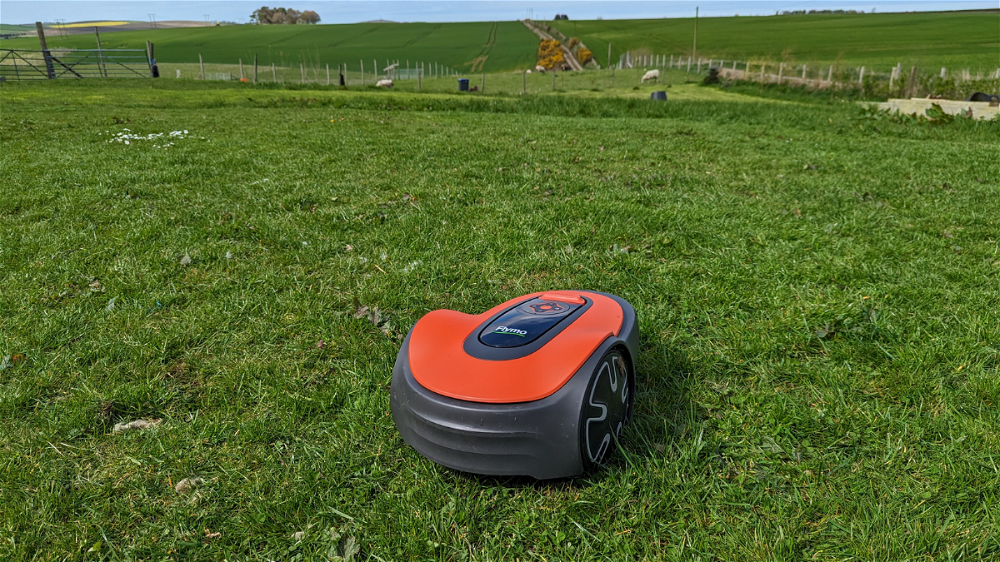
In most cases, you would buy a robotic lawn mower to maintain a lawn that has already recently been cut. However, my rough and bumpy lawn (which used to be a field) hadn’t been cut since the early autumn, and this machine was set up in March, meaning that there was a fair bit of lush spring growth for the lawn mower to munch through.
I had my doubts about whether it would manage, but it certainly proved me wrong. For the first few days, there didn’t seem to be much of a difference, but it managed to get my lawn under control after running for about a week (this is excluding the off-days that it had due to frosty weather).
Other than in cold temperatures, it cuts in all conditions, rain or shine. Its mulching function works well too – it has been a couple of months now and the lawn mower has never clogged, even when cutting wet grass.
It performed well on sloping and bumpy areas too, although I kept the cutting height quite high – this can also help to keep a bumpy lawn looking even. That said, molehills proved to be an obstacle, so you’ll need to kick those down. If not, the Flymo will softly bump into them and then change direction, which is what it does when it comes across any type of obstacle (including large twigs). Interestingly, no new molehills appeared in the cutting area once the Flymo was set up.
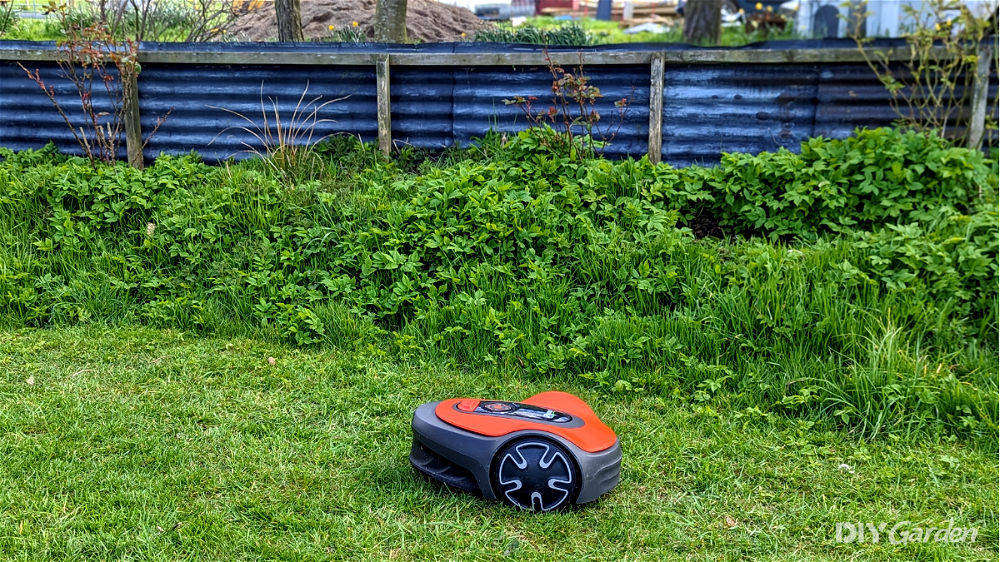
The only flaw in this machine’s performance is when it comes to lawn edges. The machine’s blade doesn’t span the entire unit, meaning that if it comes across an obstacle at the edge of a lawn, such as a wall or some raised paving, it’s not able to cut right up to the edge, leaving a fringe of long grass behind. However, if you’re prepared to manually strim your edges every couple of weeks, then this won’t matter quite so much. Other than that, if your lawn has a flat edge, then this machine will leave it looking beautiful.
Features
This lawn mower is equipped with a few different useful features:
LawnSense
The LawnSense function is one of my favourites, simply because it’s so clever. It enables the mower to recognise lawn growth. If your grass has been cut to perfection (which is a given when using the Flymo!), then the machine won’t take itself out for unnecessary drives around your lawn – it will leave things be until your grass actually needs to be re-cut.
FrostSense
I can also definitely confirm that this machine’s FrostSense feature works well! It has a sensor that keeps the machine in its base when the temperature is 4°C or lower. Being located in the north of Scotland means that there are several spring days in which the temperature struggles to rise above this, so my Flymo spent a fair bit of March snoozing in its base.
PassageSense
PassageSense is another feature promoted by the brand. This enables the lawn mower to make its way through passages of at least 60cm in width. I tested this out by adjusting the boundary and guide wires and, again, it worked well.
The App
As mentioned earlier, download the Flymo app and you’ll have access to some extra advanced features. The most useful is the lawn mower’s schedule – you can change this so that it only cuts your lawn between certain hours of the day. I left mine on its factory setting of 7am-11pm, but those who live in condensed urban areas can shorten the Flymo’s day even further to avoid disturbing neighbours. That said, this lawn mower is extremely quiet and is very unlikely to bother anyone around you. You can only really hear it if it happens to chew up a twig!
Safety
The Flymo has been designed with two important safety sensors; one to detect boundaries and a collision sensor to identify obstacles. As mentioned earlier, if it comes across an obstacle, it will gently bump against it before turning and driving off in a different direction. The bump is very soft – it won’t hurt when it hits you and there won’t be any damage to the body of the machine if it hits something hard. Since it moves very slowly, you also have plenty of time to get out of the way if it does start to head towards you.
Ideally, if you need to pick the lawn mower up for whatever reason, you would hit the very large and bright orange “stop” button before doing so. However, even if you don’t, the machine’s blades will immediately stop moving if it’s tilted or lifted up, and this will be accompanied by beeping. This makes it perfectly safe to keep around even if you have curious young children or boisterous pets.
Of course, it’s not just human safety that needs to be considered when it comes to a pricey little gadget like this – robotic lawn mowers are very appealing to thieves too! That’s exactly why the Flymo requires a pin number to be entered before it can be used. If someone were to decide to pinch the lawn mower and its base from your garden, they wouldn’t be able to use it anywhere else unless they knew its pin number.
Value for Money
Some robotic lawn mowers can cost a small fortune, which is why the Flymo will appeal to those who are on a budget. In my opinion, it’s very reasonably priced. Sure, there are a few slightly cheaper models out there, but they offer less in terms of features.
The only downside to the Flymo is that it doesn’t come with any spare parts, such as extra blades. If you keep the machine running throughout the spring and summer, you’ll probably need a couple of sets per year. That said, they’re not expensive to purchase separately, and the lack of spares could be why the machine is offered at such an affordable price.
Overall
While the Flymo may not be the most advanced of robotic lawn mowers, simplicity is sometimes all that you need. This is particularly the case if all you want to do is maintain a small-sized lawn, and this is something that the Flymo really excels in. It has proved to be reliable in all conditions and has kept to its promise of giving me an effortlessly manicured lawn. In fact, I’d say that my lawn is looking much healthier, which is probably down to the machine’s mulching capabilities.
Its useful features make it easy to customise things to suit you and your garden, and the app is a handy little extra. All in all, if you love having a neat and tidy lawn but don’t enjoy cutting it, then the Flymo EasiLife 150 GO Robotic Lawn Mower would be a great investment.
Flymo EasiLife 150 GO Robotic Lawn Mower[ SAVE 5% ]

- Ease of Setup
- 4
- Design
- 4
- Power
- 5
- Performance
- 5
- Features
- 5
- Safety
- 5
- Value for Money
- 5
- Lawn Size
- 150m²
- Weight
- 6.1 kg
- Cutting Width
- 16cm
- Cutting Height
- 20-50mm

Share