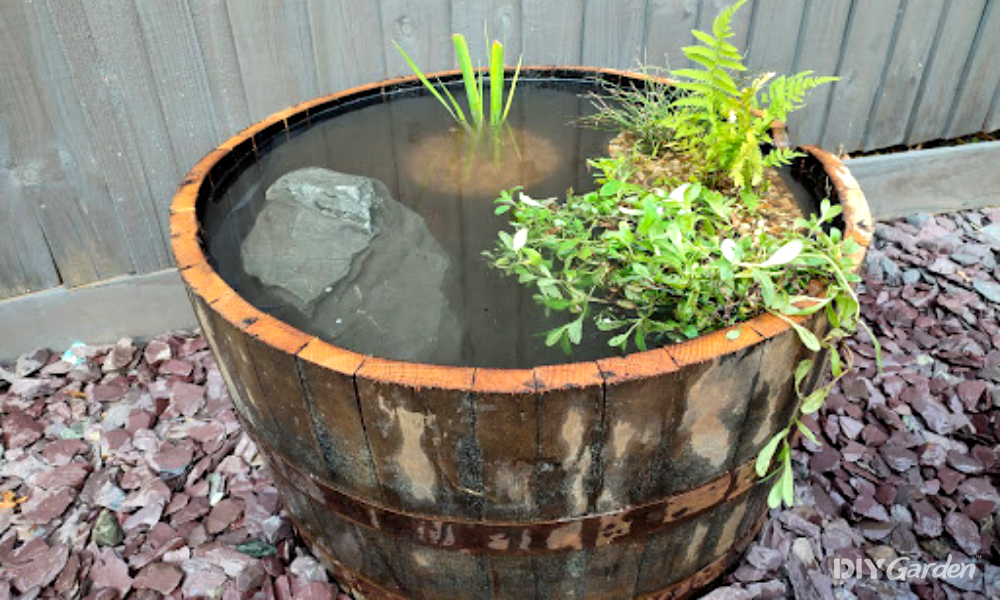
If there’s one thing that’s missing from most gardens, it’s water. We love perfecting our lawns, creating stunning beds and borders, and growing delicious fruit and veg. But many of us forget about water, a fundamental feature that benefits wildlife and increases the biodiversity in our gardens.
This summer, I set out to alter this in my garden. Yet, I didn’t want to dig a cavernous hole, as I live in a rental, and I don’t think my landlord would be very pleased! So, instead, I had to get a little creative using a half-barrel.
In this blog post, I’ll talk you through how to make a wildlife barrel pond on a budget – for less than £100 – in 8 easy steps.
Step-By-Step Guide to Making a Half-Barrel Pond
Making a half-barrel pond is a fun, small project anyone can take on, even if you’re the least practical person you know! It requires barely any tools, a small budget, and can be completed in a couple of days.
Equipment You’ll Need:
- A half-barrel
- Pond baskets
- Pond plants
- Pond soil
- Gravel
- Pond liner (recommended)
- Staple gun or stapler
- An array of house bricks and old logs or branches
- One big rock and an array of smaller rocks
If you want to sand down the hoops, you’ll need:
- Sandpaper or a steel brush attachment (and a combi drill)
And if you choose to create your own plug, you’ll also need:
- A holesaw kit (we used the Makita Holesaw Kit)
- An oakwood off-cut (to create the plug)
- A dowel
- Sealant (we used CT1)
Step 1. Acquire & Sand the Barrel
The first step to making a half-barrel pond is sourcing the barrel itself. You have two options here:
- Buy a barrel and cut it in half yourself, giving you two potential ponds
- Buy a ready-cut half-barrel
Luckily, both are pretty easy to source. If you love Facebook Marketplace as much as I do, you’ll know that you can get anything on there for a bargain. After a little patience, I found a half-barrel in my local area for just £20. So, if you’re looking for a half-barrel but don’t know where to start, I definitely recommend hopping on Facebook Marketplace! You may also find barrels for cheap on eBay, Gumtree, Etsy, in garden centres or even sometimes places like B&M.
While all barrels should be sealed, it’s worth looking for any serious damage when buying these. If there are any cracks or holes, look for another. If you see slight gaps between the staves (the pieces of wood making up the barrel’s sides), don’t worry. Barrels are typically made of oak, and oak expands when it’s wet. So, as soon as you add water to the barrel, the wood should begin to seal. How cool is that!
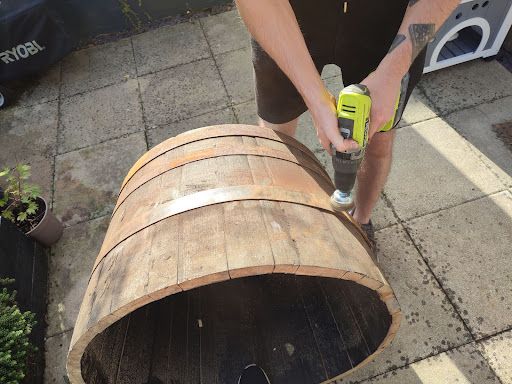
Depending on the condition of your barrel, you may want to sand it down. We sanded ours down as it had pretty serious rusting on the metal hoops. We used a Ryobi Cordless Combi Drill with a metal preparation brush set from Screwfix to sand the hoops down, and this only took us around 30 minutes.
We were originally going to paint the hoops with black Hammerite, but we decided against it as we liked the aged look. However, if your garden is more modern, this could be a good option for you.
Step 2. Plug the Hole or Add a Pond Liner
Creating the plug for the half-barrel was a little tricky, as local trade shops only seem to sell plug cutter drill attachments up to 12.7 mm – this isn’t big enough to create a barrel plug.
Instead, we decided to cut a piece of oak using a holesaw drill bit – we used a 57 mm holesaw Makita drill bit to create a plug for our 27-inch diameter barrel. However, you may need a different-sized drill attachment, depending on the size of your barrel.
It’s worth bearing in mind that if you go down this route, the holesaw bit cuts a circular hole in the centre of the plug. This obviously isn’t ideal. However, we were fortunate enough to have a dowel that was the perfect size for the hole. All we did after cutting our plug was insert the dowel, seal it with CT1 sealant, then put the plug in place and seal it from the top and bottom.
If you don’t have this type of equipment and would rather choose a slightly easier option, you can use a pond liner instead. In fact, even if you’ve made a plug, we recommend using a liner. Why? Because barrels often store alcohol, and alcohol contains chemicals that can leach into the pond water, causing harm to the aquatic life within.
There are several routes you can go down when buying a pond liner – Butyl Rubber, Polyvinyl Chloride (PVC), Low-Density Polyethylene (LDP) and Ethylene Propylene Diene Monomer (EPDM).
If you’re looking to complete this project on a budget, then a PVC liner is the best option for you. But if you’re more interested in longevity, pick a Butyl Rubber liner. These will last over 20 years and are strong, flexible, and durable. They’re the crème de la crème of pond liners.
We chose a PVC liner because this was what was available to us on the day, it was cheap, and we plan to transport the pond to a new home in the next couple of years, anyway.
To ensure you get the right-sized pond liner, measure one side of the barrel and times that value by two, then measure the barrel’s base and add the values together. Buy more than you need, as the liner will need to bend to fit the barrel, and you’ll want to have enough!
READ NEXT: The Best Pond Liners
Step 3. Cut the Liner
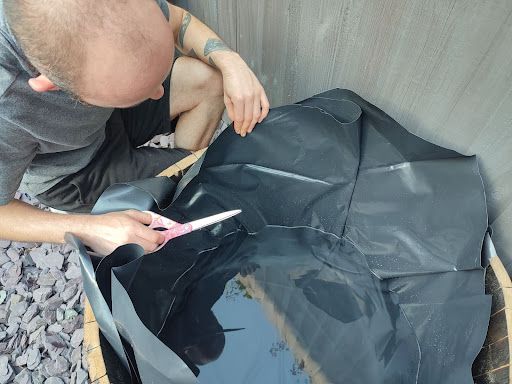
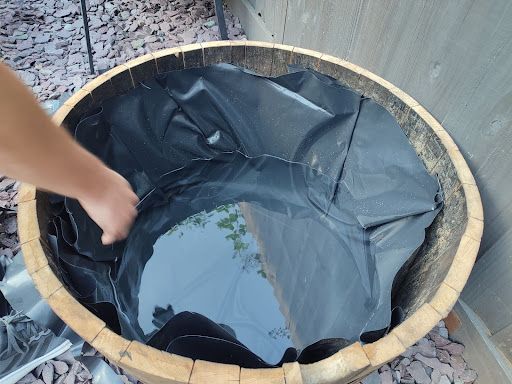
When it comes to cutting the liner, you can do this now or when you begin to fill up the barrel. We only made a rough cut before filling ours up slightly because we wanted to see whether the water pushed the liner in a particular direction. This way, we could ensure our liner was big enough to almost reach the top of the barrel.
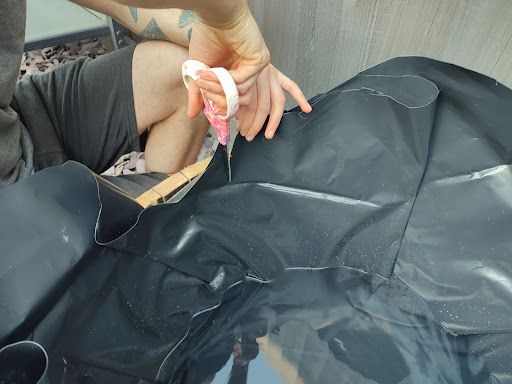
There’s no real technique to doing this, and it’s fairly straightforward. The one recommendation I have is to staple your liner before cutting it – this stops it from flapping around when you’re trying to cut it.
You’ll likely find that, when it comes to stapling the liner, you have a lot of excess liner, which causes some difficulties when you try to fit it well in the barrel. We found that folding the liner helped us get a neater fit. We then went along the liner and stapled the folds so they didn’t flap around when we added the water.
You can use a staple gun or even just a stapler for this. Our staple gun ran out of staples midway through, so we resorted to my home office stapler, and that still worked a treat (with a little oomph!).
Step 4. Buy Pond Baskets, Pond Plants, Pond Soil and Gravel
Now it’s time to shop! First on your list is pond baskets – you’ll need these rather than other plant containers, as pond baskets have thousands of tiny holes that allow water to get in and your plants’ roots to expand. You’ll also need an array of plants, pond soil, and some gravel -the stuff you find from the local garden centre is fine – we bought a £4 bag from Wickes, and it was perfect!
What you buy is really up to you. We chose two pond baskets, one in the shape of a kidney bean and another smaller, circular one. We didn’t want to crowd the pond and wanted to be able to add pond lilies later down the line. However, if you want to fill your pond with plants from the get-go, go for it!
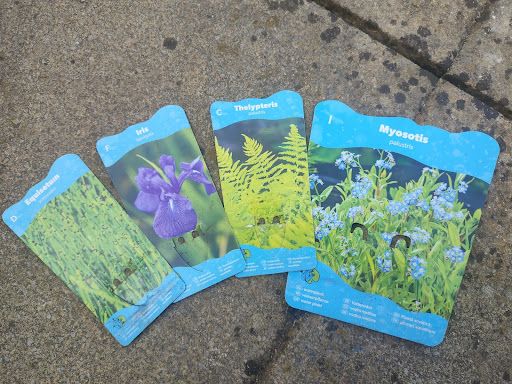
While choosing plants, I recommend looking for UK and European natives. These plants can handle our fluctuating temperatures, so they will survive the UK’s hardest frosts and hot summer days. In light of this, we chose:
- Dwarf Scouring Rush (Equisetum scirpoides)
- Japanese Iris (Iris laevigata)
- Marsh Fern (Thelypteris palustris)
- Water Forget-Me-Not (Myosotis palustris)
READ NEXT: Types of Pond Plants (Your Guide to the Best Aquatic Plants)
Step 5. Source Old Bricks, Logs, Branches, and Rocks
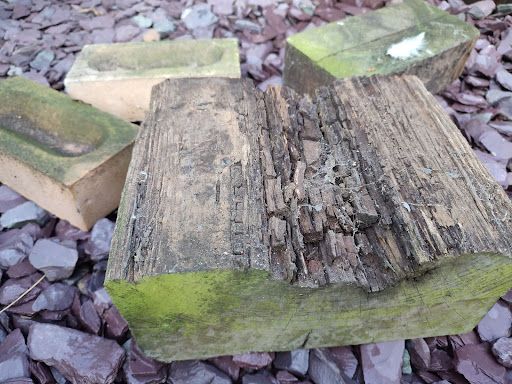
If you want to introduce insects and other forms of wildlife into your pond, you’ll need little nooks and crannies for them to hide in. Rocks are important to include in your barrel pond for this reason, as you can use an array of large and small rocks to create some spaces for insects to nestle in. You’ll also want a larger rock or two, as you can prop these halfway out of the water, providing a perching spot for reptiles and bathing birds!
To create ramps and bridges across your pond for birds, you’ll need old logs and branches. You may have some of these lying around, but if you don’t, you can search for “vivarium branches” online – there are some relatively cheap ones on eBay and Amazon!
Lastly, you’ll need something for your pond baskets to stand on, as many pond plants like to be partially, but not fully, submerged. House bricks are ideal for this. If you’ve got any lying around, that’s great! If you don’t and need to source them, try to find some with holes in them – these provide valuable habitats for insects.
Step 6. Wash & Pot Your Plants
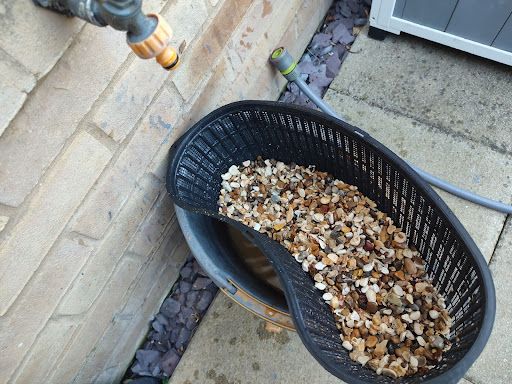
You’ll be amazed by how much dirt is on shop-bought gravel. It’s important to wash anything going into your pond, including the gravel. Otherwise, you’ll end up with a super murky pond straight from the start.
Pond baskets make a wonderful sieve, so you can simply place your gravel inside and rinse it off under an outdoor tap or hose. Remember to move the stones around to ensure you get all of the dirt off until the water runs clean underneath. Then do the same for your rocks, bricks, and logs.
Now, it’s time to pot your plants! Remove the gravel from your pond baskets and add your pond soil. We used Velda Pond Soil, but Westland Aquatic Pond Soil is also a great choice. Pot your plants up like you would any other plants, but leave 1-2 inches of space so you can cover the soil with a layer of gravel.
The gravel prevents the soil from escaping into the water when you lower it into your pond and will provide lots of little spaces for insects to lay their eggs.
Step 7. Fill Up Your Pond!
You may have already filled your pond up slightly like we did to see where the water pushed the liner. However, now it’s time to fill it up fully! At this point, you’re likely asking, “What do I fill it up with?” Well, you’ve got two options:
- Tap water
OR
- Rainwater
If you collect rainwater, then this is by far the best water you can put in your half-barrel pond. However, if (like me) you don’t collect rainwater, then tap water works fine, too.
But there’s one caveat when filling your pond up with tap water. Tap water contains chlorine and nitrogen, which will cause your pond to become murky for the first few days or even a week. Luckily, the chlorine will evaporate over time, and your pond plants will use the nitrogen, so it will clear eventually. Don’t’ worry; it won’t look bubbly for long (granted you have enough pond plants!).
Step 8. Assemble Your Pond!
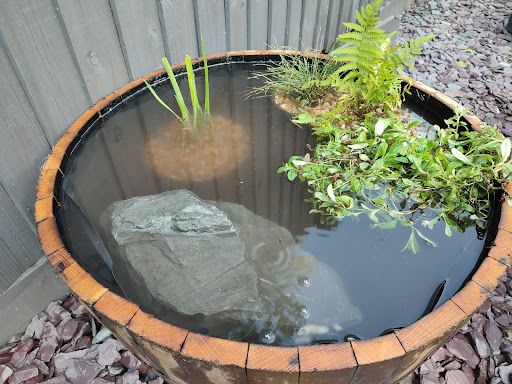
And finally, the moment you’ve been waiting for – assembly! Use your bricks to create platforms for your plants so they’re the right height.
Then, create a base for a large rock or log using bricks. Ensure that part of your rock or log is poking out of the water, as this will provide an escape for any frogs or other reptiles that need to climb out. We bought a rock for £7 from Wickes – we picked one which naturally had several heights so that it could provide steps for reptiles.
This is also the point where you’ll want to add your branches or logs. As a barrel planter isn’t ground level, you’ll need to lean a branch or log up against the side of your barrel so that reptiles can climb from the floor to the barrel and back down again.
Placing a branch across your barrel will also provide a perching spot for birds so they can scope out their surroundings before going in for a drink or bath.
Final Word on How to Make a Wildlife Barrel Pond
Creating a half-barrel pond is a rewarding and eco-friendly project that can transform your garden into a thriving habitat for various forms of wildlife. While it may seem like a small endeavour, it can have a significant impact on the local biodiversity and provide a peaceful oasis for you to enjoy.
By following the 8 easy steps outlined in this guide, you can bring water to your garden without the need for excessive digging or a large budget.
Happy pond-making!
Wildlife Half-Barrel Pond FAQs
Can I use a half-barrel as a pond?
Yes, as barrels often contain liquids such as alcohol, oil, or water, half-barrels are an ideal choice of container for a garden pond. If you do use a barrel that previously contained alcohol, however, it’s best to use a pond liner or aquatic sealant. Otherwise, the chemicals from the barrel will leak into the water. This won’t do your plants or the local wildlife any good!
What do I need for a barrel pond?
To create a wildlife barrel pond, you’ll need a half-barrel, pond liner, an array of bricks, rocks, logs, and branches, pond baskets, pond soil, pond plants, gravel, and water. The tools you’ll need include a staple gun or stapler, a holesaw attachment, a combi drill, and ideally a hose, but a watering can would do. If you want to remove rust from the hoops, you’ll also need sandpaper or a steel brush attachment for a combi drill.
Do I need to line a barrel pond?
If your half-barrel previously contained a form of alcohol, it’s best to line it with a pond liner. If you’re unsure about your barrel’s previous history, it’s better to be safe than sorry and line it. This will prevent chemicals from leaching out into your pond water and causing harm to your aquatic plants and wildlife.
How do I keep my pond barrel water clear?
Plants are the key to keeping your barrel water clear. You shouldn’t need to do an awful lot to keep your pond clear if you’ve chosen your plants right. Choose a range of plants for your barrel pond, ensuring at least 60% of those you’ve chosen are pond plants specifically, as these will help keep your pond water clear.
If you’ve loved learning how to make a wildlife barrel pond and want other ideas for adding water to your garden, you’ll love our blog post, 28 Natural Garden Pond Ideas (Raised & Waterfall Designs)!
