Read Reviews
The Best Water Butts

-
Best slimline water butt - Charles Bentley 100L Slimline Water Butt Set
-
Best value water butt - Strata 100L Slimline Water Butt Set
-
Best medium water butt - Charles Bentley Ward 210L Round Plastic Water Butt Set
-
Best large water butt - Harcostar 227L Water Butt Kit
-
Most attractive water butt - Sankey 150 L Beehive Water Butt
Water Butt Reviews
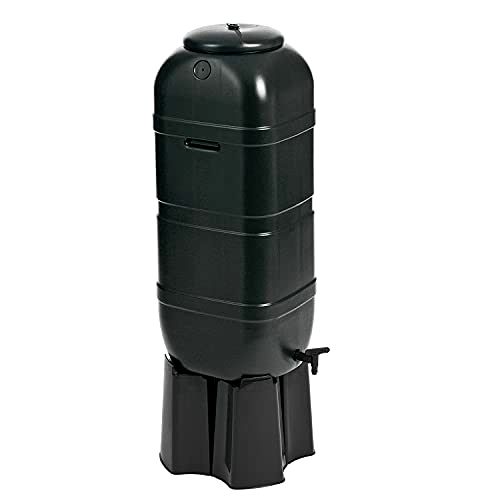
1. Charles Bentley 100L Slimline Water Butt Set
Best slimline water butt
- Its slimline design and green colour give it a sleek appearance that looks inconspicuous in the garden
- Has all of the necessary indents to be easily connected up to other water butts, which means that you can increase your water storage capacity in the future if you choose
- Reasonably priced - ideal for people on a budget
- Comes with four legs and a filler kit
- Both sides of this water butt can be connected to a drain pipe, making it more versatile when it comes to positioning
- You need to use a screwdriver to undo the lockable lid, meaning that you can’t just quickly glance in to check water content or debris when you happen to be walking by (unless you always carry a screwdriver with you!)
- Lacks stability when empty, although this isn’t an issue once there’s a bit of water inside to hold it down
- Capacity
- 100 L
- Material
- Polypropylene
- Dimensions
- 40.5 x 40.5 x 95 cm
- Weight
- 5kg
- Ease of Setup
- 5
- Design
- 5
- Ease of Use
- 5
- Stability
- 4
- Value for Money
- 5
It’s easy to see why slimline water butts are so popular, and the Charles Bentley 100l Slimline Water Butt Set is one of the bestselling models out there. I put it to the test, and unsurprisingly it come out as one of the best water butts if you’re after a slimline model.
The set-up process for this water butt was pretty standard, taking around 15 minutes. You connect the legs, create the necessary holes in your drain pipe and water butt (there are indents that show you where to drill) and then fit the various pipes.
Since the pipes are pretty short in length, you’ll need to place your water butt relatively close to your drainpipe. However, this seems to apply to the majority of water butts out there – longer pipes can always be purchased separately.
Its slimline design means that this water butt is taller and narrower than a traditional water butt which saves a fair bit of space.
In addition to its sleek aesthetic, this water butt comes with a lockable lid and four legs, along with a few extra indents that would enable you to connect it up with another water butt.
Once this plastic water butt had filled up, using it couldn’t have been easier. It sits at the right height to fill a watering can or bucket and the water flow is pretty good – I’d say it sits somewhere in the middle of the scale when compared to the other water butts that I tested.
The only downside is that you need to use a screwdriver whenever you want to undo the lockable lid – lids that have a latch are much more convenient. However, it’s a child safe lid which is good, and you’ll only need to unlock it occasionally, so it isn’t that big of a deal.
Due to their shape, slimline water butts seem to lack stability, and this one was no exception. The legs aren’t the best quality and, even when they’ve all clicked into each other, they wobble. That said, once you’ve had some rain and the water butt has started to fill up, the water gives it enough weight to hold it steady. So, if you’re at all concerned, just add a bucket of water to the water butt after setting it up to weigh it down.
In my opinion, this water butt comes in at a great price. I can’t really fault it when it comes to how it collects and stores rainwater, and the fact that it also comes with a rain diverter kit saves you from having to fork over extra to purchase one on the side.
It’s easy to see why this water butt appeals to such a wide range of people. It’s sleek enough to sit inconspicuously in the corner of small gardens, yet it’s also slim enough to be lined up in a row of connected water butts to contribute to a larger water storage system. It’s one of the best water butts if you’re after a slimline design.
Whichever set up you choose, the Charles Bentley 100l Slimline Garden Water Butt Set is a quality, well-made product that I would very much recommend.
Did you find this review helpful?
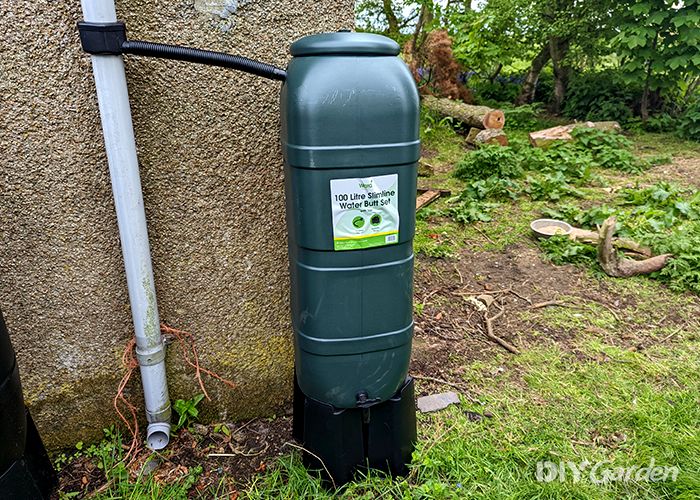
2. Strata 100L Slimline Water Butt Set[ SAVE 11% ]
Best value water butt

- Its slimline design means that it looks pretty sleek and doesn’t take up much space
- Made from high-quality plastic that feels strong and robust
- Very reasonably priced - it offers great value for money
- Comes with four legs and a filler kit
- Can be connected to other water butts to increase storage capacity
- Can be connected to a drainpipe from either side, giving you more options when it comes to choosing a location for it
- Doesn’t feel stable when empty (although it becomes much steadier once there’s some water inside)
- Needs to be placed on very level ground
- A screwdriver is needed to unlock the lid, which is slightly inconvenient
- Capacity
- 100 L
- Material
- Plastic
- Dimensions
- 36 x 32 x 96 cm
- Weight
- 2.74kg
- Ease of Setup
- 5
- Design
- 5
- Ease of Use
- 5
- Stability
- 3
- Value for Money
- 5
At first glance, the Strata 100L Slimline Water Butt Set looks near-identical to some of the other slimline designs available on the market. However, dive in a little deeper and you’ll notice that there are a few subtle differences that set this model apart from its competition.
Do these features make this Strata model worth buying? Well, I put this water butt to the test and identified it as one of the best water butts if you’re after a great value model – read on to find out why!
Setting up this plastic water butt takes about 15 minutes, and that includes digging to level out the ground so that the legs are standing on a flat surface. After fitting the legs together, I cut a hole in my drain pipe, then fit the rain diverter, before drilling a hole in the water butt to fit the pipe. It’s a fairly simple process that’s pretty standard across all of the water butts that I tested.
This water butt’s biggest draw is its slimline design. Not only does this mean that it doesn’t take up much room, but it also gives it a sleeker look, as opposed to the larger and chunkier water butts out there. However, its compact construction does also mean that its storage capacity is limited to 100 litres – whether or not this is enough for you will depend on what you need a water butt for.
However, this plastic water butt does come with the necessary indents that show you where to drill new holes if you would like to connect multiple water butts together. It also comes with four plastic legs that raise the water butt up off the ground.
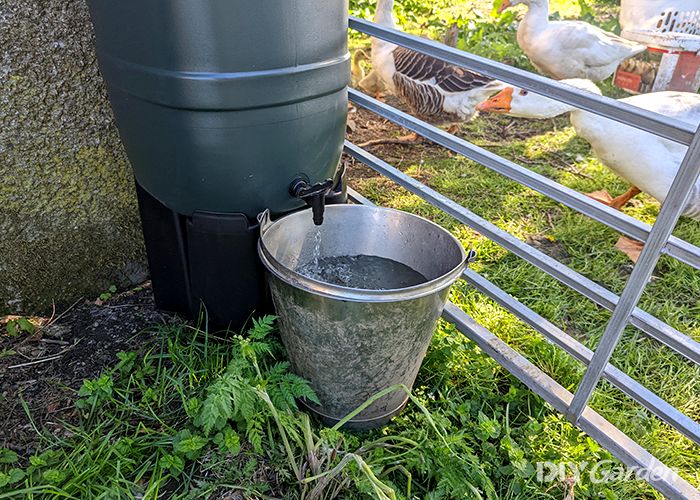
I found this water butt to be extremely easy and convenient to use. The tap sits at the perfect height for filling a bucket or a watering can, and the fact that it’s tall and slim, rather than short and wide, means that you can have it in a busier spot without it getting in the way.
I was also pleased with the water flow – although it wasn’t the fastest of the water butts that I tested, it wasn’t the slowest either. The only feature that frustrated me was the lockable lid – it’s great that it’s a child safe lid, but it’s inconvenient that you can only open it when you have a screwdriver to hand.
What lets this water butt down slightly is its lack of stability. While its slimline design is a benefit in some ways, being tall and narrow means that it isn’t quite as sturdy as the chunkier models out there. Granted, it comes with four legs, while the larger water butts only have three, but these legs aren’t anything to get excited about – they’re pretty shaky and can’t be used on ground that’s even slightly uneven.
To be fair, once the water butt fills with water, it doesn’t budge. However, its smaller capacity also means that it’s more likely to sit empty and unstable at times, compared to larger models.
Nevertheless, any minor flaws are easy to overlook once you see this product’s price tag. This was the least expensive of the water butts that I tested, and, in my opinion, it offers fantastic value for what you’re spending. The fact that it comes with a rain diverter kit is an added bonus, as you won’t need to purchase one separately. For this reason, it’s one of the best water butts if you’re after a good deal.
Other than its lack of stability, which isn’t an issue once it starts to fill, I really can’t fault this plastic water butt at all. It’s well-designed, works perfectly, and is so convenient to use – whether you’re looking for a small single water butt or you’d like to connect up a larger multi-water butt system, the Strata 100L Slimline Water Butt Set ticks all of the boxes.
Did you find this review helpful?
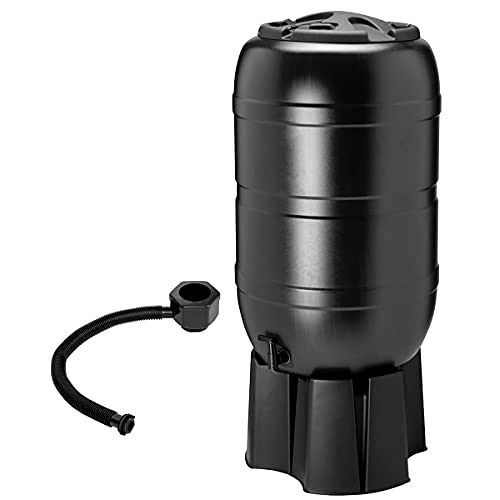
3. Charles Bentley Ward 210L Round Plastic Water Butt Set
Best medium water butt
- Stores 210 litres of water, yet doesn’t look too chunky or obtrusive
- A very stable and sturdy design makes it suitable for use in high-wind locations
- Comes with three legs and a diverter kit
- Made in the UK from strong high-density plastic
- Can be connected to other water butts to allow you to store more water
- Can be connected to a drainpipe from either side, which makes it more versatile
- You’ll need to use a screwdriver each time you want to unlock the lid to have a look inside the water butt, which is a little inconvenient
- The water flow from the tap is slow, meaning that it takes a fair bit longer to fill a bucket
- Capacity
- 210 L
- Material
- Plastic
- Dimensions
- 57 x 57 x 97 cm
- Weight
- 5kg
- Ease of Setup
- 5
- Design
- 4
- Ease of Use
- 5
- Stability
- 5
- Value for Money
- 5
Large capacity water butts can take up a fair bit of space, which is why the Charles Bentley Ward 210L Round Plastic Water Butt Set, which promises a compact and easy-to-use design, may catch your eye. But is it worth buying? Keep reading to see why I’ve chosen it as the best medium water butt.
Putting this plastic water butt together is fairly simple. You start by clicking the three legs into each other and stand them on a level surface. Then, screw the tap in, remove a 4.5cm section from your drainpipe, drill a hole into the indent in the water butt, and fit the accompanying rain diverter kit. All in all, a pretty standard process that takes about 15 minutes.
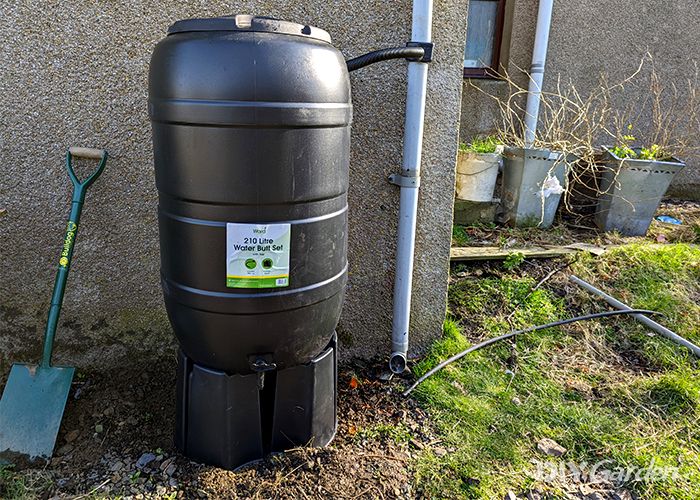
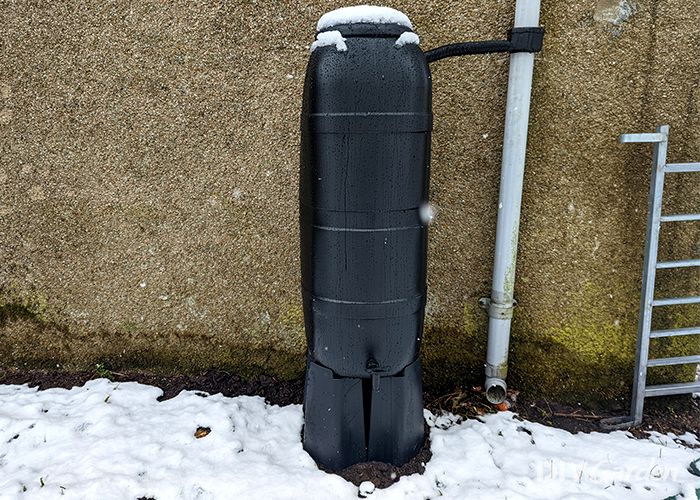
This water butt has a capacity of 210 litres, but its design manages to keep it relatively inconspicuous. It’s large, but it’s not as chunky-looking as some of the others out there. In my opinion, this is its main selling point. It has a good capacity without taking up too much space. Thanks to the subtle black colour, it can also blend into the background of your garden. Made in the UK from high-density plastic, this water butt comes with a lockable lid, although you will need a screwdriver to lock it.
The fact that you can’t just unlatch the lid to have a look inside is a little frustrating. While you can give the water butt a little push to check how much water it’s holding, it’s always useful to be able to glance inside to see if any debris has made its way in. However, it is a child safe lid, so it has its benefits. Other than the lid, this plastic water butt couldn’t have been easier to use.
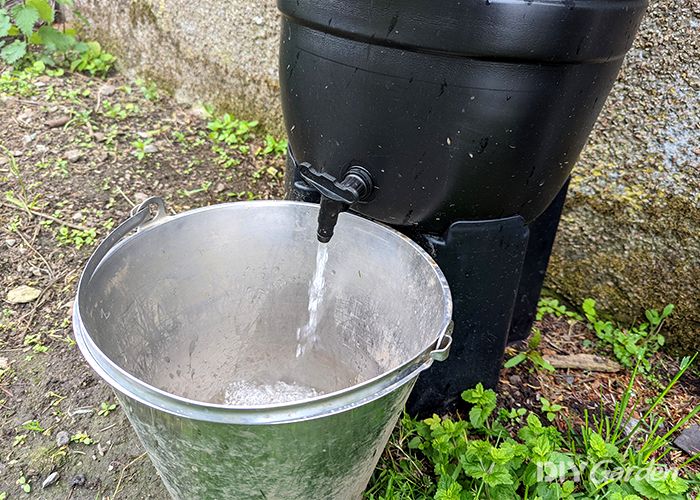
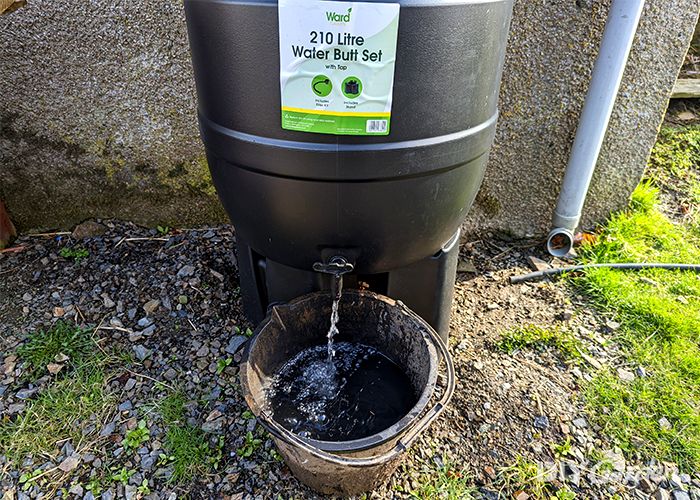
It sits high enough up off the ground that the tap fits perfectly over a bucket or a watering can, although I did find that the water flow was the slowest of all of the water butts that I tested. I noticed that there were several Amazon reviews stating that this water butt leaks at the tap. However, I’ve now been using it for four months in all weather conditions, and it hasn’t leaked once.
After initially setting up this plastic water butt, it felt a little wobbly. Mine was standing on rough ground, and even though I had levelled this out before setting the water butt up, the legs didn’t quite seem as though they would hold up to the job.
The weather was forecast to be dry but very windy, so I was dubious about whether or not the water butt would stay standing. Turns out, I was wrong to doubt it – it may not seem very stable, but it held up to windy conditions for about a week before it started to collect rainwater, after which it became even sturdier.
In my opinion, this water butt offers good value and is the best water butt if you want a larger option that won’t overcrowd the garden. I appreciated that it came with a rain diverter kit, saving me from having to purchase one separately, and was made from high-quality materials. The only downside is that it’s a little slow at filling a bucket (other water butts will do this in half the time), but its stability and reliability more than make up for this.
It’s a well-made product that does what it promises, and it has certainly made my life a whole lot easier!
Did you find this review helpful?
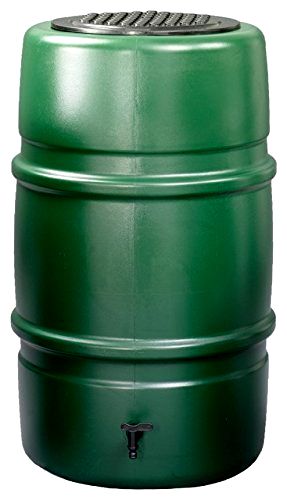
4. Harcostar 227L Water Butt Kit
Best large water butt
- Designed to fit a range of drainpipe sizes (68mm, 80mm, and 100mm plastic round drainpipes and 65mm plastic square drainpipes), making it much more versatile than other water butts
- Has a large 227 litre capacity, enabling you to collect a fair bit of rainwater
- Made in the UK from strong, high-quality recycled plastic, and all of the fittings and accessories feel very sturdy too
- The lid can easily be lifted without the need for any tools, making it easy to check how much water is inside
- Water flow from the tap is faster than most other water butts - this will save you time whenever you need to fill a bucket
- Can be connected to other water butts to give you a larger storage capacity
- Can be connected to a drain pipe from either side, which makes it more versatile
- Can feel a little unstable when empty, but it has been designed in a way that would make it easy to strap the water butt to a solid structure if you needed to hold it in place in a windy location. That said, if you ensure that there’s always some water in there, it’s stable enough to stand still without needing to be tied down, even in high winds
- Capacity
- 227 L
- Material
- Plastic
- Dimensions
- 60 x 60 x 99cm
- Weight
- 5.4kg
- Ease of Setup
- 5
- Design
- 5
- Ease of Use
- 5
- Stability
- 5
- Value for Money
- 5
While the space-saving nature of slimline water butts is great, those of you who are looking to collect larger quantities of rainwater will need a water butt with a larger capacity, which is where the Harcostar 227 Litre Water Butt Kit comes in. It was designed to channel rainwater from the roof of a house, so this is exactly what I did with it. Here’s how it performed:
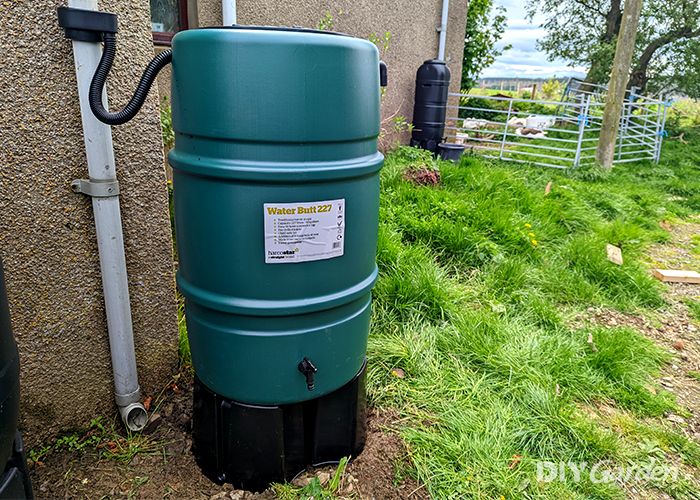
This water butt comes with all of the necessary accessories – three legs and a rain diverter kit. Unlike some of the other water butts that I reviewed, this one had a full set of instructions too, which made setting it up a breeze.
After attaching the tap, you’ll need to fit the filler kit to your drain pipe and water butt. Don’t panic if it doesn’t fit – it has been designed to work with a range of drainpipe sizes, so you may need to use a knife to expand the top piece, but there are guidelines in place to show you where to cut.
One thing to keep in mind is that all of the connections for this water butt fit pretty tightly together – in many ways, this is a good thing, but it does also mean that you’ll need to use a fair bit of strength to connect it all.
With a capacity of 227 litres, this was the largest of the water butts that I tested. It’s pretty chunky in design, but the fact that it’s green means that it would blend well into a garden. The recycled plastic construction feels strong and sturdy. In fact, all of the connections that come with this water butt are noticeably tougher, more robust, and higher quality than those supplied with the other water butts I reviewed.
One design feature that I particularly appreciated was the child-safe, spring-loaded fastening clip on the lid. Some of the other water butts that I tested required a screwdriver to open the lid, so the fact that you can peek inside this one without any tools required is a bonus.
A few hours after setting up this water butt, I was rewarded with a night of heavy rain, so I was able to put it to use the very next day.
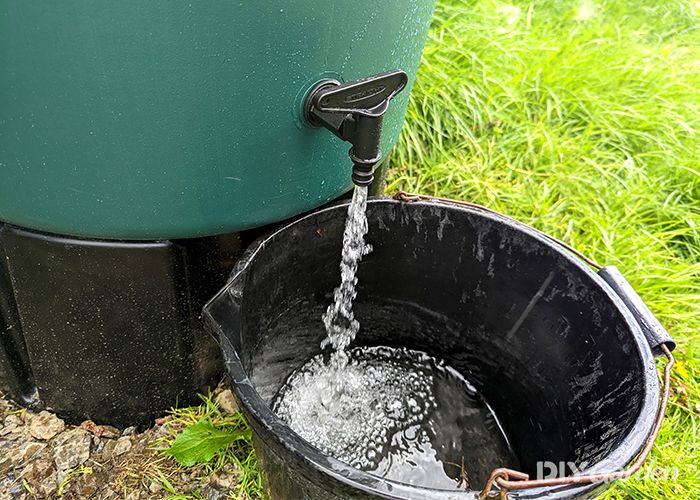
Whilst all of the water butts that I tested were easy to use, this one was my favourite. This is mainly because the water pressure from the tap is stronger than the others; therefore, it doesn’t take long to fill a bucket or a watering can. It also sits at the perfect height to be able to do this easily too.
I felt this water butt offered the most stability out of all of the models that I reviewed. I think this is due to the higher quality plastic of the legs. Plus, the larger size of this water butt means that it becomes even more stable once it starts to fill. It does feel quite shaky when empty, so I poured a bucket of water in as soon as I was done setting it up, which helped to hold it in place until the rain took over.
If you’ve set the water butt up in a very windy location, you could potentially tie a strap around it to keep it sturdy – the indents in the design should make this easy.
In my opinion, this water butt offers fantastic value for money. It may cost slightly more than some of the slimline designs out there, but it’s able to hold over double the amount of water, which makes it well worth spending a little extra on. The fact that it comes with a filler kit and legs is also handy, and I like that it’s made from recycled plastic.
If you’re looking for a high-quality water butt capable of storing a large volume of water, then the Harcostar 227 Litre Water Butt Kit won’t disappoint – it’s the best large water butt overall. It’s made from strong recycled plastic, feels sturdy once set up, and can fill a bucket much faster than its competitors – it really does excel in every aspect.
Did you find this review helpful?
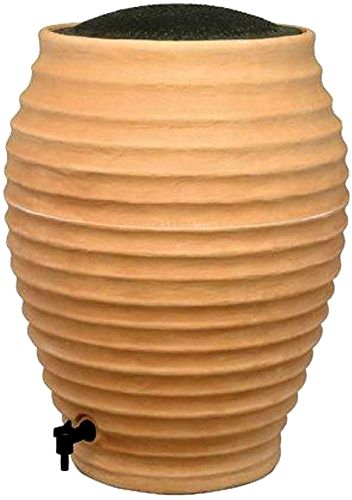
5. Sankey 150 L Beehive Water Butt
Most attractive water butt
- Has a unique, beehive-style design that would look good in any garden
- Can store 150 litres of water
- Feels stable, even when empty and stood on uneven ground in windy weather
- Recycled plastic construction
- Doesn’t come with a diverter or a stand, and the official stand for this model has been discontinued
- Can’t be connected to other water butts - it can only be used as a standalone, which means that you won’t be able to add it into a larger system in the future
- The lid doesn’t lock into place, meaning that a strong gust of wind could send it flying
- Costs a little more than traditionally-designed water butts
- Capacity
- 150L
- Material
- Plastic
- Dimensions
- 77 x 60 x 60 cm
- Weight
- 4kg
- Ease of Setup
- 5
- Design
- 5
- Ease of Use
- 2.5
- Stability
- 5
- Value for Money
- 5
There’s no denying that most of the water butts available on the market look pretty drab and boring, but the Sankey 150l Beehive Water Butt shows that this doesn’t always need to be the case. An instant attention-grabber, this water butt is easy easily one of the best water butts in terms of aethetics.
Thanks to its beehive design, it certainly looks impressive, but how does it compare to the more traditional designs out there? I put this water butt to the test to find out.
It’s a good thing that this water butt didn’t require much assembly, since it doesn’t come with any instructions or guidelines whatsoever. It’s also the only water butt that I tested that didn’t come with a diverter pipe, so you’ll need to purchase one separately.
Also, unlike the other water butts that I reviewed, where the downfill pipe attached into the side of the water butt, this one connects via its lid. This is unusual, but neither good nor bad.
On the plus side, this water butt comes with its tap already connected (not the case for most water butts), which saves a couple of minutes.
The water butt hasn’t got a lockable lid, but the lid is still quite a snug fit – you’ll need to use an implement like a knife or screwdriver to loosen it if you want to take the lid off.
There’s no competition when it comes to aesthetics, the beehive design wins hands down. There’ll be no need to tuck this one away in a hidden corner of your garden – it looks like it’s made from expensive terracotta (it’s actually made from a lightweight, weather-resistant recycled plastic) and is a great piece to have out on show. Its storage capacity of 150 litres is pretty good too, and it comes with a convex black lid to keep debris out.

Unfortunately, although it looked good, I found this water butt to be pretty inconvenient to use. The first issue was the lack of legs or a stand. It has clearly been made to be used with one, yet one doesn’t come included. Plus, the original stand designed for this model has now been discontinued.
You could use it with a garden hose, but water pressure will be pretty poor, and the hose needs to be running downhill for it to work at all. The lid also lets this water butt down – there’s no way to lock it in place, yet it’s light enough for the wind to catch. You also need to remove the downpipe any time you want to remove the lid.
The upside to sitting this water butt directly on the ground, rather than on a stand, means that it feels pretty stable. Even when empty, it doesn’t rock about in the wind, and there’s definitely no moving it once it starts to fill.
It shouldn’t come as a surprise to learn that this water butt costs a little more than the more traditional designs available. After all, its one-of-a-kind design enables it to act as both a water butt as well as a piece of garden décor. But does it offer value for money? That depends on what you’re looking for.
If you don’t mind splurging on a water butt because you want to add to the visual appeal of your garden, and are happy to spend a little more purchasing all of the extras (the filler kit and the stand), then I would say it’s worth it. However, if you’re on a tighter budget and prioritise function over form, then there are other water butts out there that provide better value for money.
Despite its higher price tag, the quirky appearance of this beehive water butt makes it a great buy for anyone who isn’t a fan of traditionally-designed water butts. Unlike the other water butts I tested, this one doesn’t try to blend into the background. Instead, it acts as a decorative focal point – you could even turn the lid upside down and grow flowers in it.
If you’ve been looking for a way to collect rainwater without ruining the aesthetics of your garden with a clunky, chunky water butt, then the Sankey 1229 150l Beehive Water Butt is one of the best water butts to consider. Plus, as an added benefit, it’s made from recycled plastic.
Did you find this review helpful?
Product Tester
Derek's Smart Buying Tips
Compare Product Features
Use the dropdown to sort the table by the feature you want to see.
Charles Bentley 100L Slimline Water Butt Set

- 4.8
- 100 L
- Polypropylene
- 40.5 x 40.5 x 95 cm
- 5kg
Strata 100L Slimline Water Butt Set
- 4.6
- 100 L
- Plastic
- 36 x 32 x 96 cm
- 2.74kg
Charles Bentley Ward 210L Round Plastic Water Butt Set
- 4.8
- 210 L
- Plastic
- 57 x 57 x 97 cm
- 5kg
Harcostar 227L Water Butt Kit

- 5
- 227 L
- Plastic
- 60 x 60 x 99cm
- 5.4kg
Sankey 150 L Beehive Water Butt

- 4.5
- 150L
- Plastic
- 77 x 60 x 60 cm
- 4kg
How to Choose The Best Water Butt
Water butts offer an eco-friendly way to keep your plants hydrated. Instead of using fresh water from the tap, water butts collect and store rainwater ready for use.
The two main benefits of a water butt are that they keep your water bill down by making use of recycled water, and they benefit plants because the water is free from chemicals like chlorine.
The best water butts have a good capacity without being overbearing in the garden. Certain things can be useful to look out for:
READ NEXT: The Best Expandable Hoses
Size and Capacity
Water butts come in a range of sizes. Naturally, having a small water butt is better than none, so even a 100 L model can be useful, especially in small gardens.
These smaller water butts often have a very small footprint (around 40 x 40 cm) so they’re the best water butts to tuck away into courtyards and patios – they won’t take up too much space. 100 L is not a large capacity though, and can fill up with just a couple of days of rain.
Small water butts are most suited to small gardens and gardens without many plants. You may need to supplement the water from the butt with some from the mains tap if it doesn’t hold enough water for your garden.
If space isn’t too much of an issue, water butts of between 250 – 300 litres are standard size. They’re the best water butts for most domestic small/medium gardens.
Larger water butts are available, going up to a capacity of several thousand litres, but these are generally too big for traditional gardens – they can take a long time to fill up, and be hard to tuck away.
Another important consideration when it comes to size is: can a watering can fit underneath the tap?
Some water butts do not come with a base, which can make it difficult to fit a watering can under the tap if the water butt is small. Take note of how high the tap is when buying a water butt.
If it doesn’t come with a base you should consider buying one separately. Not only will it help with filling a watering can, it will also help retain the shape of the water butt.
READ NEXT: The Best Hose Reels
Features to Look Out For
The best water butts have additional features which make them more practical to use or assemble:
- A water diverter kit – used to help divert rainwater from the guttering into the water butt (we’ll cover water diverters in a lot more detail in the following section). Some water butts come with a ‘water butt kit’, including diverter, whilst others don’t. It’s also necessary to check that the diverter is the right size to fit on the downpipe.
- An included stand – not all water butts come with a stand, but most of the time you’ll find that one is necessary. Unless the water butt is very large and rigid, a stand should be used to protect the tank and help it stay upright. Another reason why a stand is so important is that it makes it possible to fit a watering can underneath the tap. Without a stand, the tap will generally be too close to the floor.
- Pre-drilled holes – these make it a lot easier to set up the water butt. If holes are not pre-drilled, you will need to make a hole of around 25-30 mm to connect the water diverter. Given that most people don’t have a drill bit of this size, this can be quite a difficult process. If you want a water butt with pre-cut holes, try to find a model with several pre-cut, plugged holes on different sides of the water butt. This will give flexibility on where the diverter can be connected, and where the water butt can be positioned.
- Hose-fit tap – some water butts have hose fit taps that are compatible with standard hose fittings, such as those for Hozelock Hoses and Gardena hoses. Generally, compatibility will be stated. In order to get a more forceful flow of water through a hose, a pump will need to be placed in the water butt.
Using a Water Diverter
A lot of the best water butts will come with a water diverter included. If not, you will likely want to buy one separately in order to connect the water butt to the guttering in order to collect rain water.
The water diverter connects to the downpipe of a drainage system. It diverts some of the run-off rainwater away from the main drainage route and into the water butt.
Given that there are both round and square drainpipes, it’s possible to get differently shaped water diverters in order for them to fit on the drain.
READ NEXT: The Best Hose Connectors
Installing a Water Diverter
Putting in a water diverter involves cutting through the downpipe of the guttering. In most cases, these pipes are plastic and the job isn’t too difficult. However, be aware that if you have metal pipes, the job will be more complicated.
The basic procedure for installing a water diverter is as follows (but check any manufacturer instructions for differing information):
- Ensure the water butt is positioned within 50 cm of the downpipe
- If the water butt does not come with pre-cut holes for the diverter, you will have to make these yourself. Measure approx. 10 cm down from the top of the water butt, on the side facing the downpipe, and mark where the hole will go. Use a hole saw with the correct size bit (as per the water butt instructions) to create the hole.
- Using a spirit level, measure directly across from the hole and make a mark on the downpipe. You will need to make two marks, parallel with the top and bottom of the hole you have created.
- Saw the marked section in order to remove it from the downpipe.
- Fit the rubberised splash seal to the top section of pipe, then connect the diverter between the two sections. Make sure that the outlet hole is at the bottom. Then pull the splash seal down over the join.
- Connect the hose: feed the hose through the hole in the water butt and secure it in place with a screw nut. Then attach the other end of the hose to the diverter.
READ NEXT: How to Water Plants When You’re on Holiday
Water Butt FAQs
Some of the best water butts will come with a hose connector tap. Check this before purchasing the water butt as it’s not always possible to detach the existing tap.
Alternatively, in some cases a hose-compatible connector can be fitted over the tap. The hose will not produce a powerful jet, but it will allow for water to be transported around the garden. To achieve a jet of water you will need to fit a pump inside the water butt.
Water butts fit to a gutter’s downpipe, so the first step is to choose a suitable downpipe in a location that is convenient. The water butt should be positioned a maximum of 50 cm away from the downpipe.
Place your water butt on its stand. Measure 10 cm down from the top of the water butt and drill a hole large enough for the water diverter. Use a spirit level to measure across from this hole, and mark it on the downpipe. Use a hacksaw to cut the downpipe at this mark. You can then fit the rainwater diverter to the downpipe.
Some water butts come with the tap preinstalled. However, some won’t, meaning that you can choose where to position your tap. If it isn’t pre-installed, you will need to drill a hole and connect the tap through this hole. Make sure you have enough room to fit a watering can under the tap comfortably. Bear in mind that the tap won’t work once the water level goes below it, so don’t place it too high up.
The size of water butt you should buy will be dictated by two factors: how much space you have in your garden, and how much watering you need to do.
If you only have a small garden or patio, purchasing a slimline 100 L water butt is recommended. It won’t hold a lot of water, but it should be sufficient for most small watering jobs and it won’t take up too much space.
If you have a small/medium garden, a standard water butt has a capacity between 250 – 300 litres. This will be sufficient for most of the year. Larger models are available, including water butts with a capacity of 1000 litres +, you just need to have enough space to store them.
When left to sit and stagnate, algae and bacteria can grow on the water in a water butt. Whilst this might not seem like a problem, some of the bacteria can actually be harmful to plants when they are watered – especially baby seedlings.
There are chemicals that can be added to the water, but it’s always a risk using chemicals around plants as you never quite know what affect they will have on the delicate chemical balance of the soil. Some gardeners like to use an organic, biologically safe solution of ‘friendly bacteria’ to clear the harmful stuff out.
Of course, this problem doesn’t happen if water isn’t left to stagnate, so some of the best advice is to use the water butt regularly and clean it every year. Keeping a water butt in a cool, shady place will stop it from getting too warm which can also encourage the growth of bacteria.
Share